Barefoot Contessa’s Heavenly Coconut Cream Pie Recipe
Barefoot Contessa Coconut Cream Pie represents the pinnacle of indulgent dessert craftsmanship.
Professional bakers and home cooks alike marvel at its delicate balance of textures and flavors.
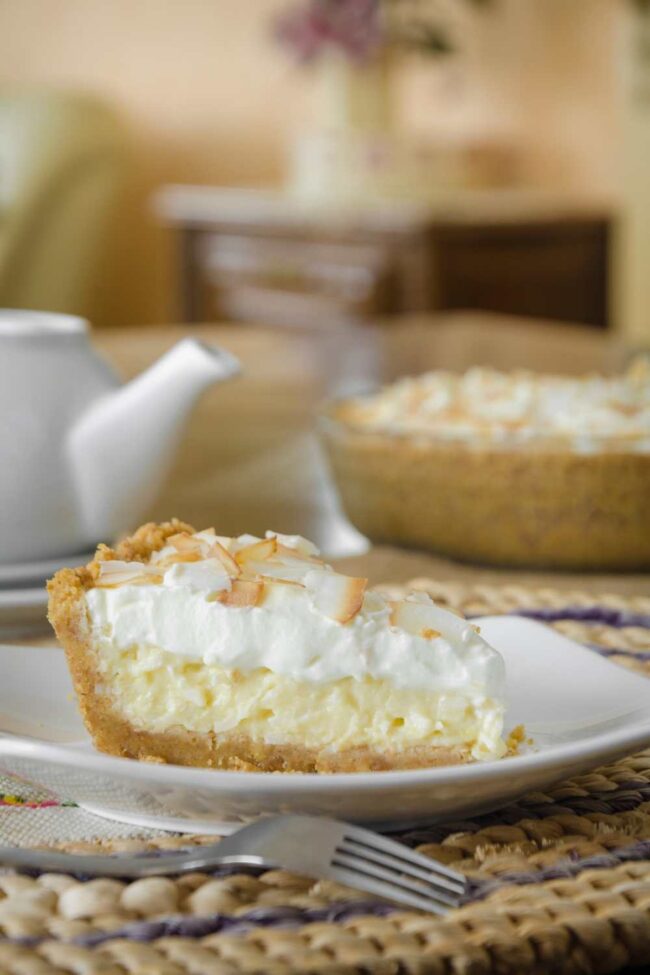
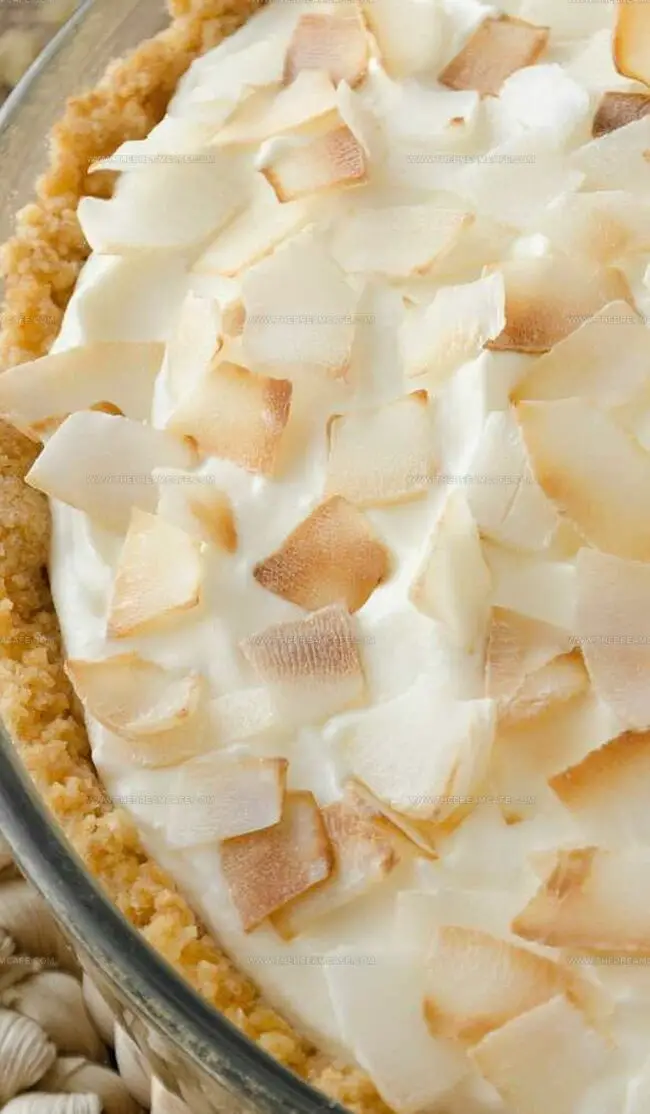
Creamy, luscious filling nestles between a buttery, perfectly crisp crust that crumbles with each delightful bite.
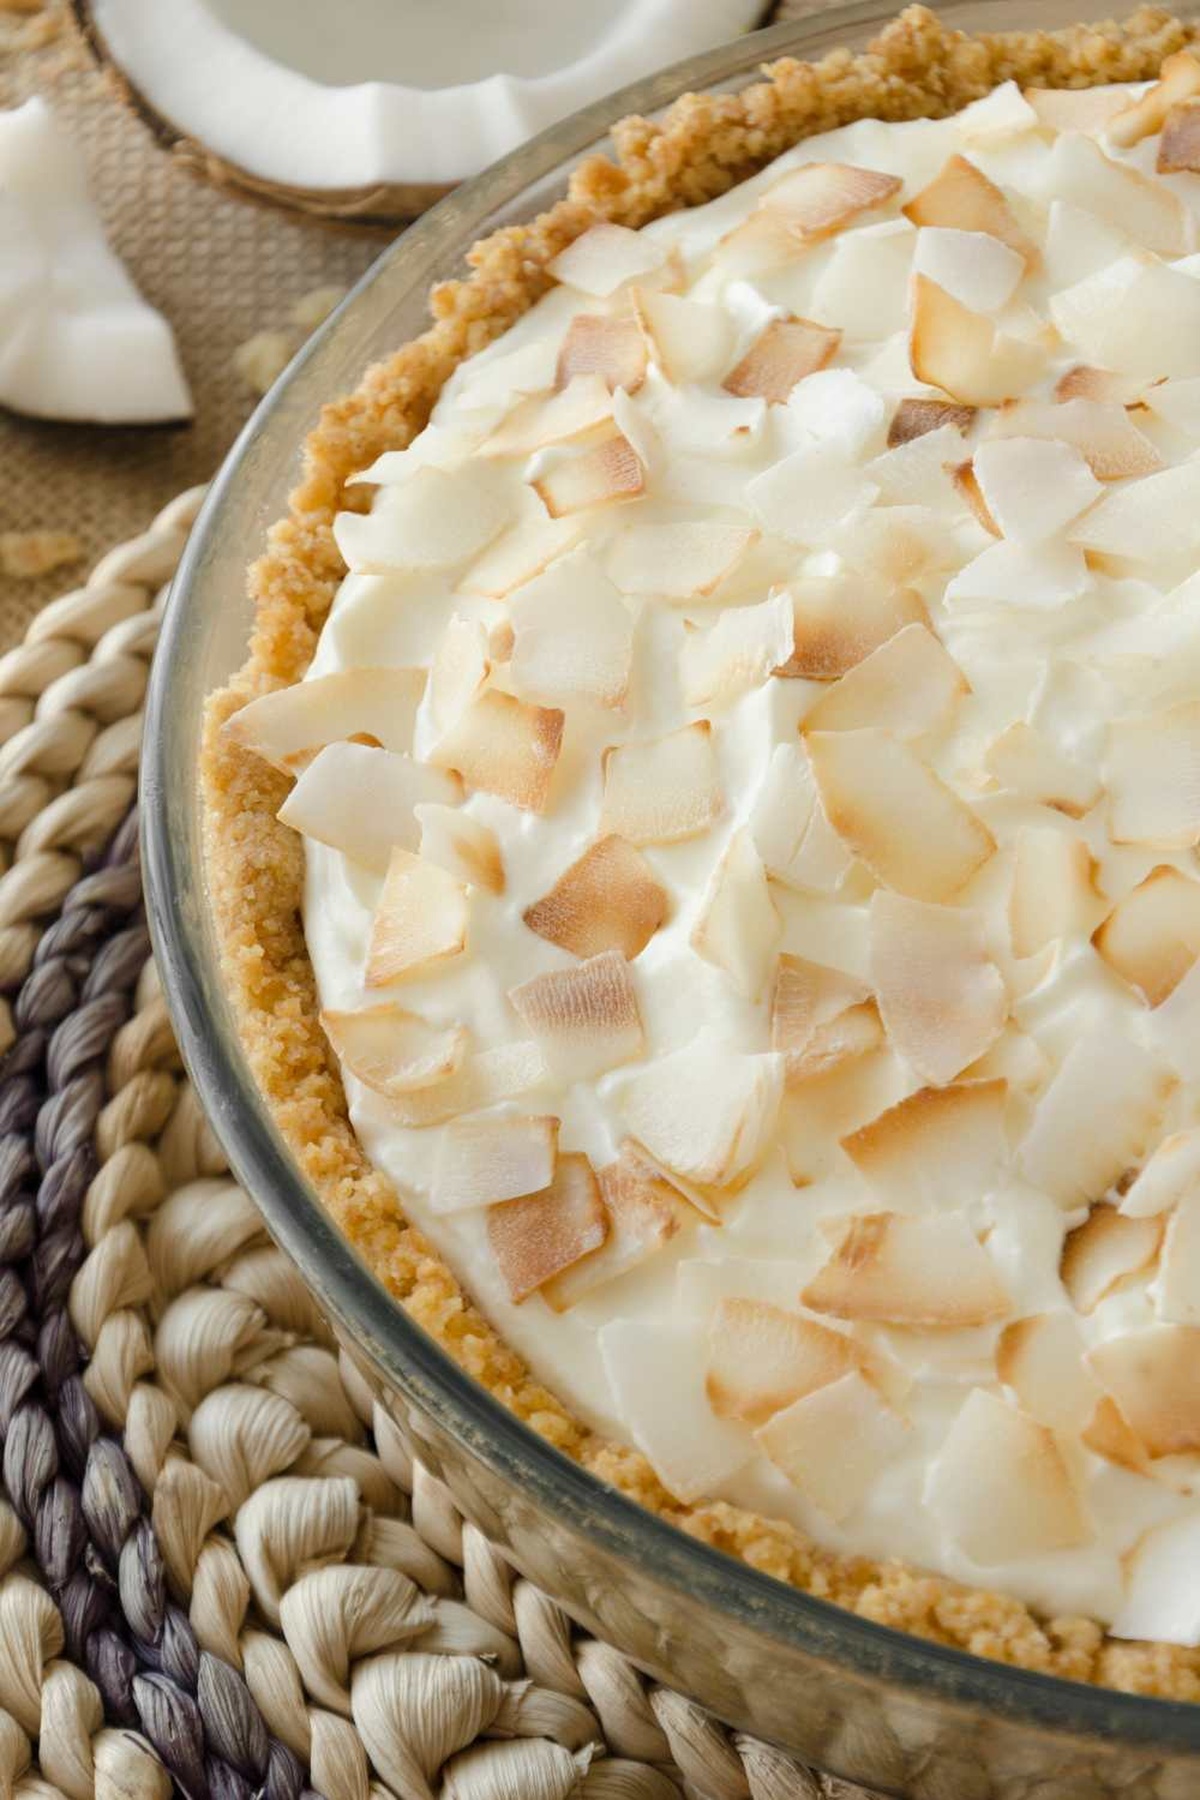
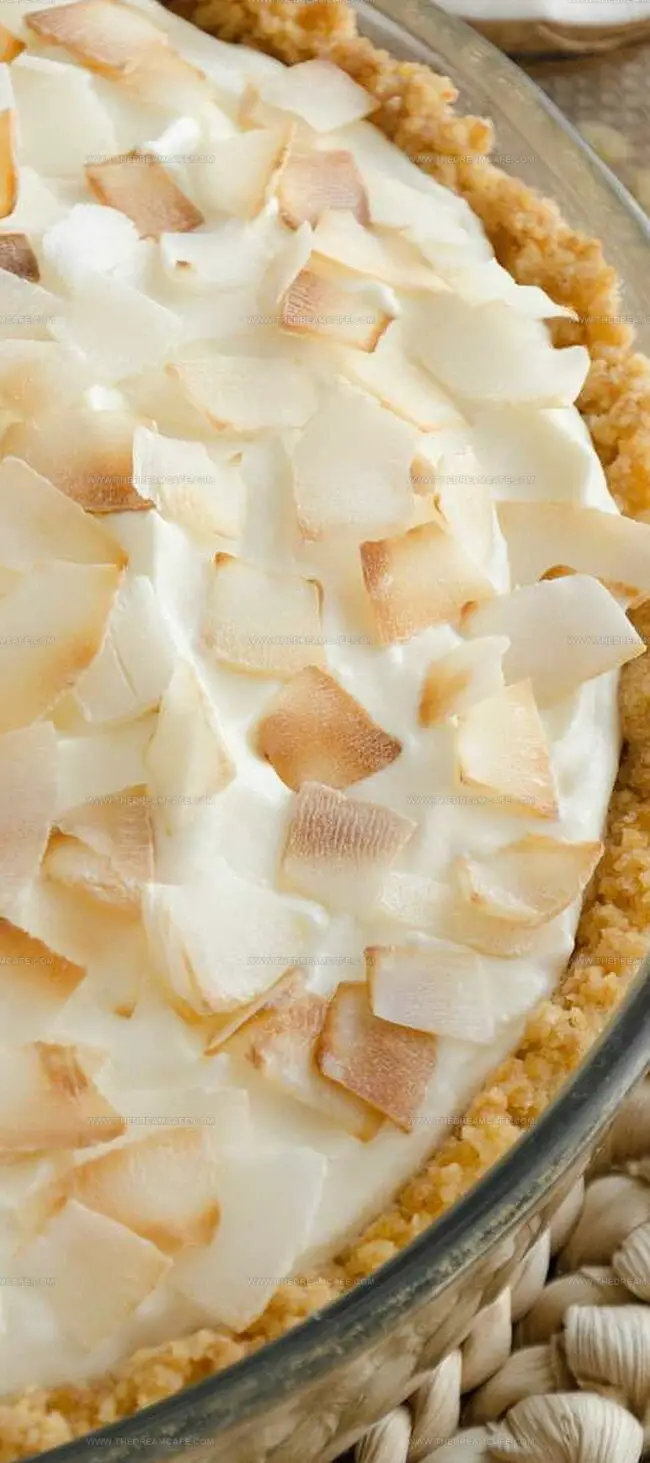
Shredded coconut adds a tropical nuance, transforming an ordinary pie into an extraordinary culinary experience.
Layers of silky custard and fluffy meringue create a harmonious symphony of sweet sensations.
The recipe demands patience but rewards you with a spectacular dessert that impresses even the most discerning palates.
Each slice promises a moment of pure, unadulterated comfort: dive in and savor the magic.
Why We Adore Barefoot Contessa Coconut Cream Pie
What Goes into Barefoot Contessa Coconut Cream Pie
Pie Crust Ingredients:Filling Ingredients:Meringue Topping Ingredients:Baking Steps for Barefoot Contessa Coconut Cream Pie
Step 1: Prepare Pie Crust Dough
Blend in a food processor:Mix until combined. Add butter and pulse until mixture resembles yellow cornmeal with small butter chunks. Add egg and pulse until dough forms a ball. Add cold water if dough seems dry.
Step 2: Chill Dough
Shape dough into a disk, wrap in plastic wrap. Refrigerate for at least 1 hour.
Step 3: Roll and Shape Crust
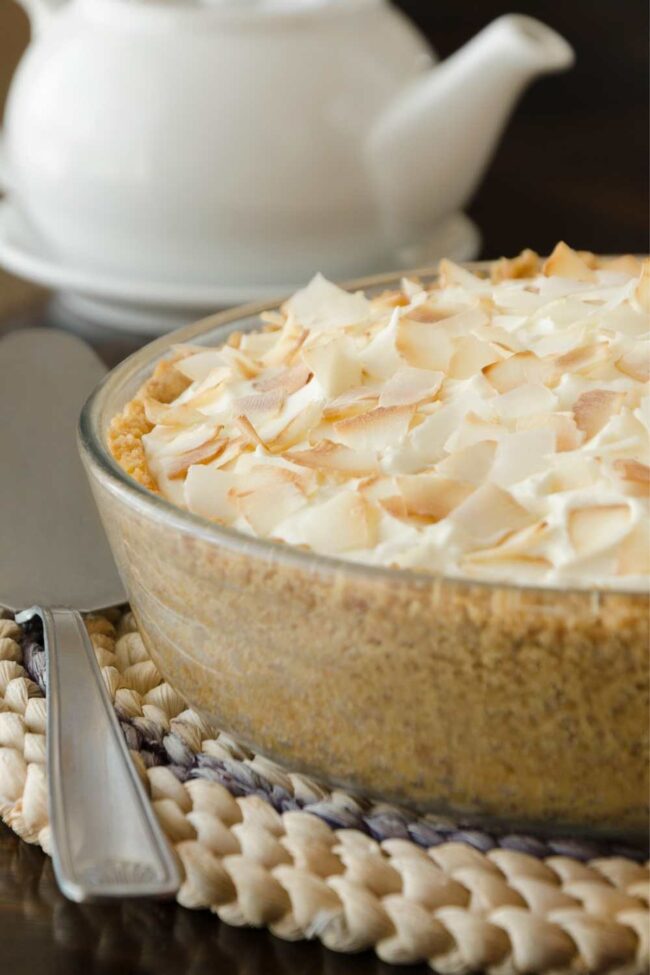
Roll dough into a 12-inch circle on floured surface. Transfer to 9-inch pie pan. Trim edges, leaving a 1-inch overhang. Fold under to create thick rim. Crimp edges decoratively. Freeze pie shell for 30 minutes.
Step 4: Blind Bake Crust
Preheat oven to 400°F. Place rack in center. Cover crust with parchment paper. Fill with pie weights or dried beans. Bake on center rack for 20 minutes. Remove weights and parchment. Bake additional 10 minutes until lightly golden. Cool on wire rack.
Step 5: Create Creamy Coconut Filling
Prepare custard base by whisking:In saucepan, combine:Cook until just boiling. Temper egg mixture by slowly adding hot liquid while whisking. Return to pan, cook until thick like pudding. Strain if lumpy. Stir in:Pour into cooled pie crust. Chill 2 hours or overnight.
Step 6: Whip Luxurious Meringue Topping
Create meringue using stand mixer:Heat mixture over simmering water, stirring constantly. Transfer to mixer, add vanilla. Whip until stiff peaks form.
Step 7: Finish and Torch Meringue
Remove plastic wrap from chilled pie. Spread meringue completely over filling, sealing edges. Create decorative peaks and swirls. Toast meringue using kitchen torch or broiler until golden brown. Sprinkle with toasted coconut. Serve chilled and enjoy!
Coconut Cream Pie Tips from Barefoot Contessa’s Playbook
Best Storage Tips for Coconut Cream Pie (Barefoot Style)
Sweet Twists on Barefoot Contessa Coconut Cream Pie
The Coconut Cream Pie Finale with Barefoot Contessa
Coconut cream pie emerges as pure culinary magic from Barefoot Contessa’s legendary kitchen.
Silky custard nestles between flaky pastry, promising indulgent comfort with each forkful.
Meringue clouds dance atop rich coconut filling, creating symphonic dessert harmony.
Layers of texture and flavor whisper gourmet sophistication through classic technique.
Weekend bakers and seasoned chefs alike can master this spectacular slice of happiness.
Grab your spatula, sprinkle those final toasted coconut flakes, and watch jaws drop as passion meets pastry – share this recipe, snap that pic, and let deliciousness reign supreme!
Print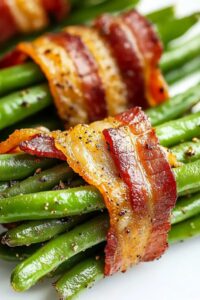
Low Carb Keto Bacon Wrapped Green Bean Bundles Recipe
- Total Time: 30 minutes
- Yield: 4 1x
Description
Savory bacon-wrapped green bean bundles deliver a keto-friendly side dish that elevates simple vegetables into an elegant experience. Crispy bacon hugs tender green beans, creating a delicious low-carb companion perfect for dinner parties or weeknight meals you’ll crave.
Ingredients
Main Proteins:
- 6 slices bacon (cut in half for shorter pieces)
Vegetables:
- 900 grams / 2 pounds green beans (trimmed; about 72–84 individual green beans)
Seasonings and Sweeteners:
- ½ teaspoon garlic powder
- ¼ teaspoon black pepper
- 3 tablespoons brown monk fruit allulose blend
Instructions
- Prepare the oven environment by heating to 200°C / 400°F and positioning an oven-safe rack over a baking sheet to ensure proper air circulation and even cooking.
- Distribute halved bacon slices across the rack in a uniform single layer, then roast for 10-15 minutes until partially cooked but not completely crisp.
- Fill a large saucepan with water and bring to a rolling boil, then gently immerse green beans and simmer for 3-5 minutes to achieve a crisp-tender texture.
- Immediately transfer beans to a colander, rinse thoroughly with ice-cold water to halt the cooking process, and meticulously pat dry using paper towels to remove excess moisture.
- Collect bacon drippings from the initial roasting pan and pour over green beans in a spacious mixing bowl, then season with garlic powder and freshly ground black pepper, tossing carefully to ensure even coating.
- Clean the baking sheet surface, then create compact bundles by grouping 6-7 green beans and wrapping each bundle with a bacon slice, securing tightly with a toothpick to maintain structural integrity.
- Delicately sprinkle approximately ¾ teaspoon of brown monk fruit allulose blend over each bacon-wrapped green bean bundle.
- Return bundles to the oven and bake for 10-15 minutes, monitoring until bacon achieves a crispy exterior and green beans reach desired tenderness.
- For those desiring extra crispness, activate the broiler and expose bundles for 2-3 minutes, watching carefully to prevent burning.
Notes
- Bacon’s crispy edge matters most when it’s baked just right, avoiding over-crispiness that leads to breakage.
- Moisture is the enemy of perfect bacon wrapping, so thoroughly dry green beans after blanching.
- Toothpicks become your secret weapon for keeping bacon-wrapped bundles tight and tidy during baking.
- Bacon drippings aren’t just fat – they’re liquid flavor gold that helps seasonings cling to green beans.
- Broiling transforms good bacon bundles into great ones, adding that final crispy crunch in just minutes.
- Prep Time: 10 minutes
- Cook Time: 20 minutes
- Category: Appetizer, Snacks, Dinner
- Method: Baking
- Cuisine: American
Nutrition
- Serving Size: 4
- Calories: 139 kcal
- Sugar: 4.9g
- Sodium: 236mg
- Fat: 9.1g
- Saturated Fat: 4.1g
- Carbohydrates: 11.1g
- Fiber: 4.1g
- Protein: 5.6g
- Cholesterol: 21mg
Julian Park
Co-Founder, Cuisine Researcher & Food Culture Writer
Expertise
Education
The Institute of Culinary Education (ICE), Los Angeles, CA
Julian Park is a natural storyteller at The Dream Café who blends hands-on culinary experience with a passion for exploring global food traditions. A graduate of The Institute of Culinary Education in Los Angeles, Julian combines professional technique with a love for cultural discovery, diving into how dishes reflect heritage, migration, and identity.
His work spans everything from in-depth cuisine guides to reflections on everyday meals around the world. With a curious palate and a journal always close by, Julian helps readers connect with food in a way that feels so insightful and personal.