
The Coziest Barefoot Contessa Grapenut Pudding Recipe Ever
Grape-Nuts pudding transforms humble ingredients into a nostalgic dessert that whispers comfort and warmth.
Creamy textures mingle with crunchy cereal, creating a delightful contrast that dances across your palate.
Sweet memories surface with each spoonful of this classic treat, reminding you of grandmother’s kitchen and cozy afternoons.
Home cooks adore this simple yet sophisticated dessert for its rustic charm and unexpected depth of flavor.
Sophisticated yet unpretentious, the pudding speaks to traditional American baking with its straightforward approach and rich ingredients.
Minimal effort yields maximum satisfaction, turning everyday components into something truly magical.
Prepare to fall in love with a dessert that celebrates simplicity and pure, unadulterated deliciousness:
What’s Great About Grapenut Pudding by Barefoot Contessa
All the Ingredients for Grapenut Perfection
Custard Base:Dry Ingredients:Baking Accessories:Making Barefoot Contessa’s Pudding
Step 1: Prepare Baking Setup
Preheat oven to 325°F. Grab an 8-inch round cake pan at least 2 inches deep. Generously grease the pan with butter or cooking spray to prevent sticking.
Step 2: Create Creamy Base
Whisk eggs in a large mixing bowl until smooth. Pour in milk and continue whisking until fully combined and silky.
Step 3: Blend Dry Ingredients
Combine dry ingredients in a separate bowl:Stir ingredients thoroughly until evenly distributed.
Step 4: Assemble Pudding Mixture
Pour dry ingredient blend into egg and milk mixture. Gently fold everything together until well incorporated.
Step 5: Set Up Water Bath
Transfer pudding mixture into prepared cake pan. Place cake pan inside a larger baking dish. Fill larger pan with warm water until it reaches about 3/4 up the sides of the cake pan.
Step 6: Bake Pudding
Carefully slide water bath into preheated oven. Bake for approximately 60 minutes. Check doneness by inserting a toothpick into center – it should come out clean.
Step 7: Cool and Serve
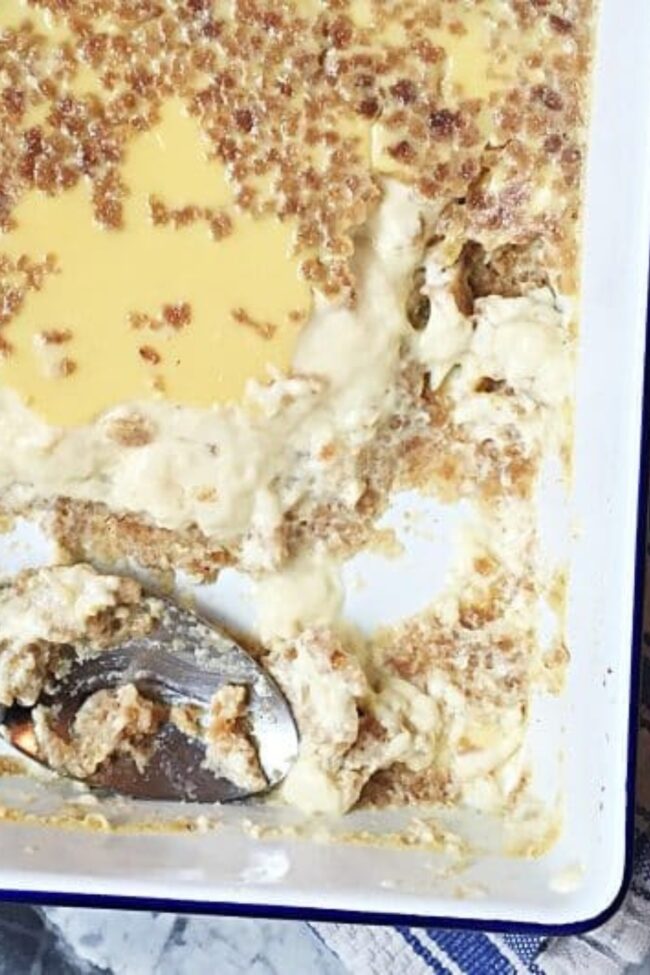
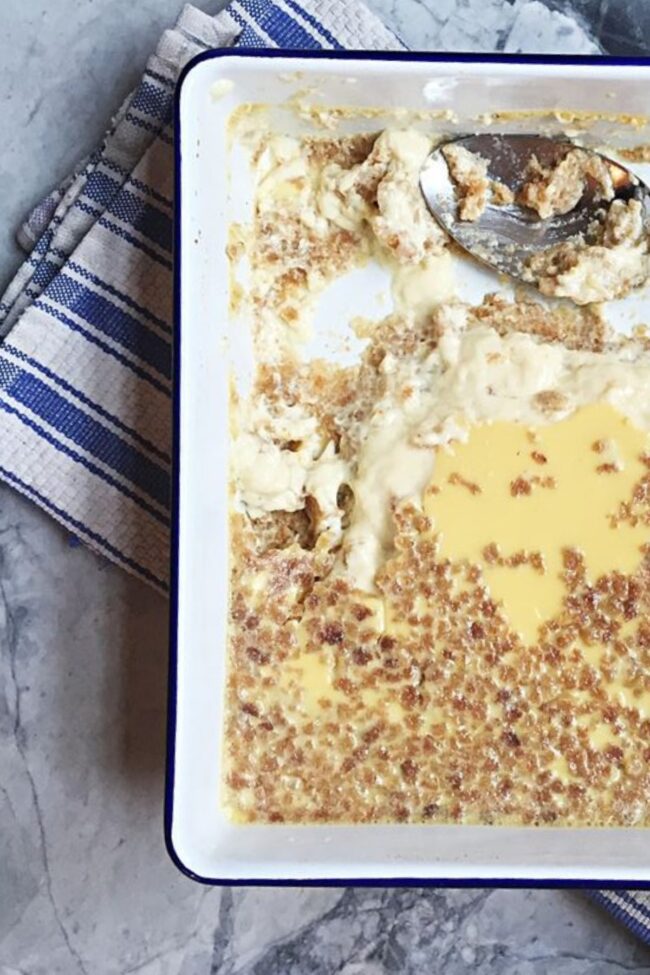
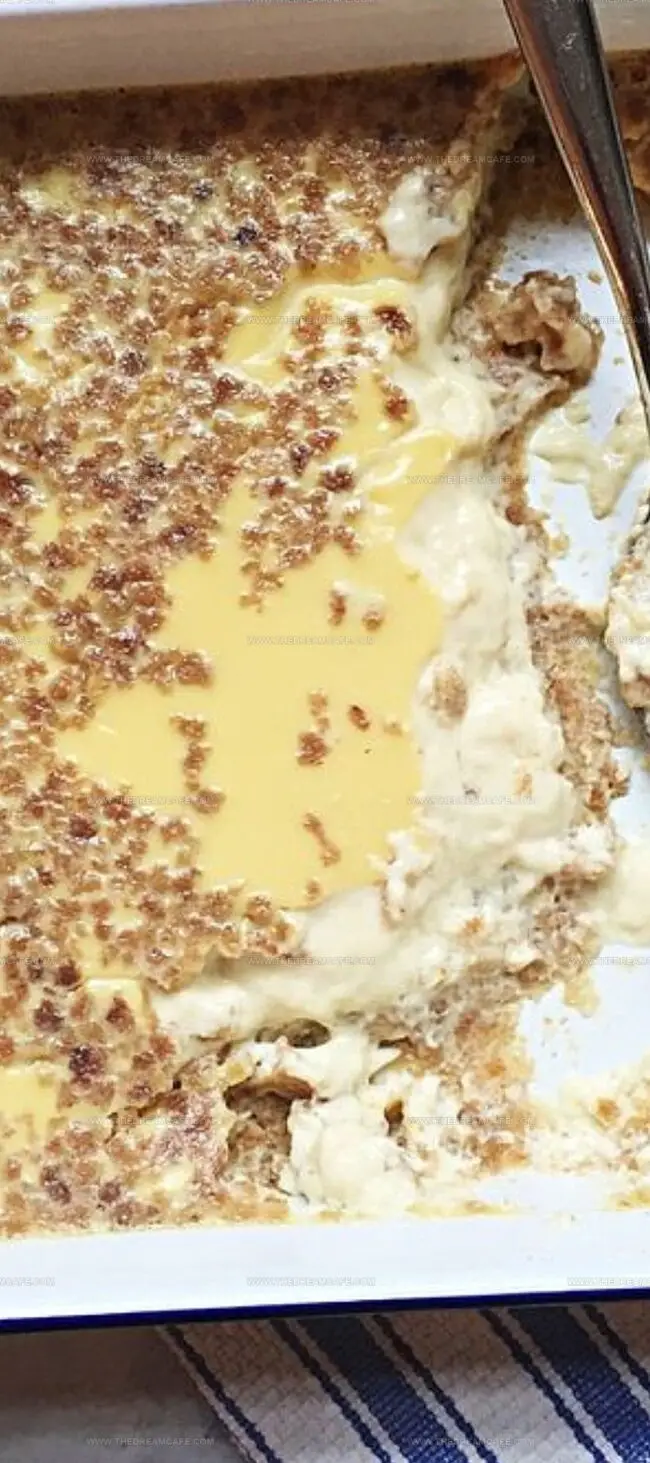
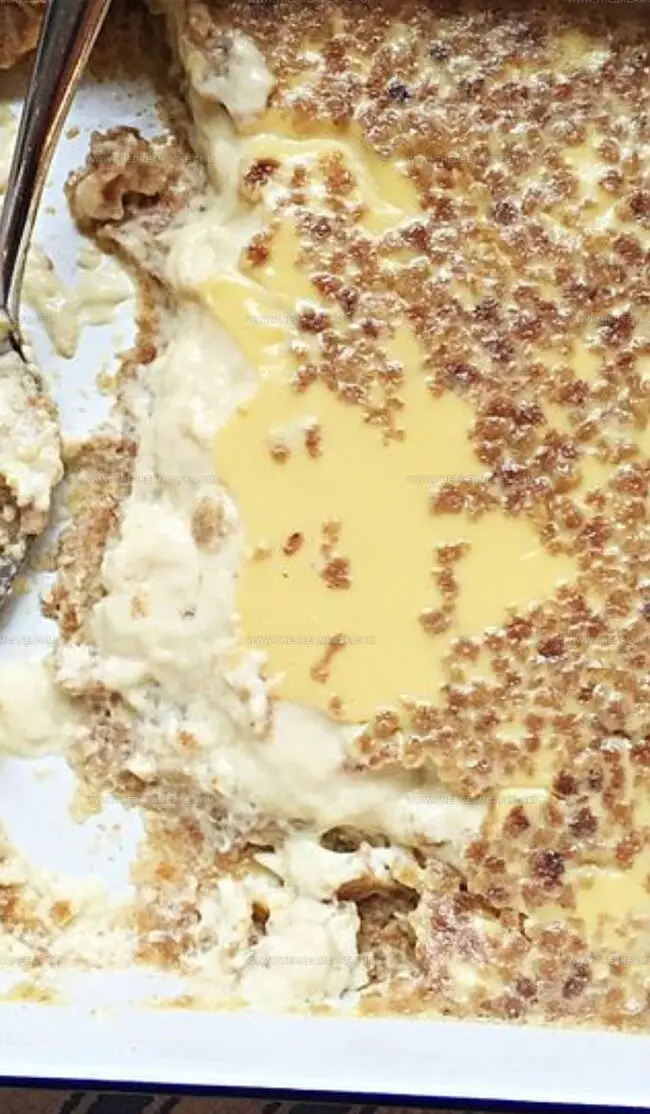
Remove pudding from oven. Allow to rest 15-30 minutes at room temperature. Optional: Refrigerate for firmer texture. Serve in individual bowls.
Step 8: Optional Garnish
Top with whipped cream or vanilla ice cream. Store any remaining pudding in refrigerator for up to 3 days.
Best Tips for Grapenut Dessert
Storing Grapenut Pudding the Right Way
Sweet Variations on a Classic
The Final Scoop of Grapenut Pudding
Grape-Nuts pudding whispers nostalgic comfort from grandma’s kitchen, blending simple ingredients into culinary magic.
Classic New England desserts rarely showcase such delicate texture and rich flavor profile.
Warm custard promises ultimate satisfaction with each creamy spoonful.
Breakfast cereal transforms into elegant pudding through Ina Garten’s masterful technique.
Weekend bakers discover pure delight in this unexpectedly sophisticated recipe.
Curious souls: dive into this delectable journey, share the recipe’s charm across social platforms, and spark conversations that celebrate traditional dessert craftsmanship.
Print
Low Carb Keto Slow Cooker Chicken Pot Pie Soup Recipe
- Total Time: 4 hours 10 minutes
- Yield: 6 1x
Description
Keto chicken pot pie soup delivers comfort without carbs, bringing creamy goodness to dinner tables everywhere. Hearty ingredients meld perfectly in slow cookers, offering dieters a guilt-free twist on classic comfort cuisine that satisfies completely.
Ingredients
Main Proteins:
- 1 lb / 450g boneless, skinless chicken breasts
- 8 oz / 225g cream cheese
Vegetables and Seasonings:
- 1 cup / 150g onion, diced
- 2 cups / 250g frozen peas and carrots, diced
- 1 bay leaf
- 1 teaspoon poultry seasoning
- ½ teaspoon sea salt (plus more to taste)
- ¼ teaspoon black pepper
Cooking Liquids and Additives:
- 4 cups / 950 milliliters chicken broth, reduced sodium
- 2 tablespoons unsalted butter (optional, for sautéing onion)
- ½ teaspoon xanthan gum (optional, for thicker soup)
Instructions
- Gently caramelize the onion in a skillet with melted butter over medium heat, cooking for 7-8 minutes until golden and translucent, which enhances the overall flavor profile of the dish.
- Transfer raw chicken breasts into the slow cooker, generously seasoning with poultry seasoning, kosher salt, and freshly ground black pepper to ensure depth of flavor.
- Pour chicken broth into the slow cooker, add the aromatic bay leaf, and incorporate the sautéed or raw onion depending on preferred preparation method.
- Secure the slow cooker lid and allow chicken to cook thoroughly on Low setting for 4-6 hours or on High setting for 2-3 hours, ensuring internal temperature reaches 165°F (74°C) for food safety.
- Carefully extract the bay leaf and discard. Using two forks, methodically shred the cooked chicken into tender, bite-sized pieces.
- Soften the cream cheese using microwave or double boiler technique. Transfer to a blender, gradually introducing 1-of reserved cooking broth, blending until achieving a silky, smooth consistency.
- Optional: Sprinkle xanthan gum into the blended mixture to provide additional thickness and creamy texture.
- Activate the slow cooker’s High setting, introduce frozen peas and carrots, and allow vegetables to become tender within 5-10 minutes.
- Integrate the cream cheese blend seamlessly into the soup, stirring until uniformly incorporated. Fold in shredded chicken and adjust seasoning with additional salt if needed.
Notes
- Turn to rotisserie chicken as a time-saving hack for perfectly cooked, juicy meat that adds instant flavor without extra prep work.
- Allow cream cheese to warm up on the counter for about 20 minutes, preventing lumpy textures and ensuring silky smooth blending.
- Break down chicken effortlessly using two forks or a hand mixer, distributing meat evenly and maintaining that tender, melt-in-your-mouth texture.
- Elevate soup depth by sautéing onions in butter before adding to the slow cooker, creating a rich, caramelized foundation of flavor.
- Incorporate xanthan gum carefully and gradually while blending to guarantee a thick, luxurious consistency without unwanted clumps.
- Prep Time: 10 minutes
- Cook Time: 4 hours
- Category: Dinner, Snacks
- Method: Slow Cooking
- Cuisine: American
Nutrition
- Serving Size: 6
- Calories: 269 kcal
- Sugar: 2.5g
- Sodium: 429.5mg
- Fat: 19.3g
- Saturated Fat: 10.8g
- Carbohydrates: 10.9g
- Fiber: 2.3g
- Protein: 21.8g
- Cholesterol: 86.8mg
Julian Park
Co-Founder, Cuisine Researcher & Food Culture Writer
Expertise
Education
The Institute of Culinary Education (ICE), Los Angeles, CA
Julian Park is a natural storyteller at The Dream Café who blends hands-on culinary experience with a passion for exploring global food traditions. A graduate of The Institute of Culinary Education in Los Angeles, Julian combines professional technique with a love for cultural discovery, diving into how dishes reflect heritage, migration, and identity.
His work spans everything from in-depth cuisine guides to reflections on everyday meals around the world. With a curious palate and a journal always close by, Julian helps readers connect with food in a way that feels so insightful and personal.