The Ultimate Chocolate Peanut Butter Rice Krispie Balls Recipe
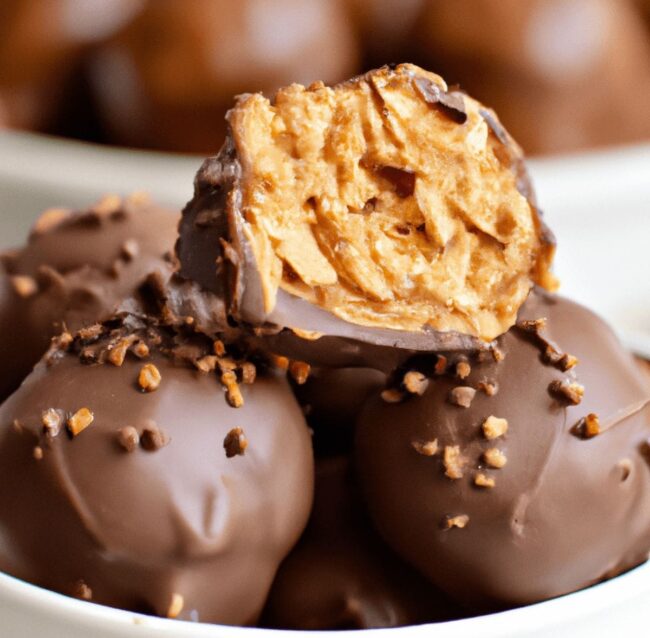
Chocolate peanut butter rice Krispie balls burst with nostalgic childhood flavor and irresistible textures that dance across your palate.
These delightful morsels blend sweet and salty components into compact, bite-sized spheres of pure indulgence.
Crispy cereal provides unexpected crunch while creamy peanut butter delivers rich, smooth undertones that complement the chocolate coating.
Each ingredient works harmoniously to create a treat that feels simultaneously familiar and exciting.
Simple pantry staples change into something magical through careful mixing and creative technique.
No complicated equipment or baking skills are required to craft these crowd-pleasing confections.
Prepare to wow friends and family with a dessert that looks impressive but comes together effortlessly.
Why Chocolate Peanut Butter Balls with Rice Krispies Are a Hit
What You Need for Chocolate Peanut Butter Balls with Rice Krispies
Base Ingredients:Dry Ingredients:Coating and Decoration:Easy Instructions for Peanut Butter Balls with a Crunch
Step 1: Prepare Baking Station
Line a large baking sheet with parchment paper for easy cleanup and smooth truffle placement.
Step 2: Create Creamy Base
In a large mixing bowl, blend:Mix until ingredients transform into a silky, smooth consistency.
Step 3: Sweeten the Mixture
Gradually incorporate powdered sugar at a time, stirring until the mixture becomes moldable and uniform.
Step 4: Add Crunchy Texture
Gently fold in crispy rice cereal, using hands if needed to ensure even distribution throughout the mixture.
Step 5: Shape Delightful Bites
Roll the mixture into 1-inch balls, placing each carefully on the prepared baking sheet.
Step 6: Chill and Firm
Refrigerate balls for 30 minutes or freeze for 20 minutes to help them maintain shape during coating.
Step 7: Melt Chocolate Coating
Carefully melt candy coating following package instructions, ensuring smooth and even consistency.
Step 8: Dip and Coat
Use a toothpick or dipping tool to fully submerge each ball in melted chocolate, ensuring complete coverage.
Step 9: Add Final Touches
Place chocolate-coated balls on parchment paper and optionally sprinkle with:Step 10: Let Chocolate Set
Allow truffles to rest until chocolate coating becomes completely firm and glossy.
Tips to Perfect Chocolate Peanut Butter Balls
Keeping Chocolate Peanut Butter Balls Fresh and Delicious
Best Things to Serve with Chocolate Peanut Butter Balls
Tasty Twists on Classic Chocolate Peanut Butter Balls
Print
Chocolate Peanut Butter Rice Krispie Balls Recipe
- Total Time: 1 hour
- Yield: 9 1x
Description
Rich chocolate and peanut butter collide in these irresistible no-bake treats that combine crispy rice cereal with creamy filling. Sweet meets salty in a perfect bite-sized snack you’ll devour in moments and crave repeatedly.
Ingredients
Main Ingredients:
- 2 cups (480 ml) peanut butter (crunchy or creamy)
- ½ cup (114 grams) unsalted butter, softened
- 2 cups (50 grams) crispy rice cereal
- 3–4 cups (340–454 grams) powdered sugar
Flavoring Ingredients:
- 1 teaspoon vanilla extract
Coating/Topping Ingredients:
- 16 ounces (454 grams) chocolate candy coating (such as Ghirardelli or almond bark)
- ¼ cup (40 grams) chocolate jimmies or chopped salted peanuts (optional)
Instructions
- Gather a spacious mixing bowl, ensuring ample room for combining ingredients smoothly.
- Cream together softened unsalted butter (113 grams or ), smooth peanut butter (236 milliliters or ), and pure vanilla extract until the mixture achieves a silky, uniform consistency.
- Gradually incorporate powdered sugar (240 grams or ), folding it into the butter mixture in incremental portions to prevent clumping and create a malleable texture.
- Gently fold crispy rice cereal (120 grams or ) into the mixture, using clean hands to ensure even distribution without crushing the delicate cereal grains.
- Meticulously roll the combined mixture into compact, uniform spheres approximately 2.5 centimeters (1 inch) in diameter, positioning each ball carefully on a parchment-paper-lined baking sheet.
- Refrigerate the formed balls for 25-35 minutes, or briefly freeze for 15-20 minutes, allowing them to firm up and maintain their shape during the chocolate coating process.
- Melt chocolate coating or chocolate chips (340 grams or ) using a double boiler or microwave, stirring frequently to achieve a smooth, glossy consistency.
- Carefully dip each chilled ball into the melted chocolate, using a fork or specialized dipping tool to ensure complete and even coverage, allowing excess chocolate to drip off gently.
- Optional: Sprinkle chopped roasted peanuts or chocolate sprinkles over the freshly coated balls for added texture and visual appeal.
- Allow the chocolate-coated balls to rest at room temperature or in a cool environment until the chocolate sets completely, approximately 15-20 minutes.
Notes
- Keep these delectable treats chilled to maintain their perfect texture and prevent melting.
- Store the chocolate peanut butter balls in an airtight container in the refrigerator for up to a week.
- Freezing works great for longer storage, lasting up to three months when wrapped carefully.
- Avoid leaving the balls at room temperature for extended periods to preserve their shape.
- Separate layers with wax paper when storing to prevent sticking and maintain their beautiful appearance.
- Prep Time: 30 minutes
- Cook Time: 30 minutes
- Category: Snacks, Desserts
- Method: None
- Cuisine: American
Nutrition
- Serving Size: 9
- Calories: 300 kcal
- Sugar: 26g
- Sodium: 100mg
- Fat: 18g
- Saturated Fat: 9g
- Unsaturated Fat: 8g
- Trans Fat: 0g
- Carbohydrates: 32g
- Fiber: 1g
- Protein: 4g
- Cholesterol: 15mg






Julian Park
Co-Founder, Cuisine Researcher & Food Culture Writer
Expertise
Education
The Institute of Culinary Education (ICE), Los Angeles, CA
Julian Park is a natural storyteller at The Dream Café who blends hands-on culinary experience with a passion for exploring global food traditions. A graduate of The Institute of Culinary Education in Los Angeles, Julian combines professional technique with a love for cultural discovery, diving into how dishes reflect heritage, migration, and identity.
His work spans everything from in-depth cuisine guides to reflections on everyday meals around the world. With a curious palate and a journal always close by, Julian helps readers connect with food in a way that feels so insightful and personal.