
Irresistible Cool Whip Candy Recipe for Sweet Tooths
Sweet tooths unite over this irresistible cool whip candy recipe that combines creamy textures with delightful confectionery magic.
Whipped to perfection, this dessert brings a playful twist to traditional treats.
The cool whip candy melts effortlessly on your tongue, creating a smooth and decadent experience.
Each bite promises a cloud-like sensation that dances between light and indulgent.
Simple ingredients transform into an extraordinary dessert that requires minimal effort.
Chocolate lovers and sweet enthusiasts will be enchanted by this quick and delectable confection.
Let’s find out this delicious adventure and watch how a few ingredients create pure dessert bliss.
Quick Recipe Overview
What Goes Into Making Cool Whip Candy
For Chocolate Coating:For Soft Creamy Core:Tools That Help With Quick Candy Assembly
How to Make Cool Whip Candy Quickly
Gently heat milk chocolate chips in a microwave-safe bowl, stirring periodically until smooth and glossy. Work slowly to prevent burning and ensure silky consistency.
Create a smooth foundation by lining an 8×8 pan with parchment paper, allowing slight overhang for easy removal later.
Carefully blend melted chocolate into Cool Whip, embracing the natural texture where chocolate might form delicate flakes throughout the mixture.
Transfer the combined mixture into the prepared pan, then slide into the freezer for a brief 30-minute transformation. Once firm, slice into delectable bite-sized squares.
Melt dark chocolate wafers and lovingly dip each frozen candy square, creating a luxurious outer shell. Place coated treats on a parchment-covered tray.
Store these decadent morsels in the freezer until the moment of indulgence arrives. For a playful twist, you can also drop spoonfuls directly onto a tray and freeze for truffle-style bites.
Tricks That Make This Candy More Fun
How to Serve Cool Whip Candy for Guests
Candy Storage Tips That Actually Work
Print
Creamy Whip Candy Recipe
- Total Time: 15 minutes
- Yield: 25 1x
Description
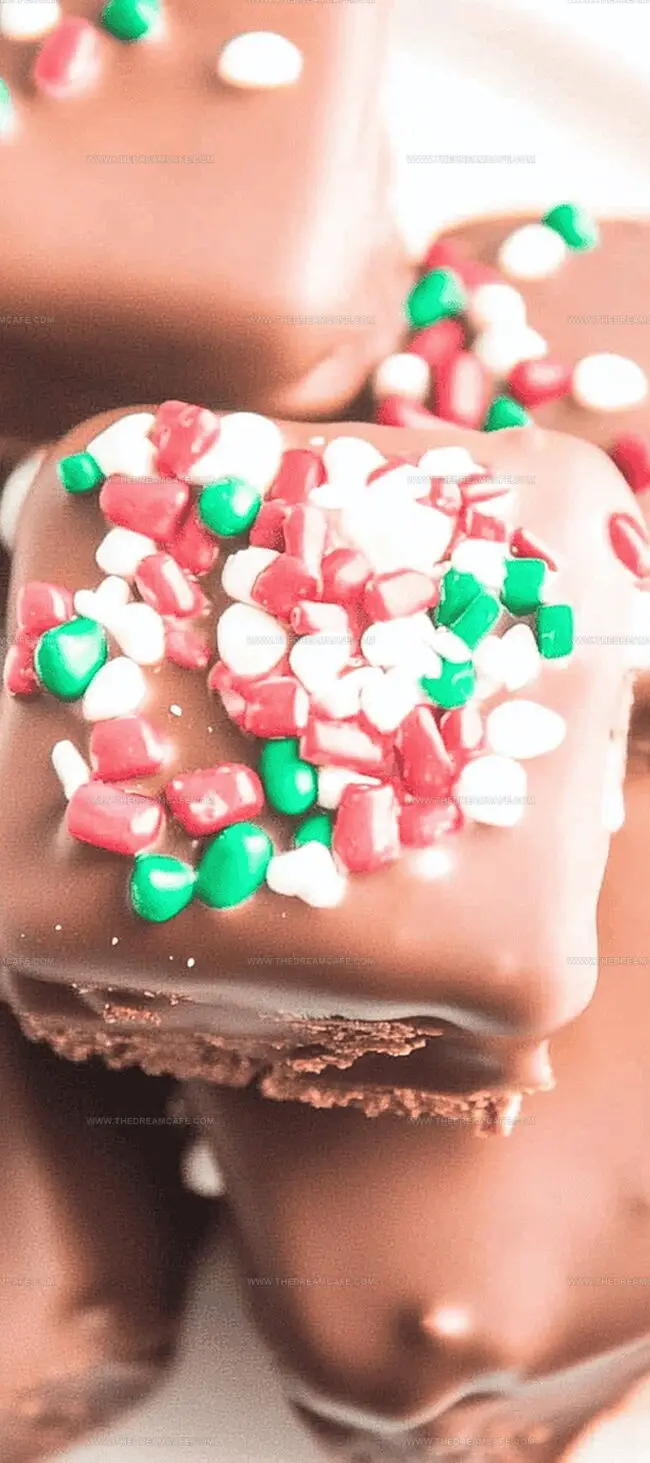
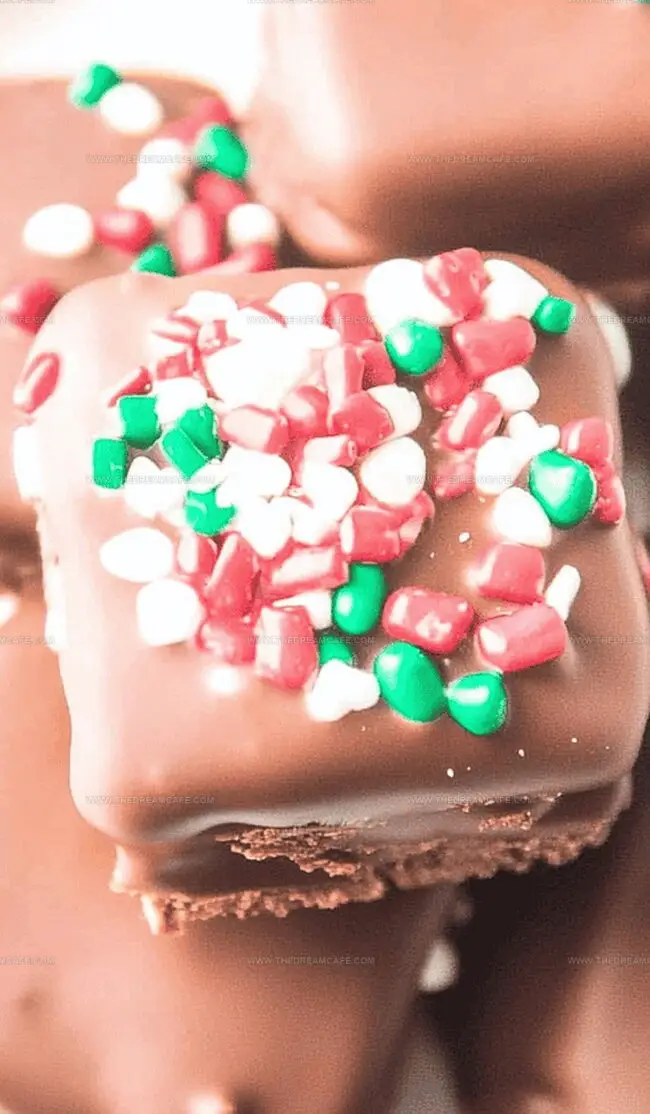
Cool whip candy brings delightful sweetness to dessert tables across America. Creamy, light textures blend with chocolate chips for a quick no-bake treat you can enjoy with friends and family.
Ingredients
- 24 oz (680 g) dark chocolate melting wafers
- 2 bags milk chocolate chips, 22 oz (624 g) total
- 1 tub Cool Whip whipped topping, 8 oz (226 g)
Instructions
- Chocolate Preparation: Melt milk chocolate chips in a microwave-safe bowl, stirring every 30-45 seconds until smooth and liquid.
- Pan Setup: Line an 8-inch square baking pan with parchment paper, covering bottom and sides completely.
- Mixture Creation: Blend melted milk chocolate with Cool Whip until uniformly combined, embracing the natural chocolate flake formation during mixing.
- Pan Layering: Spread the chocolate-Cool Whip mixture evenly across the parchment-lined pan, creating a consistent 1/2-inch thick layer.
- Freezing Process: Freeze the mixture for 25-35 minutes until completely firm and solidified.
- Cutting and Coating: Remove from freezer, slice into 1-inch squares, then immerse each piece in melted dark chocolate wafers, ensuring full coverage.
- Final Preservation: Place chocolate-coated candies on a fresh parchment-lined tray and return to freezer until serving, maintaining optimal coldness to preserve texture and flavor.
Notes
- Chocolate Melting Mastery: Microwave chocolate in short intervals, stirring gently to prevent burning and ensure smooth, even melting.
- Pan Preparation Precision: Line baking pan completely with parchment paper for easy removal and clean cutting of candies.
- Texture Expectations: Small chocolate flakes during mixing are normal and won’t affect the final candy quality.
- Freezing and Storage Strategy: Keep candies frozen until serving to maintain ideal texture and prevent melting.
- Prep Time: 15 minutes
- Cook Time: 0 minutes
- Category: Desserts, Snacks
- Method: None
- Cuisine: American
Nutrition
- Serving Size: 25
- Calories: 155
- Sugar: 14 g
- Sodium: 25 mg
- Fat: 9 g
- Saturated Fat: 5 g
- Unsaturated Fat: 4 g
- Trans Fat: 0 g
- Carbohydrates: 18 g
- Fiber: 1 g
- Protein: 2 g
- Cholesterol: 0 mg
Sophie Reynolds
Co-Founder, Recipe Curator & Culinary Educator
Expertise
Education
Auguste Escoffier School of Culinary Arts, Boulder, CO
Oregon State University
Sophie Reynolds is the recipe developer and culinary voice behind many of the approachable, flavor-focused creations at The Dream Café.
Sophie’s style leans into comfort food made simple: wholesome, satisfying meals anyone can make with confidence. Her passion lies in helping home cooks feel at ease in the kitchen while finding joy in the everyday act of cooking.