
Simple 4-Ingredient Peanut Butter Banana Bar Recipe
Soft, chewy, and irresistibly delicious, these four-ingredient peanut butter banana bars deliver a quick and wholesome treat that’ll satisfy your sweet tooth.
Packed with natural goodness, this simple recipe combines ripe bananas and creamy peanut butter into a delectable snack that feels like an indulgent dessert.
No complicated steps or fancy equipment needed – just blend, mix, and bake.
The minimal ingredient list makes these bars perfect for busy days when you want something sweet yet nutritious.
Protein-rich and naturally sweetened, these bars offer a perfect balance of flavor and health.
Grab an apron and get ready to transform those overripe bananas into a mouthwatering treat that’ll have everyone asking for seconds.
Quick Recipe Overview
4 Ingredient Peanut Butter Banana Bars Ingredient List
For Base and Binding:For Flavor and Texture Enhancement:For Structure and Final Touch:Tools to Make Peanut Butter Banana Bars Quickly
Instructions for Peanut Butter Banana Bars
Gather your baking excitement and warm up the kitchen with a toasty oven set to 350°F. Grab a loaf pan and give it a quick spray or parchment paper hug.
Smash those ripe bananas into a creamy dream, then welcome peanut butter and vanilla for a flavor party. Stir everything until it’s smooth and happy.
Sprinkle in oats, a pinch of salt, and baking powder. Mix gently until your batter looks perfectly combined and inviting.
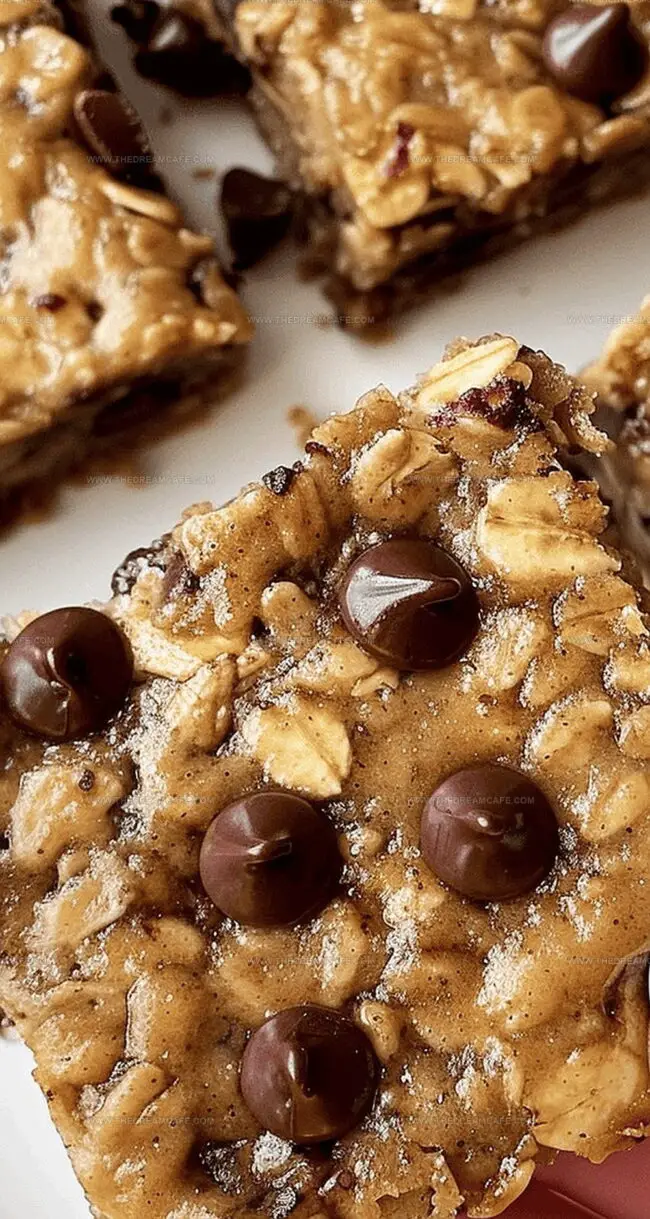
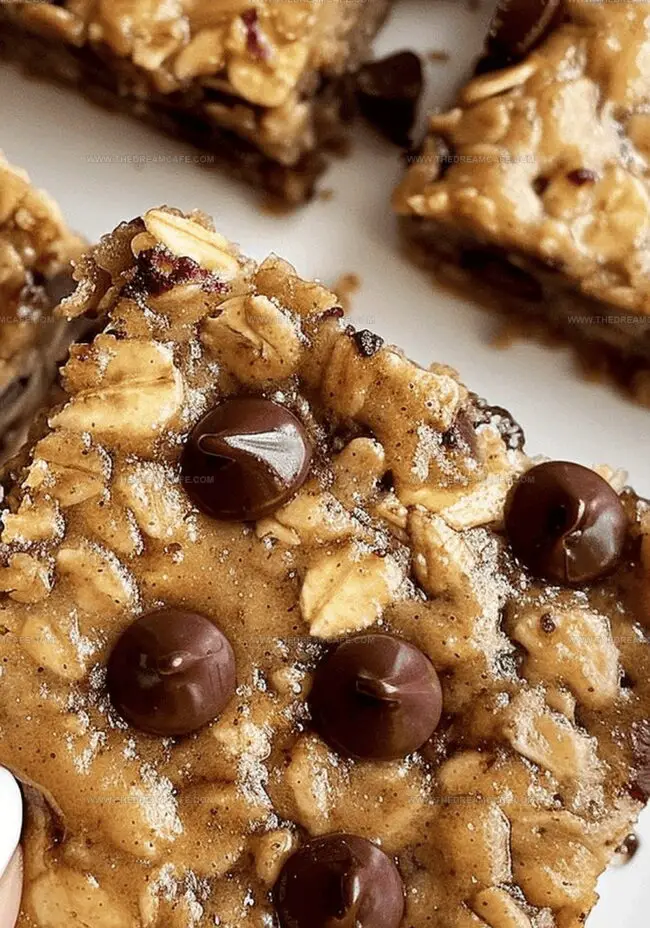
Fold most of the chocolate chips into the mixture, saving a few for a delicious topping. Pour the batter into your prepared pan and spread it evenly.
Dot the remaining chocolate chips across the surface like little flavor gems.
Slide the pan into the oven and let the magic happen for about 25-30 minutes. When a knife comes out clean, your bars are ready to rock.
Let the bars chill completely in the pan, then slice into 6-8 pieces of pure deliciousness.
Tips for Better Peanut Butter Banana Bar Texture
Serving Peanut Butter Banana Bars on the Go
Storage Guide for Peanut Butter Banana Bars
Print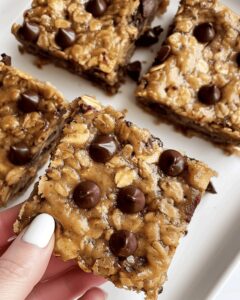
Decadent Peanut Butter Banana Bars Recipe
- Total Time: 35 minutes
- Yield: 13 1x
Description
Delightful 4 ingredient peanut butter banana bars combine creamy peanut butter with ripe bananas for a quick, wholesome treat. Minimal effort delivers maximum flavor, satisfying sweet cravings with simple, nutritious ingredients you’ll crave.
Ingredients
- 3 super ripe bananas
- ¼ cup (60 ml) smooth natural peanut butter
- 1 teaspoon vanilla extract
- 1 ¼ cups (150 g) instant or quick-cooking oats
- ½ teaspoon baking powder
- ¼ teaspoon salt
- ½ cup (85 g) chocolate chips
Instructions
- Preparation: Preheat oven to 350°F and line a 9×5-inch loaf pan with parchment paper or lightly grease with cooking spray.
- Banana Base: Thoroughly mash ripe bananas in a large mixing bowl until achieving a smooth, creamy texture, then blend in peanut butter and vanilla extract until fully integrated.
- Dry Ingredient Incorporation: Gently fold rolled oats, kosher salt, and baking powder into the banana mixture, ensuring even distribution of dry ingredients throughout the batter.
- Chocolate Enhancement: Fold two-thirds of chocolate chips into the batter, reserving the remaining chips for final topping.
- Pan and Bake: Transfer batter to prepared loaf pan, smoothing the surface with a silicone spatula, then sprinkle remaining chocolate chips on top for a decorative finish.
- Baking and Cooling: Bake for 25-30 minutes until a knife inserted into the center comes out clean, then allow bars to rest in the pan for 10 minutes before transferring to a wire rack for complete cooling.
- Serving: Once fully cooled, slice into 6-8 uniform bars ready for enjoyment.
Notes
- Ripe Banana Selection: Choose bananas with brown spots for maximum sweetness and easier mashing, which enhances the bar’s natural flavor and moisture.
- Peanut Butter Consistency: Use smooth, room temperature peanut butter to ensure seamless mixing and prevent lumpy texture in the batter.
- Precise Baking Time: Watch closely during the 25-30 minute baking window; ovens vary, so check doneness with a toothpick test to avoid dry or undercooked bars.
- Storage Strategy: Store cooled bars in an airtight container at room temperature for 3-4 days or refrigerate for up to a week to maintain freshness and texture.
- Prep Time: 10 minutes
- Cook Time: 30 minutes
- Category: Breakfast, Snacks, Desserts
- Method: Baking
- Cuisine: American
Nutrition
- Serving Size: 13
- Calories: 130
- Sugar: 6 g
- Sodium: 80 mg
- Fat: 5 g
- Saturated Fat: 1 g
- Unsaturated Fat: 4 g
- Trans Fat: 0 g
- Carbohydrates: 18 g
- Fiber: 2 g
- Protein: 3 g
- Cholesterol: 0 mg
Sophie Reynolds
Co-Founder, Recipe Curator & Culinary Educator
Expertise
Education
Auguste Escoffier School of Culinary Arts, Boulder, CO
Oregon State University
Sophie Reynolds is the recipe developer and culinary voice behind many of the approachable, flavor-focused creations at The Dream Café.
Sophie’s style leans into comfort food made simple: wholesome, satisfying meals anyone can make with confidence. Her passion lies in helping home cooks feel at ease in the kitchen while finding joy in the everyday act of cooking.