
Explosive Flavor Bombs Recipe: Ignite Your Taste Buds Today
Dive into the delightful world of chocolate bombs that melt your heart with pure indulgence.
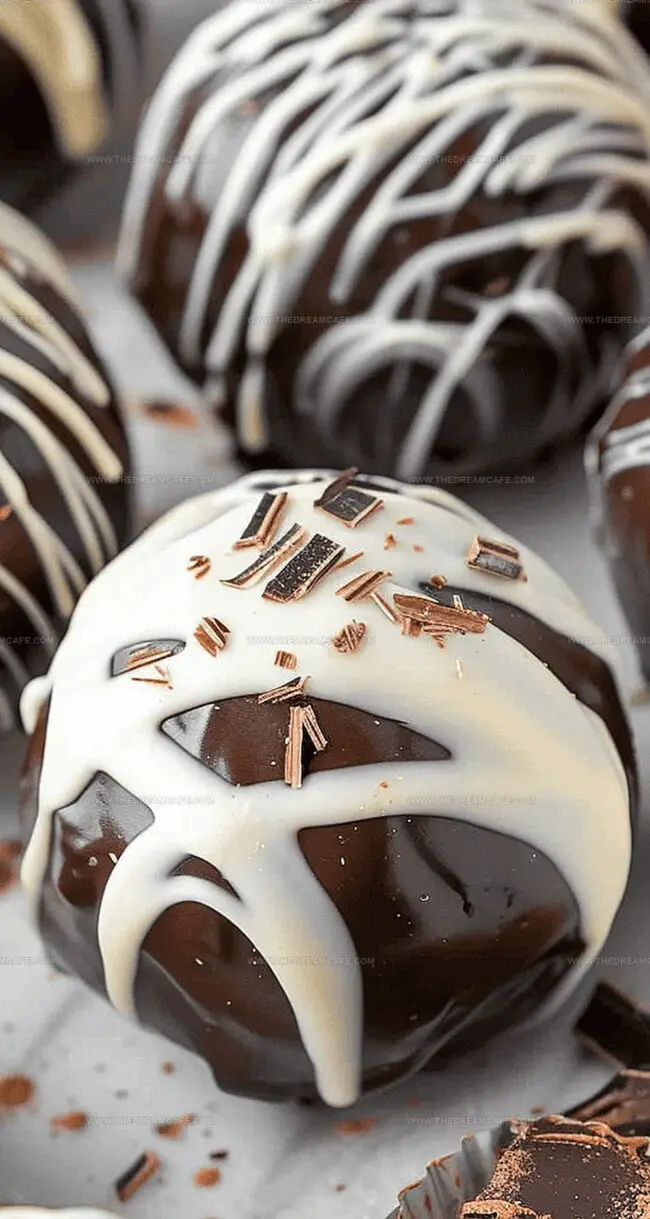
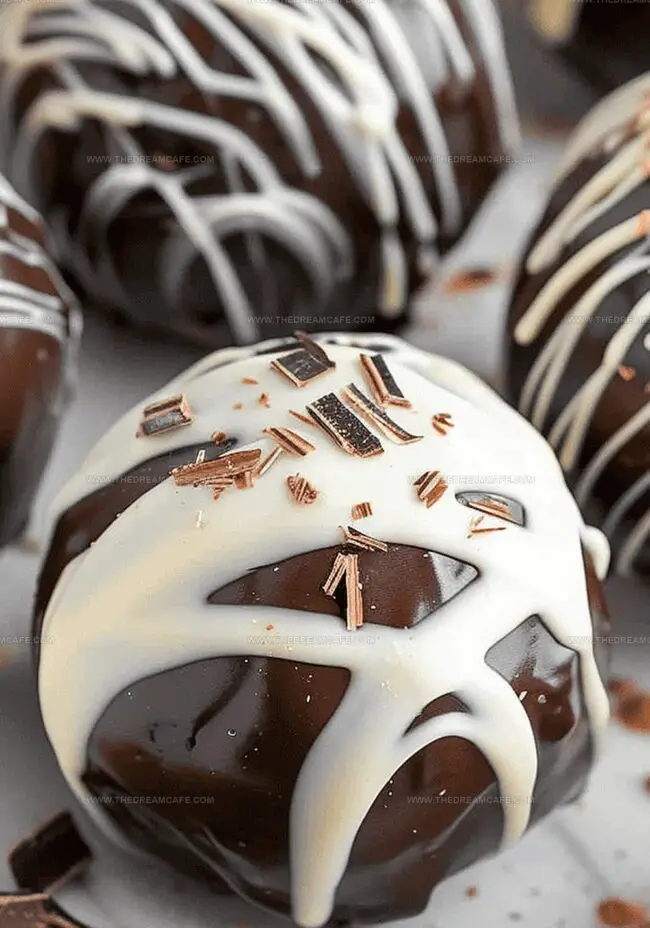
These decadent chocolate bombs burst with flavor and surprise in every sip.
Rich, velvety chocolate shells hide a treasure trove of marshmallows and cocoa mix waiting to be dissolved.
Crafting these magical treats requires minimal ingredients and simple techniques anyone can master.
The smooth chocolate exterior gives way to a creamy, warm center that dances on your taste buds.
Impress your loved ones with these show-stopping dessert delights that turn an ordinary drink into an extraordinary experience.
Your next cozy moment deserves these irresistible chocolate bombs.
Quick Recipe Overview
Ingredients That Make Hot Bombs Irresistible
For Base:For Flavor Enhancers:For Topping and Garnish:Kitchen Tools to Prepare Hot Bombs
Hot Bombs Step-by-Step Instructions
Gather a microwave-safe bowl, silicone mold, cookie sheet, and spoon. Select high-quality chocolate for best results.
Carefully melt chocolate in microwave, stirring until completely smooth and glossy. Ensure no lumps remain in the mixture.
Position silicone mold on cookie sheet. Gently spoon chocolate into each well, using back of spoon to create smooth, even coating along sides.
Place mold in freezer for approximately 10 minutes. Check chocolate thickness and reinforce thin areas with additional melted chocolate. Return to freezer for another 5 minutes.
Remove mold from freezer and carefully peel back silicone to release delicate chocolate halves.
Warm a small skillet briefly. Melt chocolate half edges, then fill one half with hot cocoa mix and mini marshmallows. Fuse halves together by gently pressing edges.
Optional artistic touch: drizzle additional melted chocolate over completed hot bombs for elegant presentation.
Tips to Switch Up Hot Bombs Flavor
Serve Hot Bombs as a Snack or Starter
Hot Bombs Storage Advice You’ll Use
Print
Delectable Bombs Recipe
- Total Time: 50 minutes
- Yield: 7 1x
Description
Mexican paletas combine refreshing fruit with rich flavors in a cool summer treat. Homemade popsicles offer pure delight when you crave something sweet and chilled.
Ingredients
- 6 cups (1.4 liters) whole milk
- ¼ cup (60 milliliters) honey
- 1 tablespoon (15 milliliters) vanilla extract
- ½ cup (120 milliliters) whipped cream
- 2 tablespoons (30 milliliters) chocolate shavings
- 1 tablespoon (15 milliliters) cocoa powder
Instructions
- Chocolate Preparation: Melt premium chocolate in a microwave-safe bowl, stirring until achieving a lustrous, velvety texture that flows smoothly.
- Molding Foundation: Secure a silicone mold on a stable cookie sheet, ensuring precision and preventing accidental movement during chocolate application.
- Shell Creation: Craft chocolate shells by generously coating mold cavities with molten chocolate, using a spoon to distribute an even, consistent layer that covers all interior surfaces.
- Initial Solidification: Quickly freeze the chocolate-lined mold for 10 minutes, allowing the delicate shells to transform into rigid structures with structural integrity.
- Reinforcement Layer: Identify any fragile areas in the chocolate shells and reinforce them with an additional chocolate layer, returning to the freezer for 5 minutes to guarantee durability.
- Shell Extraction: Delicately release the chocolate halves from the silicone mold by gently peeling away the flexible surface, revealing pristine spherical shells.
- Assembly Technique: Warm a ceramic plate to a comfortable temperature, then delicately melt chocolate half edges by briefly touching the heated surface, creating smooth joining points.
- Filling Composition: Generously populate one chocolate half with hot cocoa mix and miniature marshmallows, creating a decadent interior payload.
- Final Fusion: Repeat edge-warming for the second chocolate half, then carefully unite the two halves by pressing edges together, forming a seamless spherical hot bomb.
- Artistic Finishing: Optional decorative embellishments include elegant chocolate drizzles or intricate design patterns to elevate visual presentation.
Notes
- Select Premium Chocolate: Use high-quality chocolate with at least 60% cocoa content for rich, smooth texture and intense flavor that melts perfectly.
- Prevent Moisture Mishap: Ensure all utensils and work surfaces are completely dry to avoid chocolate seizing or becoming grainy during melting.
- Master Chocolate Coating: Create thick, even chocolate shells by using the back of a spoon to carefully spread molten chocolate along mold sides, eliminating thin or weak spots.
- Perfect Sealing Technique: Warm plate edges gently and precisely to create a seamless seal between chocolate halves, preventing potential leakage and ensuring a professional finish.
- Prep Time: 50 minutes
- Cook Time: 0 minutes
- Category: Lunch, Dinner
- Method: None
- Cuisine: American
Nutrition
- Serving Size: 7
- Calories: 360
- Sugar: 27 g
- Sodium: 90 mg
- Fat: 20 g
- Saturated Fat: 12 g
- Unsaturated Fat: 8 g
- Trans Fat: 0 g
- Carbohydrates: 36 g
- Fiber: 1 g
- Protein: 9 g
- Cholesterol: 70 mg
Sophie Reynolds
Co-Founder, Recipe Curator & Culinary Educator
Expertise
Education
Auguste Escoffier School of Culinary Arts, Boulder, CO
Oregon State University
Sophie Reynolds is the recipe developer and culinary voice behind many of the approachable, flavor-focused creations at The Dream Café.
Sophie’s style leans into comfort food made simple: wholesome, satisfying meals anyone can make with confidence. Her passion lies in helping home cooks feel at ease in the kitchen while finding joy in the everyday act of cooking.