Large Pot: Needed for boiling potatoes and later cooking pierogi.
Skillet: Great for sautéing onions and frying pierogi to golden perfection.
Potato Masher: Perfect for creating smooth, creamy potato filling.
Cutting Board: Provides a clean surface for rolling and cutting dough.
Colander: Useful for draining boiled potatoes and pierogi.
Spatula: Helps flip pierogi while frying and transfer them between cooking stages.
Step-by-Step to Make Your Own Pierogi Dough & Fillings
Dough Preparation A soft, stretchy dough comes to life by gently mixing flour, eggs, and water. Knead the mixture until it feels smooth and relaxed, then let it rest quietly for about an hour.
Potato Filling Magic Create a creamy potato mixture by boiling tender potatoes and blending them with caramelized onions and sharp cheese. The filling should feel rich and comforting.
Pierogi Shaping Workshop Roll out the dough into delicate circles, then carefully cradle a spoonful of potato goodness inside. Gently fold and pinch the edges to create little flavor pockets.
Cooking Transformation Slide the pierogi into bubbling water until they dance and float to the surface. Then, transform them to golden perfection in a sizzling butter bath with sweet onions.
Final Feast Serve these warm, delightful parcels with a dollop of cool sour cream, inviting friends and family to enjoy a taste of comfort and tradition.
Filling Variations and Sauce Tips for Pierogi
Knead the dough thoroughly to develop gluten, which makes pierogi more tender and prevents tearing during cooking. Resting the dough allows the flour to absorb moisture, creating a more elastic and manageable texture.
Experiment with different cheese varieties like farmer’s cheese, gouda, or smoked cheddar to add unique depth to your potato filling. Roasted garlic or fresh herbs like chives can elevate the classic potato mixture.
Uncooked pierogi freeze beautifully for up to three months. Arrange them on a baking sheet, freeze until solid, then transfer to freezer bags. Cook directly from frozen, adding an extra minute to boiling time.
Besides boiling and frying, try baking pierogi in a buttered casserole dish at 375°F for a crispy exterior. Alternatively, air fry at 370°F for 8-10 minutes for a healthier golden crunch.
Swap potato for sauerkraut, mushroom, sweet cheese, or fruit fillings like blueberries for sweet pierogi.
Pierogi Serving Tips from Classic to Creative
Cozy Family Feast: Gather loved ones around the table and share these delightful pierogi as a heartwarming meal that brings everyone together.
Rustic Brunch Delight: Serve pierogi alongside crispy bacon, scrambled eggs, and fresh herbs for a weekend breakfast that feels like a comforting celebration.
Elegant Appetizer Platter: Arrange golden-fried pierogi on a beautiful wooden board with small dishes of sour cream, chopped chives, and caramelized onions for a stunning party starter.
Hearty Comfort Bowl: Create a satisfying one-bowl meal by topping pierogi with sautéed mushrooms, extra crispy onions, and a sprinkle of fresh parsley for added depth and flavor.
Store Homemade Pierogi Without Losing Texture
Smart Batch Cooking: Prepare multiple batches of pierogi in one session. Freeze uncooked dumplings on a baking sheet, then transfer to freezer bags for quick future meals. Great for busy weeknights when cooking time is limited.
Refrigeration Magic: Store cooked pierogi in airtight containers for 3-4 days. Separate layers with parchment paper to prevent sticking. Reheat gently in a skillet with a touch of butter to maintain their delicious crispy texture.
Freezer-Friendly Strategy: Raw or cooked pierogi can be frozen up to 3 months. Wrap tightly in plastic wrap, then place in freezer bags. Label with date and contents for easy tracking. Thaw overnight in refrigerator before cooking.
Quick Lunch Hack: Pack cooled pierogi in lunch containers with a small side of sour cream. They taste delicious at room temperature and reheat beautifully in a microwave. Perfect for work or school meals that need zero complicated preparation.
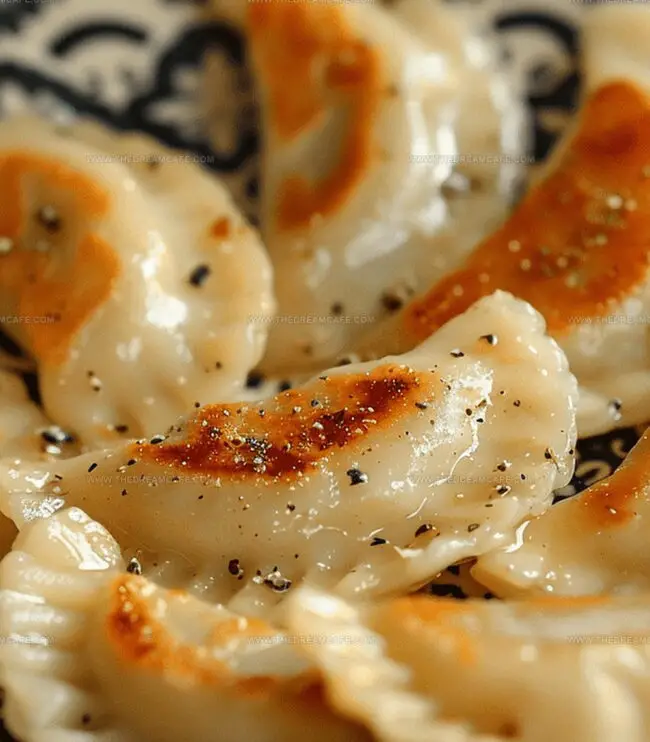
Polish pierogi showcase delicate dough pockets filled with savory potato and cheese. Crafted with love, these traditional dumplings invite you to savor authentic Eastern European comfort.
Ingredients
Scale
6 cups (1440 ml) all-purpose flour
2 eggs, beaten
2 tsps salt
6 tbsps (90 ml) canola or vegetable oil
2 cups (480 ml) cold water (split into 2 parts)
3.75 lbs (1700 g) baking potatoes
4.5 cups (540 g) cheddar cheese, shredded finely
1 medium white onion, chopped finely
0.33 cup (75 g) softened butter (divided)
Salt to taste
White pepper to taste (or very fine black pepper)
1 onion, diced or sliced thinly
2 tbsps (30 ml) butter (or as needed for frying)
Sour cream (optional for serving)
Instructions
Dough Preparation: Merge flour, eggs, vegetable oil, salt, and water in a spacious mixing bowl. Knead the mixture on a clean surface for 4-5 minutes until achieving a silky, elastic texture. Wrap in plastic and let rest 30-60 minutes to develop gluten structure.
Potato Filling Creation: Boil diced potatoes in salted water until tender. Drain and mash thoroughly. Caramelize onions in butter until translucent, then integrate with mashed potatoes and cheddar cheese, creating a creamy, flavorful filling.
Pierogi Assembly: Roll dough to ⅛-inch thickness and cut into 3-inch rounds. Place potato filling in the center of each circle. Fold dough over, forming half-moon shapes, and seal edges meticulously by crimping and pressing.
Cooking Process: Submerge pierogi in boiling salted water, cooking until they float (2-4 minutes). Transfer to a buttered skillet with diced onions, sautéing until achieving a golden-brown, crispy exterior on both sides.
Serving Suggestion: Plate pierogi hot, garnishing with caramelized onions and a generous dollop of sour cream for an authentic, comforting dining experience.
Notes
Master Dough Consistency: Kneading develops gluten, creating a stretchy, smooth texture that prevents pierogi from falling apart during cooking.
Potato Filling Technique: Thoroughly drain potatoes to avoid watery filling, ensuring a rich, creamy mixture that holds together perfectly.
Sealing Secrets: Press pierogi edges firmly with fingertips or a fork to create a tight seal, preventing filling from leaking during boiling.
Crispy Finish Strategy: Sautéing after boiling adds a golden-brown crust, transforming traditional pierogi into a restaurant-quality dish with irresistible texture.
Auguste Escoffier School of Culinary Arts, Boulder, CO
Degree: Diploma in Culinary Arts
Focus: Hands-on training in classic and modern culinary techniques, emphasizing sustainable cooking practices, kitchen professionalism, and real-world restaurant experience through externships.
Oregon State University
Degree: B.S. in Nutrition and Food Management
Focus: In-depth study of human nutrition, food safety, meal planning, and food-service operations, with a strong foundation in public health, dietetics, and community-based nutrition programs.
Sophie Reynolds is the recipe developer and culinary voice behind many of the approachable, flavor-focused creations at The Dream Café.
Sophie’s style leans into comfort food made simple: wholesome, satisfying meals anyone can make with confidence. Her passion lies in helping home cooks feel at ease in the kitchen while finding joy in the everyday act of cooking.


Sophie Reynolds
Co-Founder, Recipe Curator & Culinary Educator
Expertise
Education
Auguste Escoffier School of Culinary Arts, Boulder, CO
Oregon State University
Sophie Reynolds is the recipe developer and culinary voice behind many of the approachable, flavor-focused creations at The Dream Café.
Sophie’s style leans into comfort food made simple: wholesome, satisfying meals anyone can make with confidence. Her passion lies in helping home cooks feel at ease in the kitchen while finding joy in the everyday act of cooking.