Hearty Homemade Stuffed Cabbage Rolls Recipe: Family Favorite
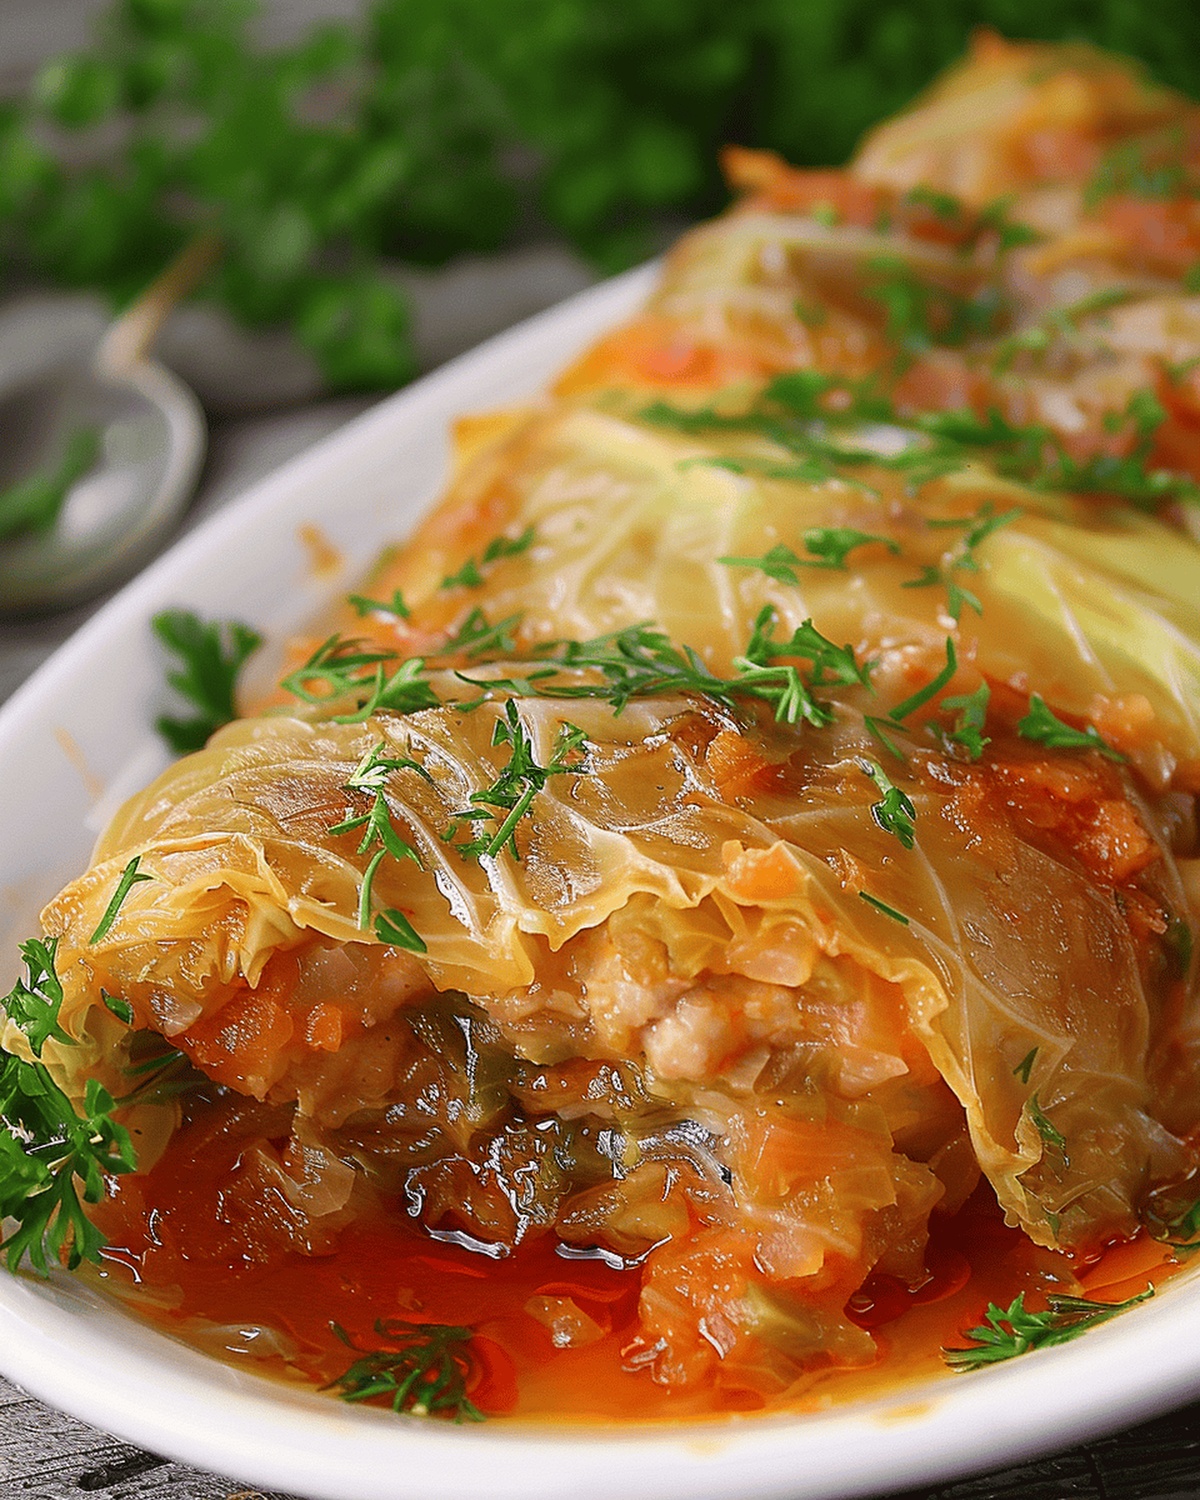
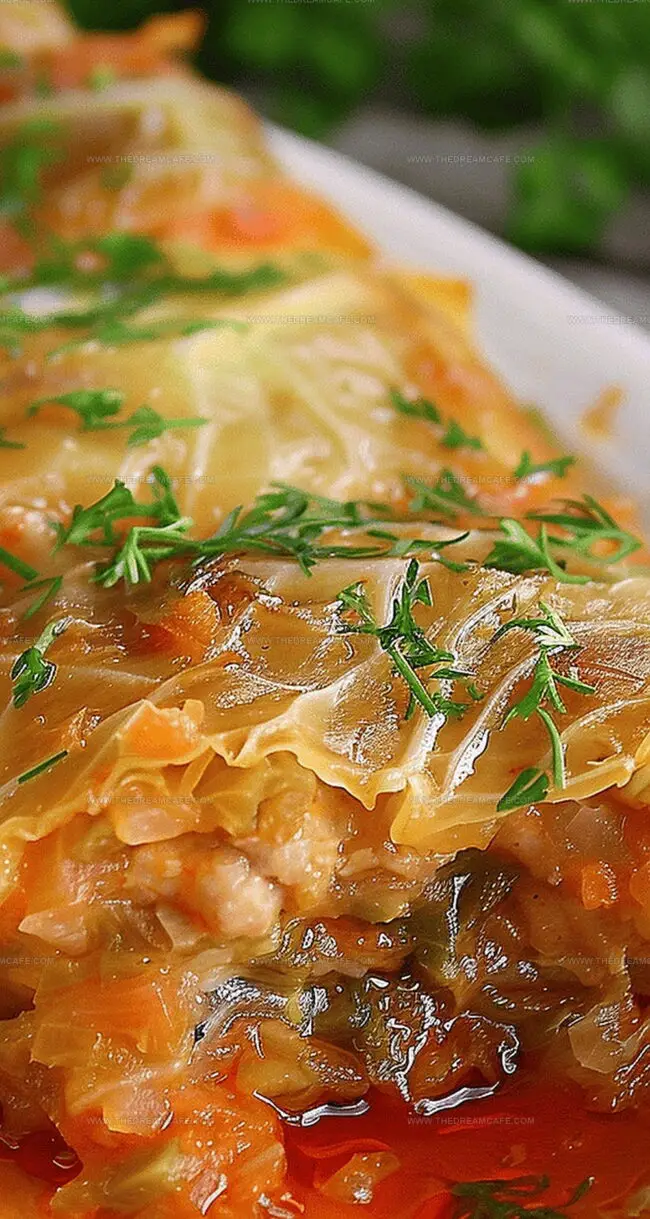
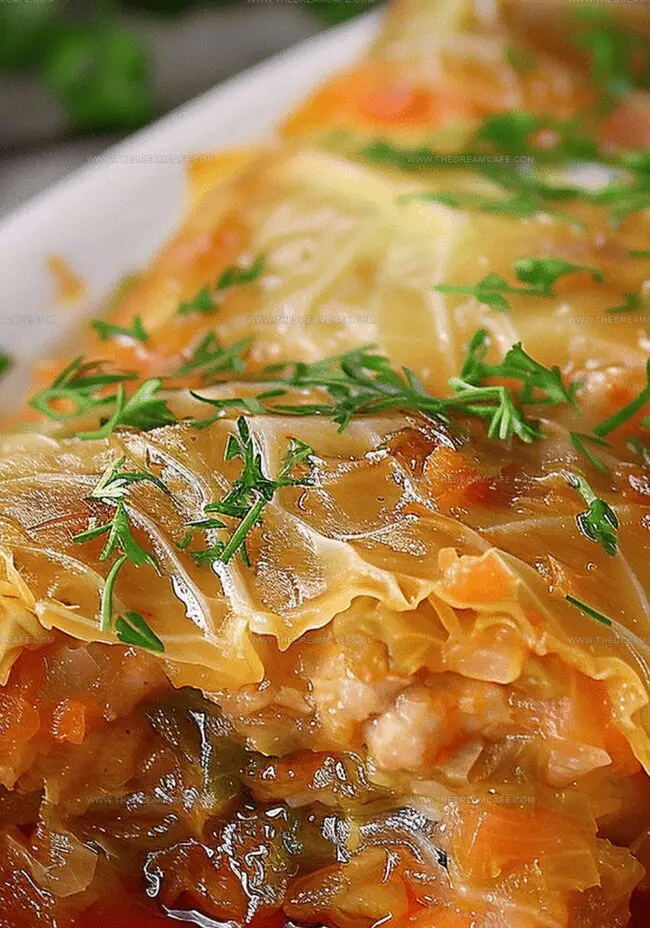
Hearty and comforting, these traditional stuffed cabbage rolls deliver a symphony of flavors that dance across your palate.
Generations of home cooks have perfected this classic stuffed cabbage rolls recipe, blending tender cabbage leaves with savory meat and aromatic spices.
Soft cabbage wraps envelop a rich filling of ground beef, rice, and herbs that melt in your mouth with each delightful bite.
The recipe carries whispers of Eastern European kitchens, where grandmothers lovingly crafted these delectable parcels.
Simmered in a tangy tomato sauce, these rolls promise a deeply satisfying meal that connects you to timeless culinary traditions.
Warm, hearty, and packed with robust flavors, this dish stands ready to become a cherished favorite at your dinner table.
Prepare to embark on a delicious journey that celebrates comfort and home-style cooking.
Quick Recipe Overview
Ingredients Needed for Flavorful Stuffed Cabbage Rolls
For Base and Liquid:For Vegetable Components:For Binding and Finishing:Kitchen Essentials to Roll and Bake Cabbage Rolls
How to Assemble and Cook Stuffed Cabbage Rolls
Select a fresh cabbage head and gently remove the core. Submerge the entire cabbage in boiling salted water, letting it soften for about 5 minutes. Carefully peel away the tender leaves, setting aside the remaining chopped cabbage for additional flavor.
Delicately trim the thick stem portions from each leaf, creating a smooth surface perfect for rolling. Ensure the leaves remain intact and flexible.
In a warm skillet, sauté a medley of diced onions, minced garlic, colorful bell peppers, and sweet carrots in rich butter. Allow the vegetables to develop a golden, fragrant character before cooling.
Blend ground meats with fluffy rice, a whisked egg, and the cooled vegetable mixture. Season generously with salt and pepper. Lovingly wrap the savory filling into each cabbage leaf, creating neat little bundles of deliciousness.
Nestle the cabbage rolls snugly in a large pot. Pour a vibrant tomato sauce over the rolls, allowing them to simmer and meld their flavors for about an hour until perfectly tender.
Create a luxurious sauce by mixing the pot’s cooking juices with a touch of butter and flour. Swirl in velvety sour cream for a creamy finish. Serve alongside golden potatoes and sprinkle with fresh herbs.
Variation Ideas for Classic Stuffed Cabbage Rolls
Serving Stuffed Cabbage Rolls for Family Meals
Storage and Reheating Tips for Cabbage Rolls
Print
Irresistible Banana Chocolate Chip Cookies Recipe
- Total Time: 25 minutes
- Yield: 19 1x
Description
Homemade banana chocolate chip cookies blend sweet ripe bananas with rich chocolate morsels for an irresistible treat. Crisp edges and chewy centers make these cookies a delightful dessert you’ll want to share with friends and family.
Ingredients
- 1 ⅓ cups (170 g/6 oz) all-purpose flour
- 1 cup brown sugar, packed
- ⅔ cup (115 g/4 oz) chocolate chips
- ½ cup (120 ml/4 fl oz) vegetable oil or melted butter
- 2 tsps ground cinnamon
- 1 small overripe banana, mashed (about ¼ cup or 60 ml/2 fl oz)
- 1 egg yolk
- 1 tsp vanilla extract
- ½ tsp baking soda
- ½ tsp salt
Instructions
- Preparation: Melt butter and mash bananas thoroughly in a large mixing bowl, blending brown sugar until the mixture becomes smooth and uniform.
- Wet Ingredients: Incorporate egg yolk and vanilla extract, stirring until the mixture achieves a consistent, lump-free texture.
- Dry Ingredient Integration: Softly combine flour, baking soda, cinnamon, and salt, mixing until a cohesive dough emerges.
- Chocolate Enhancement: Gently disperse semi-sweet chocolate chips throughout the dough, ensuring even distribution.
- Dough Conditioning: Allow the dough to rest at room temperature for 15-20 minutes, enabling flavor development and structural stabilization.
- Oven Preparation: Heat oven to 350°F (175°C), lining a baking sheet with parchment paper or silicone mat.
- Portioning and Placement: Scoop uniform dough balls (approximately 1.5 inches) onto the prepared sheet, spacing them 2 inches apart.
- Baking Process: Bake for 10-12 minutes until edges turn golden brown and centers remain slightly soft.
- Cooling Technique: Let cookies rest on the baking sheet for 5 minutes to solidify their structure, then transfer to a wire rack for complete cooling.
Notes
- Mash Bananas Thoroughly: Ensure bananas are completely smooth to prevent chunky texture and distribute flavor evenly throughout the cookies.
- Chill Dough Strategically: Resting dough at room temperature helps develop deeper flavor and prevents excessive spreading during baking.
- Chocolate Chip Distribution: Gently fold chocolate chips to maintain their shape and create pockets of melty chocolate in each bite.
- Precise Baking Time: Watch cookies closely between 10-12 minutes; golden edges indicate perfect doneness while keeping centers soft and chewy.
- Prep Time: 15 minutes
- Cook Time: 10 minutes
- Category: Desserts, Snacks
- Method: Baking
- Cuisine: American
Nutrition
- Serving Size: 19
- Calories: 169
- Sugar: 10 g
- Sodium: 75 mg
- Fat: 7 g
- Saturated Fat: 1 g
- Unsaturated Fat: 6 g
- Trans Fat: 0 g
- Carbohydrates: 25 g
- Fiber: 1 g
- Protein: 2 g
- Cholesterol: 24 mg
Sophie Reynolds
Co-Founder, Recipe Curator & Culinary Educator
Expertise
Education
Auguste Escoffier School of Culinary Arts, Boulder, CO
Oregon State University
Sophie Reynolds is the recipe developer and culinary voice behind many of the approachable, flavor-focused creations at The Dream Café.
Sophie’s style leans into comfort food made simple: wholesome, satisfying meals anyone can make with confidence. Her passion lies in helping home cooks feel at ease in the kitchen while finding joy in the everyday act of cooking.