
Dreamy Homemade Red Velvet Cake Recipe: Sweet & Unforgettable
Baking a decadent red velvet cake can transport you to a world of rich, velvety indulgence that melts in your mouth.
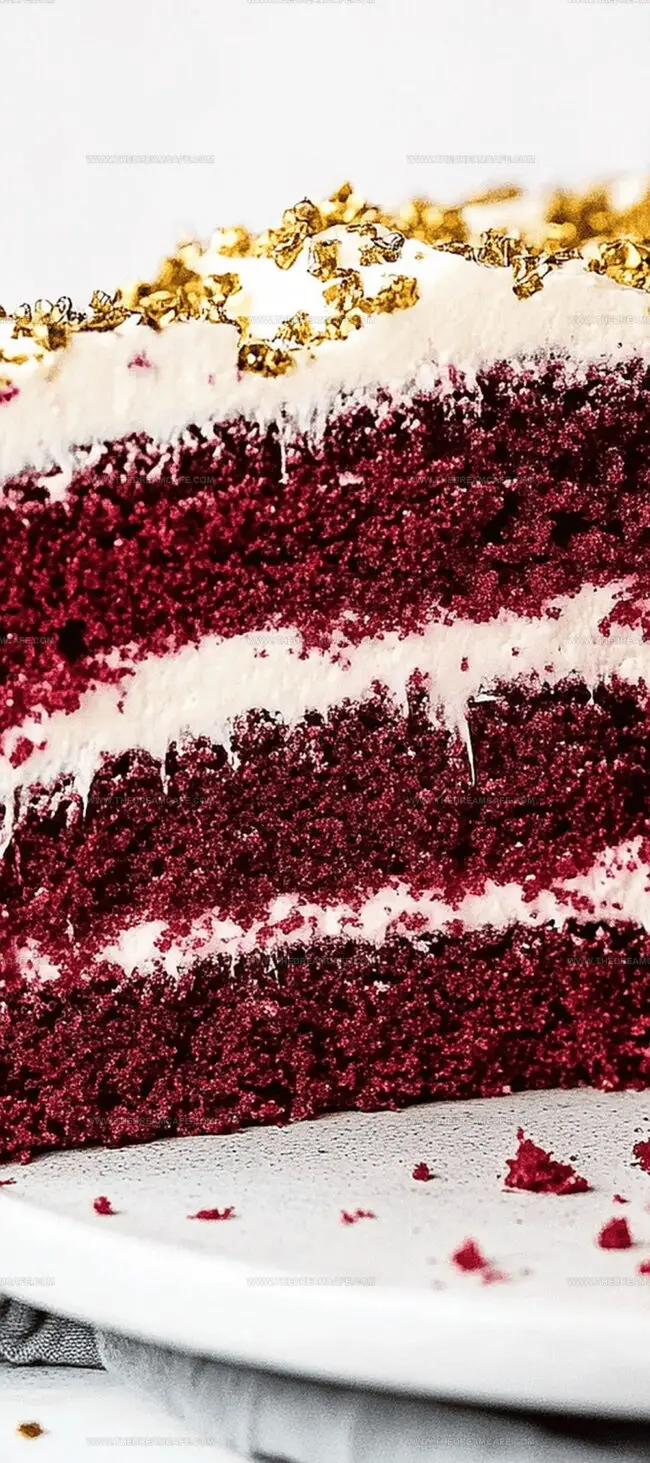
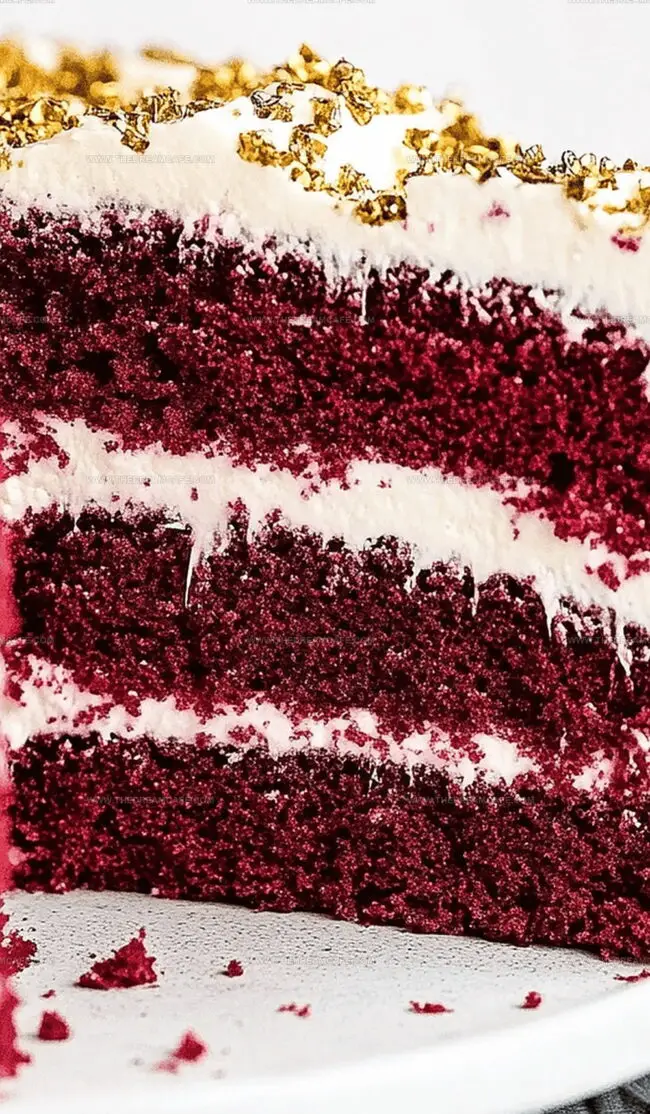
This classic Southern red velvet cake recipe brings together the perfect balance of cocoa, buttermilk, and vibrant crimson color.
Smooth cream cheese frosting complements the subtle chocolate undertones, creating a dessert that’s both visually stunning and irresistibly delicious.
Each slice promises a luxurious experience that feels like a celebration on its own.
The deep red hue hints at the luscious layers waiting to be savored, making this cake a showstopper at any gathering.
Gather your ingredients and get ready to create a dessert that will have everyone asking for seconds.
Prepare to fall in love with this ultimate red velvet cake that turns an ordinary moment into something extraordinary.
Quick Recipe Overview
Everything You Need for Red Velvet Cake
For Dry Ingredients:For Wet Ingredients:For Coloring and Flavoring:For Cream Cheese Frosting:Must-Have Equipment for Red Velvet Cake
Red Velvet Cake Made Simple in the Kitchen
Warm your oven to a cozy 325°F and lovingly butter three cake pans, creating the perfect stage for a delectable dessert adventure.
Combine rich coffee with deep cocoa powder, letting the mixture mingle and develop an intense, sophisticated taste profile.
In separate bowls, gently blend dry and liquid components, creating a smooth canvas for your cake’s incredible texture.
Fold ingredients together with gentle strokes, introducing the coffee and tangy vinegar that will give your cake its signature vibrant character.
Pour the velvety batter into prepared pans, spreading evenly and sliding into the waiting oven for 25-30 minutes until perfectly risen and tender.
Whip cream cheese, butter, and sweet powdered sugar into a cloud-like frosting that will crown your magnificent cake creation.
Carefully layer and lavish your cake with the dreamy frosting, creating a stunning dessert that promises to delight every single guest.
Tricks for Getting Red Velvet Cake Just Right
Red Velvet Cake – Ways to Serve That Work
Red Velvet Cake Storage Tips That Work
Print
Heavenly Red Velvet Cake Recipe
- Total Time: 50 minutes
- Yield: 13 1x
Description
Indulgent red velvet cake combines rich cocoa and buttermilk for a luxurious dessert with deep crimson color. Cream cheese frosting complements the cake’s velvety texture, promising a delightful experience you won’t soon forget.
Ingredients
- 2 large eggs, at room temperature
- 1 large egg yolk, at room temperature
- 2 ¼ cups (279 grams) all-purpose flour
- 2 cups (400 grams) granulated sugar
- 1 cup buttermilk, at room temperature
- ½ cup (109 grams) vegetable oil
- 1 stick (113 grams) unsalted butter, melted
- ½ cup plain hot coffee or boiling water
- 3 tsps red gel food coloring, plus more if needed
- Vanilla extract to taste
- 16 oz (454 grams) cream cheese, at room temperature
- 227 grams unsalted butter
- 4 cups (500 grams) powdered sugar, sifted
Instructions
- Preheat Preparation: Set oven to 325°F (163°C) and thoroughly coat three 8-inch round cake pans with butter or non-stick spray.
- Cocoa Infusion: Whisk hot coffee and unsweetened cocoa powder into a smooth, intense liquid base that will enhance the cake’s rich flavor profile.
- Dry Ingredient Fusion: Combine flour, granulated sugar, baking soda, and salt in a large mixing bowl, ensuring complete and uniform integration.
- Liquid Mixture Creation: Blend vegetable oil, buttermilk, eggs, red food coloring, and white vinegar until achieving a vibrant crimson consistency that defines red velvet’s signature appearance.
- Batter Integration: Gently fold dry ingredients into wet mixture, incorporating the coffee-cocoa infusion and stirring until color is perfectly uniform and no streaks remain.
- Pan Preparation: Evenly distribute batter across prepared pans, smoothing surfaces to eliminate potential air pockets and ensure consistent baking.
- Baking Process: Slide pans into preheated oven, rotating midway through 25-30 minute cooking time to guarantee even browning and checking with a toothpick for perfect doneness.
- Cooling Stage: Allow cakes to rest in pans for 10 minutes, then transfer to wire rack for complete cooling, preparing for the frosting application.
- Frosting Finalization: Whip cream cheese, unsalted butter, powdered sugar, and vanilla extract into a smooth, creamy mixture that will elegantly coat the cooled cake layers.
- Presentation: Carefully layer and frost the cake, creating a polished and professional dessert that showcases the rich red velvet tradition.
Notes
- Precise Temperature Matters: Maintaining exact 325°F ensures perfect cake texture and prevents drying or underbaking.
- Coffee Cocoa Magic: Hot coffee intensifies chocolate flavor and creates deeper, richer cake complexity.
- Color Control: Use gel food coloring for vibrant red hue without altering batter consistency.
- Gentle Mixing Strategy: Overmixing develops gluten, resulting in tough cake texture; fold ingredients delicately to preserve tenderness.
- Prep Time: 25 minutes
- Cook Time: 30 minutes
- Category: Desserts, Snacks
- Method: Baking
- Cuisine: American
Nutrition
- Serving Size: 13
- Calories: 570
- Sugar: 50 g
- Sodium: 300 mg
- Fat: 34 g
- Saturated Fat: 20 g
- Unsaturated Fat: 10 g
- Trans Fat: 0 g
- Carbohydrates: 60 g
- Fiber: 1 g
- Protein: 6 g
- Cholesterol: 110 mg
Sophie Reynolds
Co-Founder, Recipe Curator & Culinary Educator
Expertise
Education
Auguste Escoffier School of Culinary Arts, Boulder, CO
Oregon State University
Sophie Reynolds is the recipe developer and culinary voice behind many of the approachable, flavor-focused creations at The Dream Café.
Sophie’s style leans into comfort food made simple: wholesome, satisfying meals anyone can make with confidence. Her passion lies in helping home cooks feel at ease in the kitchen while finding joy in the everyday act of cooking.