
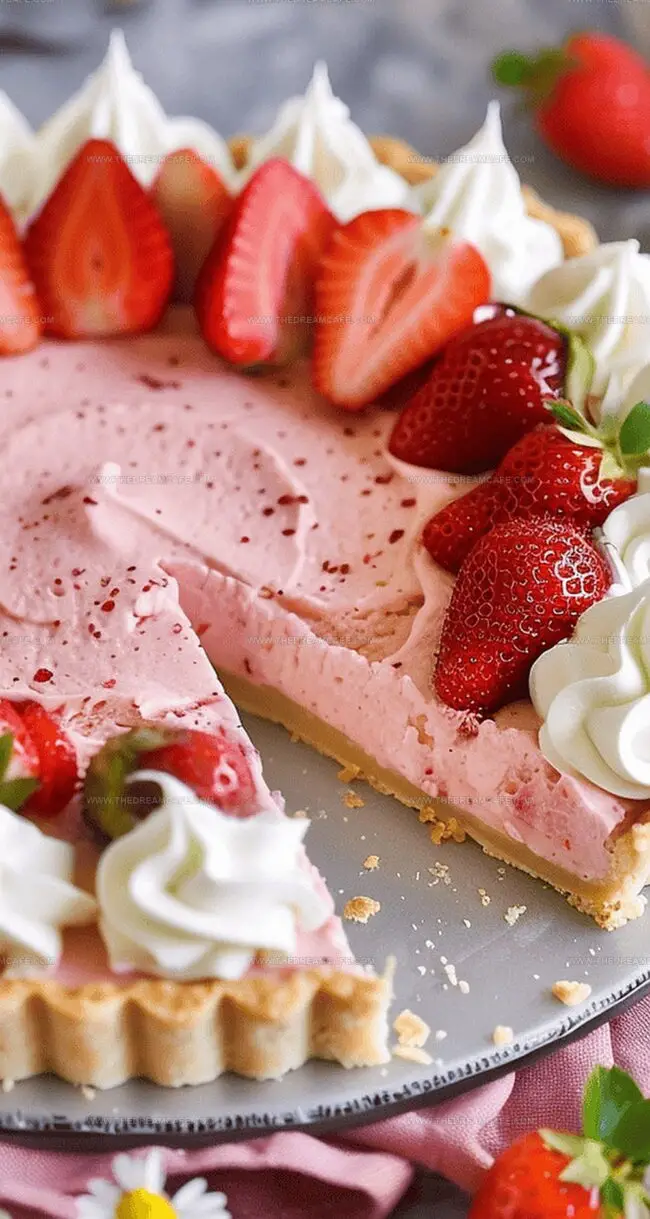
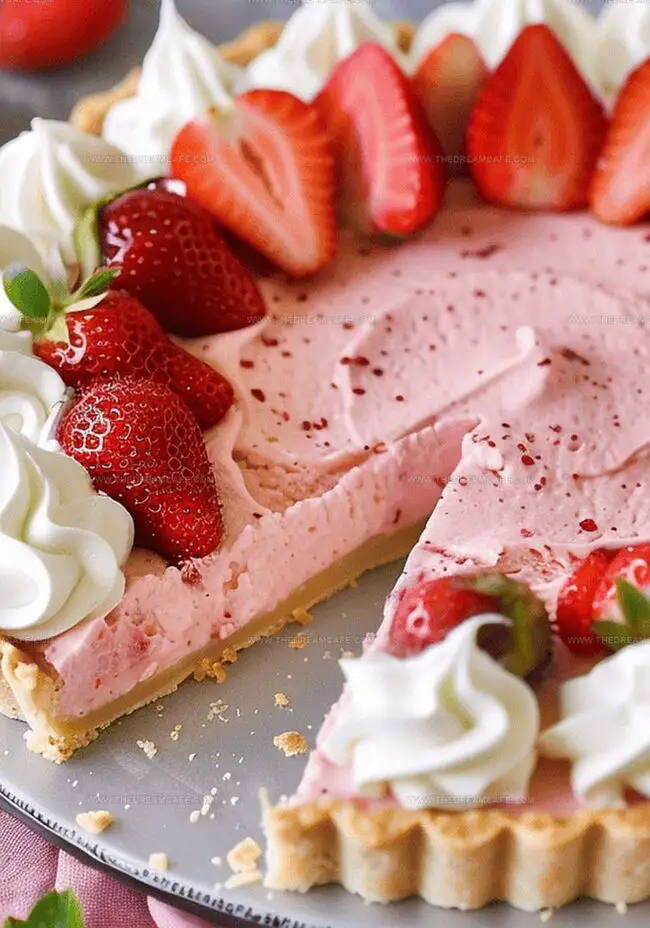
Dreamy Whipped Strawberry Crust Tart Recipe for Sweet Lovers
Decadent desserts often start with a spark of inspiration, and this whipped strawberry crust tart brings summer’s sweetest moments to your plate.
Silky smooth textures dance with vibrant berry flavors in every delightful bite.
Strawberries burst with juicy intensity, creating a canvas of pure culinary magic.
The delicate crust provides a perfect golden foundation for this irresistible treat.
Fresh ingredients blend seamlessly, promising a dessert that delights both eyes and palate.
Rich, creamy, and utterly indulgent, this tart will become your new favorite summer sensation.
Let’s find out a recipe that transforms simple ingredients into an extraordinary masterpiece.
Quick Recipe Overview
What’s Needed for Whipped Strawberry Crust Tart
For Crust Base:For Filling Stabilizers:For Creamy Whipped Layer:For Fruit Component:For Binding:Tools for Making the Strawberry Crust Tart
How to Make Whipped Strawberry Tart
Grab ripe, juicy strawberries and transform them into a silky smooth liquid using a blender, creating a vibrant base for your delightful dessert.
Combine the strawberry puree with sugar and gelatin in a saucepan, gently heating and stirring until everything melts together into a glossy, luscious sauce.
Introduce a cornstarch slurry to the strawberry mixture, cooking and stirring until the sauce thickens and develops a luxurious, velvety consistency.
Allow the strawberry mixture to chill completely in the refrigerator, letting the flavors meld and the texture set perfectly.
Whip cream cheese until smooth, then gradually incorporate heavy cream, creating a dreamy, cloud-like mixture that holds its shape beautifully.
Gently fold the cooled strawberry sauce into the cream cheese mixture, creating a mesmerizing swirl of pink and white.
Pour half the strawberry mixture into your crust, then briefly chill to create a solid foundation for the next layer.
Spread the remaining whipped cream blend on top, then refrigerate for several hours to let the flavors mingle and the texture set.
Before serving, adorn your tart with fresh strawberries, delicate meringue cookies, or a dollop of whipped cream for a stunning presentation.
Tips to Improve Your Strawberry Tart Flavor
Serving the Strawberry Crust Tart Gracefully
How to Store Leftover Strawberry Crust Tart
Print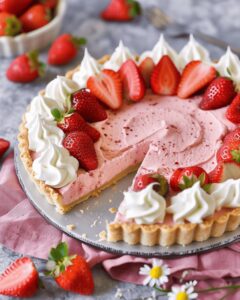
Heavenly Strawberry Tart Recipe
- Total Time: 45 minutes
- Yield: 9 1x
Description
Delightful whipped strawberry crust tart combines silky filling with crisp pastry. Summer desserts from France showcase elegant simplicity that welcomes you to savor each delicate bite.
Ingredients
- 1.75 cups all-purpose flour
- 1.25 cups sugar (0.5 + 0.75)
- 2 tsp unflavored gelatin
- 0.5 tsp salt
- 1 tbsp cornstarch
- 400g (14 oz) fresh strawberries, quartered (about 2.5 cups)
- 1 large egg, room temperature
- 4 oz (113 g) cream cheese, room temperature
- 1.5 cups heavy cream
- 0.5 cup (113 g) unsalted butter, room temperature
- 1 tsp vanilla extract
- 1 tbsp water
- 0.5 cup water or your favorite rosé
Instructions
- Puree Preparation: Blend strawberries and water into a silky, uniform puree using a high-speed blender.
- Syrup Infusion: In a medium saucepan, combine strawberry puree with granulated sugar and gelatin, heating while stirring to dissolve ingredients completely, creating a vibrant, glossy base.
- Thickening Process: Craft a cornstarch slurry with cold water, then seamlessly integrate into the strawberry mixture, whisking continuously over heat until the consistency transforms into a luxurious, glossy texture.
- Cooling Phase: Transfer the strawberry mixture to a clean bowl, allowing it to chill thoroughly in the refrigerator for 30-45 minutes, developing intense flavor concentration.
- Cream Transformation: Utilize an electric mixer to whip cream cheese until silky smooth, gradually introducing heavy cream and beating until robust, voluminous peaks form.
- Marbling Technique: Gently fold the chilled strawberry sauce into the whipped cream cheese, creating an elegant, pink-hued blend that maintains its airy, delicate structure.
- Layering Strategy: Construct the tart by pouring half the strawberry mixture into a prepared crust, briefly chilling to set the foundation.
- Final Assembly: Spread the remaining whipped cream cheese mixture evenly across the initial layer, ensuring a pristine, smooth surface.
- Setting and Finishing: Refrigerate the tart for 2-3 hours or overnight, allowing complete setting and flavor melding, then garnish with fresh strawberry slices, delicate meringue cookies, or an additional cream dollop for an exquisite presentation.
Notes
- Chill Strategically: Refrigerate the strawberry mixture for 30-45 minutes to achieve the perfect consistency and prevent runny filling.
- Prevent Deflation: Fold the strawberry sauce gently into whipped cream cheese to maintain the light, airy texture of the tart.
- Stabilize Cream: Room-temperature cream cheese helps create smoother, more stable whipped peaks without lumps.
- Flavor Intensification: Allowing the tart to set overnight enhances the strawberry flavor and creates a more cohesive dessert structure.
- Prep Time: 25 minutes
- Cook Time: 20 minutes
- Category: Desserts
- Method: Blending
- Cuisine: British
Nutrition
- Serving Size: 9
- Calories: 363
- Sugar: 25 g
- Sodium: 120 mg
- Fat: 28 g
- Saturated Fat: 17 g
- Unsaturated Fat: 8 g
- Trans Fat: 0 g
- Carbohydrates: 30 g
- Fiber: 1 g
- Protein: 3 g
- Cholesterol: 85 mg
Sophie Reynolds
Co-Founder, Recipe Curator & Culinary Educator
Expertise
Education
Auguste Escoffier School of Culinary Arts, Boulder, CO
Oregon State University
Sophie Reynolds is the recipe developer and culinary voice behind many of the approachable, flavor-focused creations at The Dream Café.
Sophie’s style leans into comfort food made simple: wholesome, satisfying meals anyone can make with confidence. Her passion lies in helping home cooks feel at ease in the kitchen while finding joy in the everyday act of cooking.