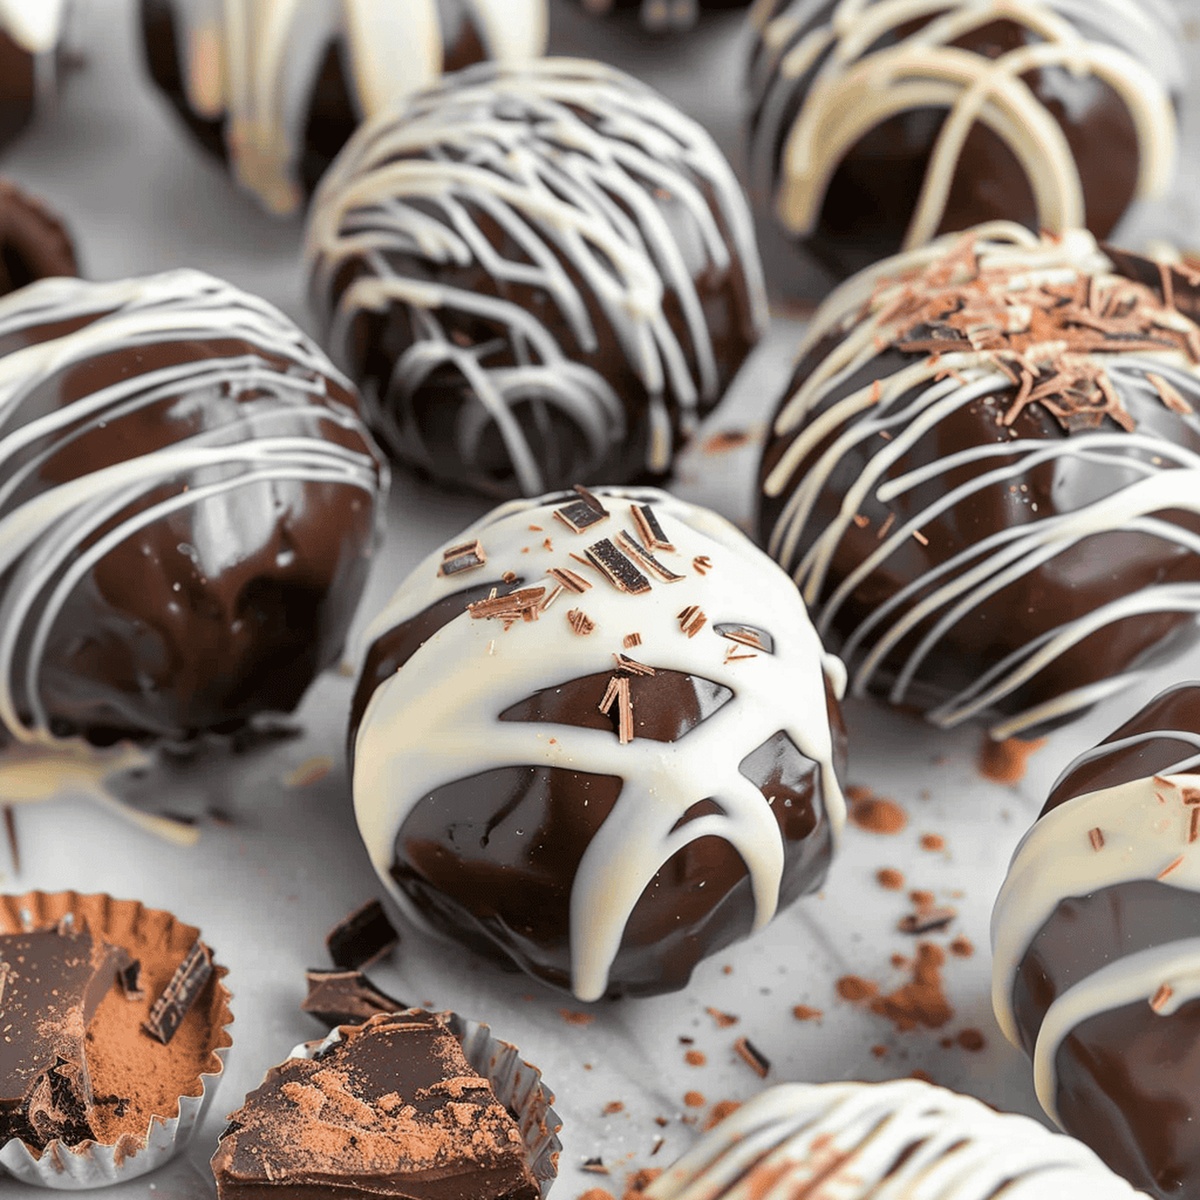
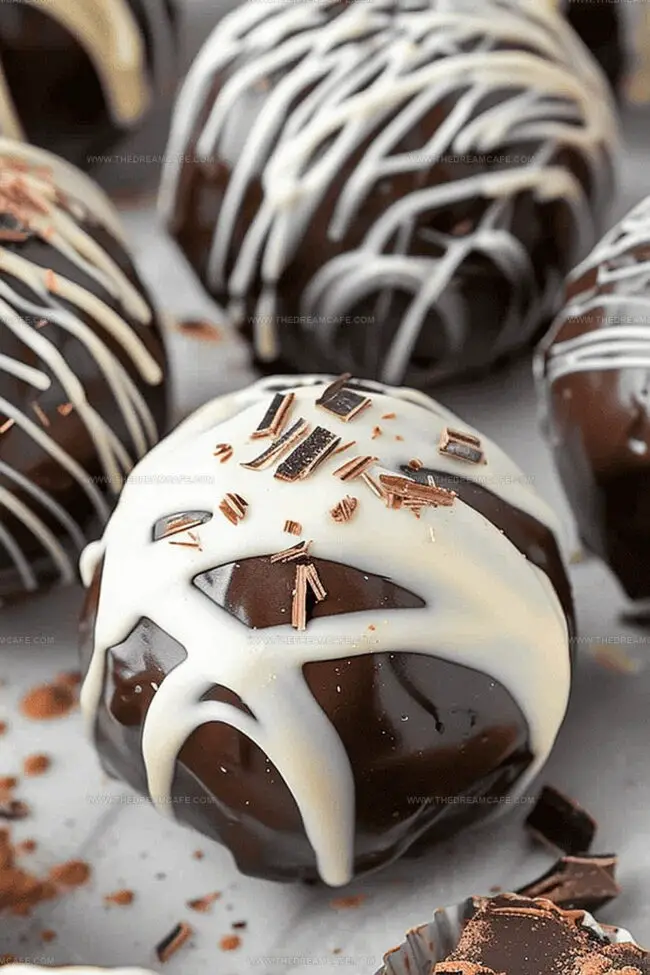
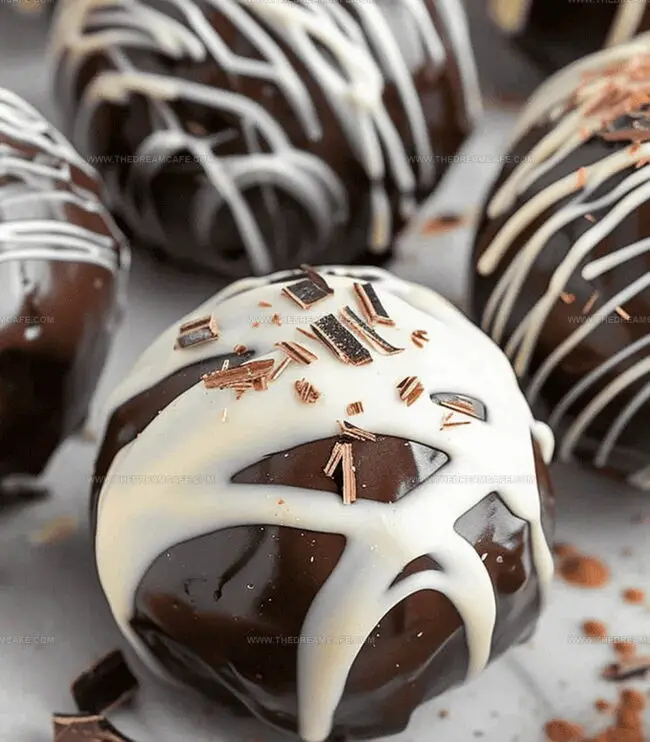
Hot cocoa bombs reimagine ordinary winter moments into magical experiences of sweet indulgence.
These chocolate spheres capture imagination with their delightful, interactive design that melts into a rich, creamy beverage.
Carefully crafted chocolate shells conceal a delectable interior of marshmallows and cocoa powder waiting to burst into life.
Delicate yet dramatic, these little spheres create an unexpected sensory journey that elevates traditional hot chocolate.
Sophisticated yet playful, they appeal to both children and adults seeking a whimsical treat.
Homemade hot cocoa bombs let you experiment with flavors and decorations, making each batch a unique culinary adventure.
What Makes Hot Cocoa Bombs So Magical
Create Magical Chocolate Spheres: These hot cocoa bombs transform a simple drink into an interactive and delightful experience that melts like a sweet surprise in your mug.
Master Impressive Dessert Technique: The recipe demonstrates a professional-level chocolate molding method that looks complicated but is surprisingly easy for home cooks to accomplish.
Enjoy Customizable Comfort Drink: With just a few ingredients, you can craft personalized hot cocoa bombs that allow for creative mix-ins and make each cup a unique treat perfect for cozy moments or entertaining guests.
Simple Ingredients for Hot Cocoa Bombs
Main Chocolate Components:
Chocolate Melting Wafers: Rich chocolate perfect for smooth coating and creating bomb shells with clean, professional finish. High-quality chocolate works best for best taste and melting properties.
Chocolate Melting Chocolate Chips: Alternative chocolate option for creating bomb shell with similar melting characteristics.
Hot Cocoa Filling:
Hot Cocoa Mix: Classic powdery mix providing signature chocolate flavor and sweetness inside the bomb. Standard packets work perfectly for consistent taste.
Mini Marshmallows: Fluffy white additions that melt deliciously when hot liquid is poured over bomb. Small size ensures even distribution and quick melting.
Cookie Sheet: Stable surface for freezing and assembling chocolate bombs. Flat surface helps maintain even chocolate structure.
Skillet or Plate: Smooth surface for gently warming chocolate edges to seal bomb halves. Room temperature metal works best for precise edge softening.
How to Make Hot Cocoa Bombs Step-by-Step
Step 1: Prepare Chocolate Coating
Melt chocolate in a microwave-safe bowl, stirring until smooth according to package instructions.
Step 2: Set Up Silicone Mold
Place silicone mold on a sturdy cookie sheet or jelly roll pan for stability.
Step 3: Create Chocolate Shell
Use a spoon to coat each mold well with 1/2-of melted chocolate
Carefully spread chocolate up the sides of each mold using the back of the spoon
Step 4: Freeze Initial Chocolate Layer
Place the mold with chocolate coating in the freezer for 10 minutes to set completely.
Step 5: Reinforce Chocolate Shells
Check each chocolate shell for thin spots
Apply additional melted chocolate to strengthen any weak areas
Return to freezer for another 5 minutes
Step 6: Remove Chocolate Halves
Gently peel the chocolate shells from the silicone mold after removing from freezer.
Step 7: Soften Chocolate Edges
Heat a skillet or plate until warm to the touch
Briefly place one rounded side of a chocolate half on the warm surface to slightly soften edges
Step 8: Fill Chocolate Bomb
Transfer softened chocolate half to cookie sheet
Add hot cocoa mix
Sprinkle 10-12 mini marshmallows inside
Step 9: Seal Hot Cocoa Bomb
Warm another chocolate half on the heated surface
Carefully press the second half over the filled half
Gently fuse edges together to create a complete sphere
Tips for Picture-Perfect Hot Cocoa Bombs
Choose High-Quality Chocolate: Select premium chocolate with at least 60% cocoa content for richer flavor and smoother melting.
Master Chocolate Tempering: Melt chocolate slowly and stir consistently to prevent burning and ensure a glossy, professional finish.
Create Even Chocolate Shells: Use a small spoon and rotate the silicone mold to coat sides uniformly, preventing weak or thin chocolate areas.
Chill Strategically: Freeze chocolate shells between layers to strengthen structure and make handling easier during assembly.
Seal Bombs Perfectly: Warm plate edges gently and press halves together carefully, ensuring a smooth, seamless connection without cracking.
How to Store Hot Cocoa Bombs to Keep Them Fresh
Refrigerate Hot Cocoa Bombs in an airtight container to maintain freshness for up to 2 weeks. Cover each bomb individually with plastic wrap before storing to prevent moisture and preserve chocolate quality. Keep them away from direct sunlight or warm areas that might cause chocolate to soften or develop condensation.
Freezing Method: Wrap each bomb carefully in plastic wrap, then place inside a freezer-safe container. Seal tightly to prevent freezer burn and store for up to 3 months. Thaw bombs naturally at room temperature for 15-20 minutes before serving to prevent chocolate cracking.
Reheating Technique: Drop a hot cocoa bomb directly into a mug of hot milk or water. Watch it melt beautifully, releasing marshmallows and cocoa mix for a delightful, steaming beverage.
What to Serve with Hot Cocoa Bombs
Pair with Cozy Comfort Companions: Snuggle up with a soft, chunky knit blanket and warm slippers while sipping your hot cocoa bomb, creating the ultimate winter relaxation experience.
Boost with Delectable Side Treats: Serve alongside crisp chocolate chip cookies or buttery shortbread for a delightful textural contrast that elevates the entire chocolate bomb enjoyment.
Match with Warm Beverage Buddies: Complement your hot cocoa bomb with a shot of espresso or a splash of Bailey’s Irish Cream for grown-ups seeking an extra layer of indulgence and warmth.
Enhance with Seasonal Garnish: Sprinkle crushed candy canes, cinnamon, or toasted marshmallow bits on top to add festive flair and extra flavor dimensions to your hot cocoa bomb experience.
Flavor Variations for Hot Cocoa Bombs Everyone Loves
Winter Wonderland Bombs: Incorporate white chocolate for a snowy look, sprinkle edible silver glitter, and add peppermint extract to the chocolate for a cool, festive flavor.
Nutty Chocolate Surprise: Mix crushed almonds or hazelnuts into the chocolate shell, fill with chocolate-hazelnut powder instead of traditional hot cocoa mix, and top with caramel chips.
Tropical Chocolate Getaway: Use dark chocolate for the shell, add coconut powder to the filling, include dried pineapple bits, and garnish with toasted coconut flakes for a beach-inspired treat.
Spiced Chocolate Adventure: Infuse the chocolate with ground cinnamon and chili powder, fill with Mexican-style hot chocolate mix, and sprinkle cayenne pepper on top for a warming kick.
Mexican hot cocoa bombs blend rich chocolate with cinnamon-spiced warmth, creating a delightful winter treat. Sweet chocolate spheres melt dramatically into creamy milk, releasing marshmallows and chocolate chips for an indulgent moment where comfort meets pure chocolate bliss.
Ingredients
Scale
Main Chocolate Components:
10 ounces (280 grams) Ghirardelli milk, dark, or white chocolate melting wafers
Cocoa and Marshmallow Fillings:
6 tablespoons hot cocoa mix
1 cup mini marshmallows
Liquid Component:
6 cups hot milk
Instructions
Carefully temper dark or milk chocolate in a microwave-safe bowl, stirring at 30-second intervals until completely smooth and glossy.
Position a clean silicone sphere mold on a sturdy baking sheet to prevent accidental movement during the chocolate shaping process.
Using a small spoon, delicately coat each hemisphere of the mold with 1/2 to of melted chocolate, ensuring thorough and even coverage along the entire interior surface.
Place the chocolate-lined mold into the freezer for approximately 10 to 12 minutes, allowing the chocolate shells to firm and solidify completely.
Remove the mold from the freezer and inspect each chocolate hemisphere for potential thin or weak sections, reinforcing those areas with an additional thin layer of melted chocolate.
Return the mold to the freezer for another 5 minutes to set the reinforced areas.
Gently extract the chocolate hemispheres from the silicone mold, handling them carefully to prevent cracking.
Warm a clean skillet or metal plate until slightly heated, then briefly touch the rounded edge of a chocolate hemisphere to create a smooth, even surface.
Place the warmed hemisphere on a parchment-lined baking sheet and fill with of high-quality hot cocoa mix and 10 to 12 miniature marshmallows.
Repeat the edge-warming process with a second chocolate hemisphere and carefully press it onto the filled half, creating a seamless, sealed sphere.
Notes
Prep this delightful treat on a clean, flat surface with all ingredients within reach for smooth assembly.
Chocolate coating thickness matters; aim for an even, sturdy shell that won’t crack when handling the bombs.
Use high-quality chocolate for the most luxurious and rich flavor that melts beautifully when hot liquid is added.
Silicone molds make creating perfect spheres effortless, ensuring consistent size and shape for professional-looking results.
Store completed hot cocoa bombs in an airtight container at room temperature for up to two weeks, preventing moisture from compromising their structure.
The Institute of Culinary Education (ICE), Los Angeles, CA
Degree: Certificate in Culinary Arts
Focus: Professional culinary techniques, global cuisine fundamentals, and real-world training in restaurant-style cooking and food presentation.
Julian Park is a natural storyteller at The Dream Café who blends hands-on culinary experience with a passion for exploring global food traditions. A graduate of The Institute of Culinary Education in Los Angeles, Julian combines professional technique with a love for cultural discovery, diving into how dishes reflect heritage, migration, and identity.
His work spans everything from in-depth cuisine guides to reflections on everyday meals around the world. With a curious palate and a journal always close by, Julian helps readers connect with food in a way that feels so insightful and personal.

Julian Park
Co-Founder, Cuisine Researcher & Food Culture Writer
Expertise
Education
The Institute of Culinary Education (ICE), Los Angeles, CA
Julian Park is a natural storyteller at The Dream Café who blends hands-on culinary experience with a passion for exploring global food traditions. A graduate of The Institute of Culinary Education in Los Angeles, Julian combines professional technique with a love for cultural discovery, diving into how dishes reflect heritage, migration, and identity.
His work spans everything from in-depth cuisine guides to reflections on everyday meals around the world. With a curious palate and a journal always close by, Julian helps readers connect with food in a way that feels so insightful and personal.