
Fluffernutter Cookies Recipe: Soft & Sweet Childhood Joy
Soft, pillowy cookies meet childhood nostalgia in this delightful fluffernutter cookies recipe that captures pure comfort in every bite.
Peanut butter lovers unite with marshmallow enthusiasts for a sweet treat that bridges memories and flavor.
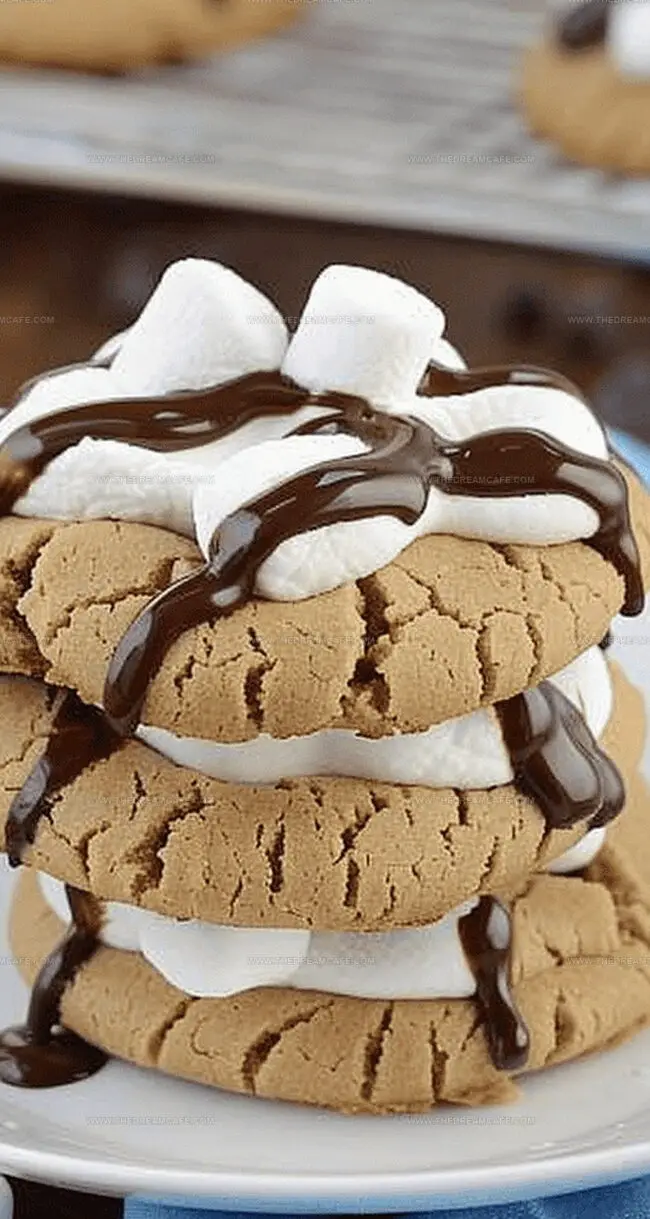
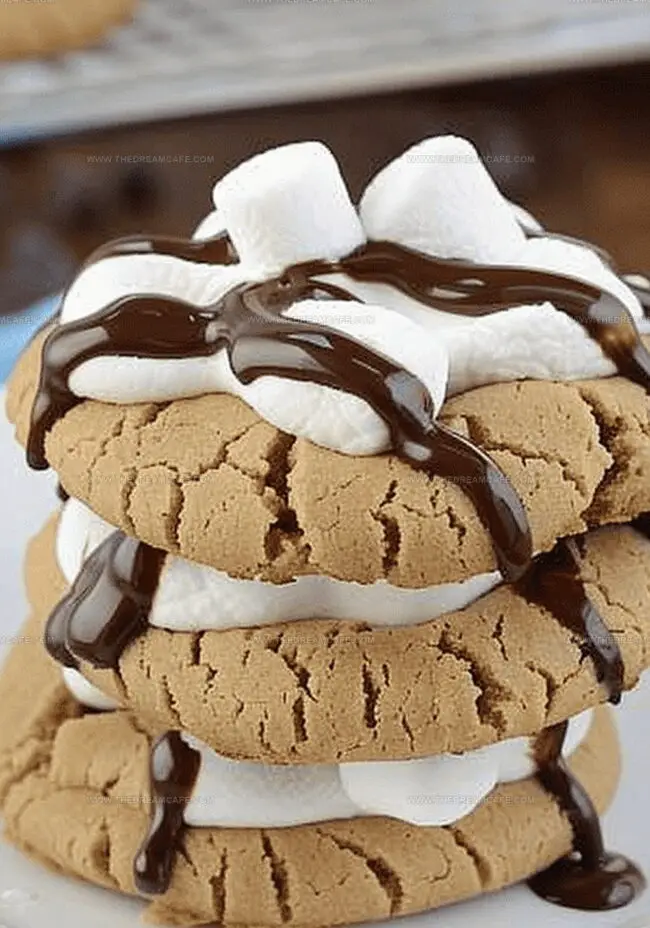
The classic sandwich combination gets a delicious cookie makeover, blending creamy peanut butter and fluffy marshmallow creme into one irresistible dessert.
These cookies promise a perfect balance of sweet and salty that melts in your mouth.
Each batch brings a playful twist to traditional cookie recipes, offering a simple yet spectacular treat.
Grab a glass of cold milk and dive into this whimsical cookie adventure that’s sure to spark joy and satisfy your most indulgent cravings.
Quick Recipe Overview
Ingredients That Make Fluffernutter Cookies Shine
For Fats and Creamy Base:For Sweeteners:For Binding and Structure:For Flavor and Decoration:Must-Have Tools for Fluffernutter Cookies Recipe
How to Bake Fluffernutter Cookies Step-by-Step
Gather your favorite baking ingredients for a delightful sweet treat that combines peanut butter and marshmallow magic.
Cream together creamy peanut butter and soft butter until the mixture becomes light and dreamy, creating a smooth base for your cookies.
Gently fold in a fresh egg and splash of vanilla, mixing until everything blends into a silky cookie canvas.
Softly incorporate flour mixture into the wet ingredients, creating a soft dough that promises delicious results.
Pop the dough into the refrigerator for a quick 15-minute relaxation, helping it firm up and develop richer flavors.
Warm up the oven to a cozy 350°F and line baking sheets with parchment paper, preparing for cookie magic.
Roll the chilled dough into adorable little balls, creating perfect circular platforms for marshmallow happiness.
Create a gentle thumb indent in each cookie ball, then bake until edges turn golden. Nestle mini marshmallows into the warm centers.
Melt chocolate into a luxurious glaze and drizzle elegantly over cooled cookies, adding a final touch of decadence to your sweet creation.
Flavor Boosts for Your Fluffernutter Cookies Recipe
Presenting Fluffernutter Cookies in Fun Ways
Storing and Saving Your Fluffernutter Cookies
Print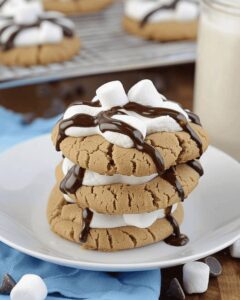
Irresistible Fluffernutter Cookies Recipe
- Total Time: 37 minutes
- Yield: 25 1x
Description
Irresistible fluffernutter cookies recipe brings peanut butter and marshmallow creme together in a delightful sweet treat. Nostalgic American flavors combine for a simple, addictive cookie perfect for sharing with friends and family.
Ingredients
- 1 ¾ cups (219 g) all-purpose flour
- ¾ cup (180 ml) creamy peanut butter
- ½ cup (113 g) unsalted butter, softened
- ½ cup (100 g) granulated sugar
- ½ cup (110 g) packed light brown sugar
- 1 large egg
- ¾ cup (128 g) semisweet chocolate chips
- 1 tbsp light corn syrup
- 1 tsp vanilla extract
- 3 tbsps (42 g) butter
- ¾ tsp baking soda
- ½ tsp salt
- ¼ tsp vanilla extract
- Mini marshmallows
Instructions
- Preparation: Whisk flour, baking soda, and salt in a mixing bowl, setting aside for future integration.
- Creaming: Use a stand mixer to blend butter, peanut butter, and sugars until light and fluffy, roughly 2 minutes.
- Mixing: Incorporate egg and vanilla extract into the creamy base, then gradually fold in dry ingredients at low speed, ensuring even distribution.
- Chilling: Refrigerate dough for 15 minutes to firm up consistency.
- Preheating: Warm oven to 350°F and line baking sheets with parchment paper.
- Forming: Roll chilled dough into 1½-inch balls, spacing them 2 inches apart on prepared sheets.
- Indenting: Create a gentle thumb depression in each cookie’s center.
- Initial Baking: Bake 7-9 minutes until edges turn golden brown.
- Marshmallow Topping: Remove cookies, reinforce center indentations, and nestle 3-4 mini marshmallows into each cookie.
- Final Baking: Return to oven for 2-3 minutes to soften marshmallows.
- Cooling: Rest cookies on baking sheets for 5 minutes, then transfer to wire racks.
- Chocolate Glaze: Construct a double boiler and melt chocolate chips, butter, and corn syrup, stirring until smooth.
- Finishing: Stir in vanilla extract, then drizzle cooled glaze over cookies, allowing natural setting.
Notes
- Handle Dough Carefully: Refrigerate dough for 15 minutes to prevent sticky texture and improve cookie shaping.
- Master Marshmallow Technique: Gently press mini marshmallows into warm cookie centers to achieve perfect melting without burning.
- Prevent Spreading: Space cookie dough balls 2 inches apart to ensure even baking and prevent cookies from merging.
- Chocolate Glaze Pro Tip: Use double boiler method for smooth, glossy chocolate drizzle without scorching ingredients.
- Prep Time: 25 minutes
- Cook Time: 12 minutes
- Category: Desserts, Snacks
- Method: Baking
- Cuisine: American
Nutrition
- Serving Size: 25
- Calories: 174
- Sugar: 11 g
- Sodium: 124 mg
- Fat: 8 g
- Saturated Fat: 4 g
- Unsaturated Fat: 2.5 g
- Trans Fat: 0 g
- Carbohydrates: 23 g
- Fiber: 1 g
- Protein: 3 g
- Cholesterol: 14 mg
Sophie Reynolds
Co-Founder, Recipe Curator & Culinary Educator
Expertise
Education
Auguste Escoffier School of Culinary Arts, Boulder, CO
Oregon State University
Sophie Reynolds is the recipe developer and culinary voice behind many of the approachable, flavor-focused creations at The Dream Café.
Sophie’s style leans into comfort food made simple: wholesome, satisfying meals anyone can make with confidence. Her passion lies in helping home cooks feel at ease in the kitchen while finding joy in the everyday act of cooking.