
Irresistible Cheesy Hawaiian Roll Garlic Bread Recipe For All
Golden, buttery Hawaiian rolls meet a garlicky, cheesy paradise that’ll make your taste buds dance with excitement.
This cheesy Hawaiian roll garlic bread recipe delivers a mouthwatering twist on classic comfort food.
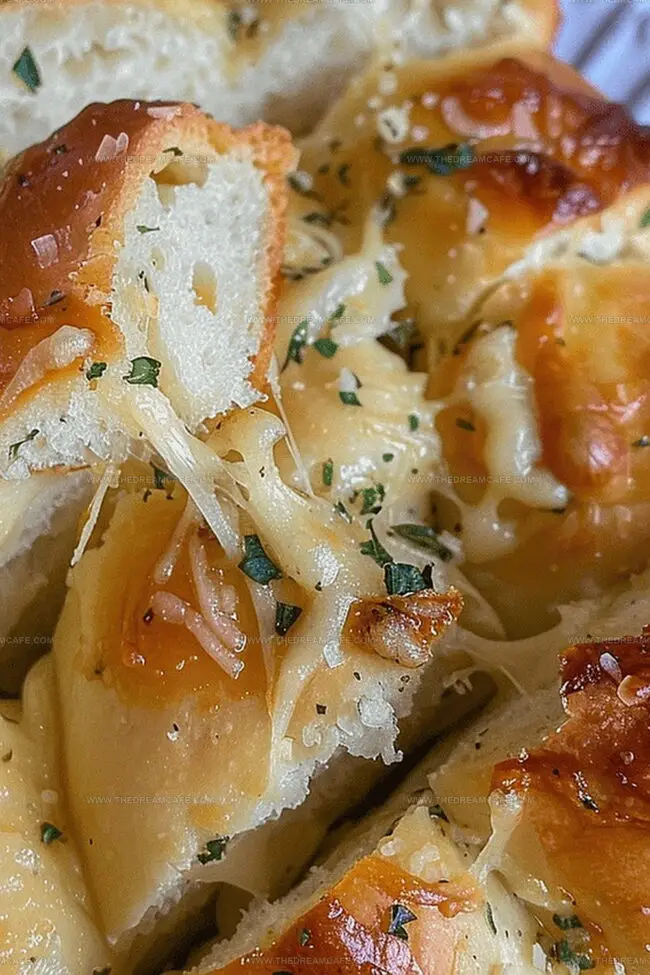
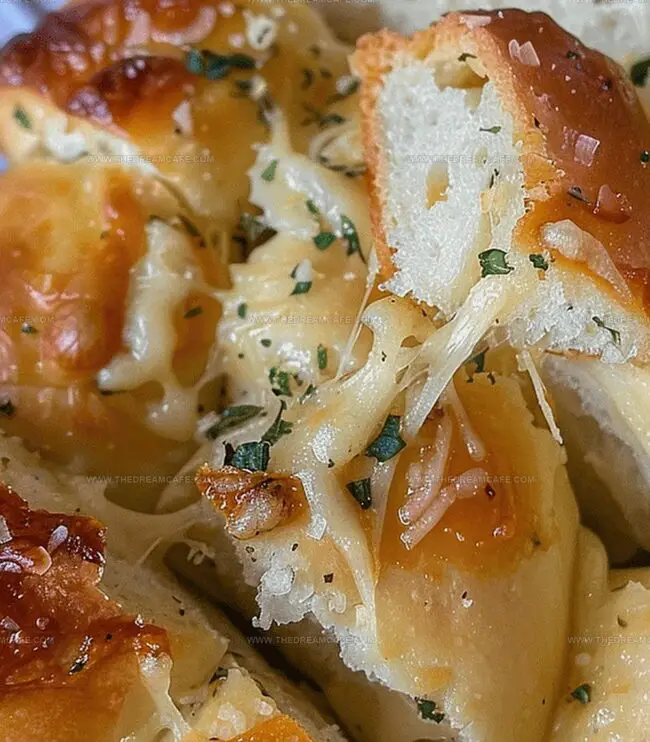
Melted cheese cascades over soft, pillowy rolls, creating an irresistible appetizer that vanishes in minutes.
Fragrant garlic and rich butter mingle perfectly with tender bread and sharp cheese, promising a flavor explosion.
Each bite promises a delightful blend of savory goodness that elevates any meal or gathering.
Simple ingredients combine to create something extraordinary, turning ordinary moments into delectable memories.
Let’s find out this easy and addictive recipe that’ll have everyone asking for seconds.
Quick Recipe Overview
Ingredients in Cheesy Hawaiian Roll Garlic Bread
For The Base:For Flavor Enhancers:For Binding And Richness:Tools That Help Perfect This Cheesy Bake
How to Bake Hawaiian Roll Garlic Bread Just Right
Warm up your oven to create the perfect toasty environment for these delightful rolls. Set the temperature to a cozy 400 degrees for optimal baking magic.
Gently lay out your Hawaiian rolls in a welcoming baking dish. Create strategic slits that will become pockets of cheesy goodness, allowing maximum flavor absorption.
Carefully nestle soft mozzarella into each carefully crafted slit. This will create unexpected pockets of melty cheese that surprise and delight every bite.
Whip together a rich mixture of butter, herbs, and Parmesan cheese. Generously coat the rolls with this flavor-packed concoction, ensuring every surface gets a loving touch of seasoning.
Slide the rolls into the preheated oven. Watch as they transform into golden, crispy treasures with melted cheese peeking through. Bake until the tops turn a beautiful bronze and the cheese becomes irresistibly gooey, which typically takes about 10 minutes.
Garlic and Cheese Tips for Flavorful Bites
Plating Ideas for Cheesy Garlic Rolls
Storing Leftovers So They’re Still Gooey Later
Print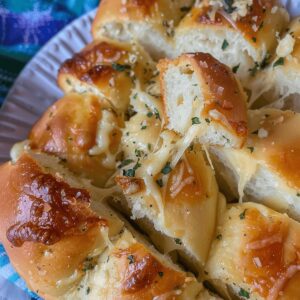
Irresistible Hawaiian Roll Garlic Bread Recipe
- Total Time: 20 minutes
- Yield: 13 1x
Description
Cheesy Hawaiian roll garlic bread combines sweet rolls with savory garlic butter for a mouthwatering side dish. Melted cheese and herbed butter create an irresistible companion you cannot resist pulling apart and devouring with friends.
Ingredients
- 12 Hawaiian slider rolls
- 1 cup mozzarella cheese
- ½ cup (4 oz or 8 tbsps) butter, softened
- 1 tbsp (0.5 oz) grated Parmesan cheese
- 2 tsps minced garlic
- 1 tsp garlic powder
- 1 tsp parsley
- ½ tsp sea salt
Instructions
- Preparation: Arrange Hawaiian rolls snugly in a baking dish, making horizontal cuts three-quarters through each roll without separating.
- Cheese Insertion: Slide thin mozzarella slices strategically into each slit, ensuring even distribution for consistent melting.
- Flavor Fusion: Whisk softened butter with Parmesan, garlic, oregano, and kosher salt until creating a fragrant, uniform compound.
- Butter Application: Lavishly spread herbed butter mixture across roll surfaces, allowing it to penetrate pre-cut sections thoroughly.
- Baking Process: Position dish in oven preheated to 400°F (200°C), baking 10-12 minutes until cheese melts completely and roll tops transform into golden-brown, crispy perfection.
- Serving: Allow bread to rest 2-3 minutes for cheese stabilization, then serve immediately while maintaining optimal warmth and flavor intensity.
Notes
- Slice Carefully: Cut rolls three-quarters deep to prevent breaking, maintaining roll structure for perfect garlic bread presentation.
- Cheese Distribution: Evenly place mozzarella slices in each slit to ensure consistent melting and balanced flavor in every bite.
- Butter Blend Technique: Whisk butter mixture thoroughly to create a uniform, fragrant compound that penetrates deeply into roll crevices.
- Temperature Watch: Monitor baking closely at 400°F to achieve golden-brown crispy tops without burning, ensuring melted cheese and perfect texture.
- Prep Time: 10 minutes
- Cook Time: 10 minutes
- Category: Appetizer
- Method: Baking
- Cuisine: American
Nutrition
- Serving Size: 13
- Calories: 175
- Sugar: 2 g
- Sodium: 310 mg
- Fat: 13 g
- Saturated Fat: 8 g
- Unsaturated Fat: 4 g
- Trans Fat: 0 g
- Carbohydrates: 12 g
- Fiber: 0.5 g
- Protein: 3 g
- Cholesterol: 30 mg
Sophie Reynolds
Co-Founder, Recipe Curator & Culinary Educator
Expertise
Education
Auguste Escoffier School of Culinary Arts, Boulder, CO
Oregon State University
Sophie Reynolds is the recipe developer and culinary voice behind many of the approachable, flavor-focused creations at The Dream Café.
Sophie’s style leans into comfort food made simple: wholesome, satisfying meals anyone can make with confidence. Her passion lies in helping home cooks feel at ease in the kitchen while finding joy in the everyday act of cooking.