
Jolly Peppermint Cookie Cups Recipe: Festive Treats in a Flash
Chocolate and peppermint dance together in these decadent peppermint cookie cups that promise pure holiday magic.
Cold winter nights call for something sweet and indulgent.
Rich chocolate combines perfectly with cool, refreshing peppermint flavors in these irresistible treats.
Layers of creamy filling nestled inside crisp cookie shells create a delightful texture contrast.
Each bite delivers a burst of festive cheer that melts smoothly on your tongue.
Guests will absolutely adore these elegant yet simple desserts that look like they came from a professional bakery.
Bring these stunning peppermint cookie cups to your next gathering and watch everyone’s eyes light up with pure delight.
Quick Recipe Overview

Ingredients in Chocolate Peppermint Cookie Cups
For Dry Ingredients:For Wet Ingredients:For Filling and Topping:Supplies to Prep Chocolate Peppermint Cookie Cups
How to Bake Chocolate Peppermint Cookie Cups Smoothly

Warm up the kitchen with a toasty 350°F environment and lightly coat cupcake tins with a thin layer of grease.
Blend soft butter with sweet sugar, then fold in eggs and a splash of vanilla until smooth. Slowly incorporate dry ingredients to form a rich, velvety mixture.
Scoop generous dollops of dough into muffin tins, creating perfect little cookie vessels. Bake until edges turn golden and centers look slightly soft, about 10-13 minutes.
While cookies are warm, gently press the center of each one using a rounded jar or tool to create a delightful cup-like indentation. Let them cool and set for 10 minutes before carefully removing from the pan.
Whip together cloud-like cream, tangy cream cheese, a hint of sugar, and refreshing peppermint extract until the mixture becomes light and fluffy.
Pipe the luscious peppermint cheesecake filling into each cookie cup. Chill in the refrigerator to help the filling set, then sprinkle with crushed candy cane pieces for a festive touch.
Notes for Chocolate Peppermint Cookie Cup Bakers
Ways to Present Chocolate Peppermint Cookie Cups
Chocolate Peppermint Cookie Cups – Keeping Them Fresh
Print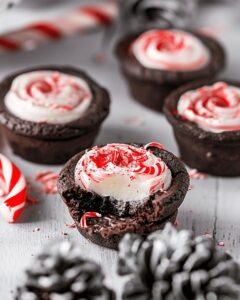
Irresistible Peppermint Cookie Cups Recipe
- Total Time: 43 minutes
- Yield: 25 1x
Description
Homemade chocolate chip peppermint cookie cups deliver festive holiday cheer with rich chocolate and cool mint flavors. Crisp cookie shells cradle silky chocolate ganache, creating an irresistible dessert you will savor with pure delight.
Ingredients
- 1 cup (227 grams) unsalted butter, room temperature
- 1 cup (220 grams) light brown sugar, packed
- ½ cup (100 grams) granulated sugar
- ½ cup (100 grams) granulated sugar (for peppermint filling)
- 2 large eggs, room temperature
- 2 cups (480 milliliters) all-purpose flour
- ¼ cup (30 grams) Dutch-processed cocoa powder, sifted
- ¼ cup (30 grams) black cocoa powder
- 1 tsp baking soda
- ½ tsp salt
- 1 tsp vanilla extract
- 8 oz (226 grams) cream cheese, full fat
- 1 cup (240 milliliters) heavy whipping cream, chilled
- 1 tsp peppermint extract
- Red color gel
- Chopped candy canes
Instructions
- Preheat Preparation: Heat oven to 350°F (175°C) and thoroughly coat cupcake tins with non-stick spray or butter.
- Dry Ingredient Fusion: Whisk flour, cocoa powder, and baking soda in a mixing bowl until uniformly combined.
- Wet Ingredient Transformation: Cream butter and sugar until fluffy, then integrate eggs and vanilla extract, mixing until silky smooth.
- Dough Assembly: Delicately fold dry ingredients into wet mixture, creating a rich chocolate cookie dough with minimal stirring.
- Baking Configuration: Distribute dough evenly into cupcake tins, filling each cavity two-thirds full for optimal shape and rise.
- Oven Performance: Bake 10-13 minutes until edges firm and centers remain slightly soft, developing a perfect cookie cup texture.
- Shaping Technique: Immediately after removing from oven, press a rounded measuring spoon into each warm cookie to create signature indentations.
- Cooling Process: Rest cookie cups in pan for 10 minutes, then transfer to wire rack for complete cooling.
- Filling Preparation: Whip heavy cream to stiff peaks, simultaneously blending cream cheese, powdered sugar, and peppermint extract until velvety.
- Filling Composition: Gently fold whipped cream into cream cheese mixture, creating a light, airy peppermint cheesecake filling.
- Filling Deployment: Pipe peppermint cheesecake filling into cooled chocolate cookie cups using a piping bag.
- Finalization: Refrigerate filled cookie cups for 30 minutes to set filling and intensify flavor, then garnish with crushed candy canes for a festive finish.
Notes
- Perfect Indentation Technique: Press the bottom of a rounded measuring spoon immediately after baking to create uniform, deep wells without breaking the warm cookie cups.
- Prevent Overmixing Disaster: Stir dry and wet ingredients gently to maintain a tender, soft cookie texture and avoid developing tough, dense cookie cups.
- Filling Stability Tip: Whip heavy cream to stiff peaks before folding into cream cheese mixture to ensure a light, stable peppermint cheesecake filling that holds its shape.
- Cooling and Setting Strategy: Refrigerate filled cookie cups for at least 30 minutes to allow flavors to meld and filling to set firmly, creating a more cohesive and delicious dessert experience.
- Prep Time: 30 minutes
- Cook Time: 13 minutes
- Category: Desserts, Snacks
- Method: Baking
- Cuisine: American
Nutrition
- Serving Size: 25
- Calories: 195
- Sugar: 10 g
- Sodium: 100 mg
- Fat: 12 g
- Saturated Fat: 7 g
- Unsaturated Fat: 5 g
- Trans Fat: 0 g
- Carbohydrates: 21 g
- Fiber: 1 g
- Protein: 2 g
- Cholesterol: 40 mg
Sophie Reynolds
Co-Founder, Recipe Curator & Culinary Educator
Expertise
Education
Auguste Escoffier School of Culinary Arts, Boulder, CO
Oregon State University
Sophie Reynolds is the recipe developer and culinary voice behind many of the approachable, flavor-focused creations at The Dream Café.
Sophie’s style leans into comfort food made simple: wholesome, satisfying meals anyone can make with confidence. Her passion lies in helping home cooks feel at ease in the kitchen while finding joy in the everyday act of cooking.