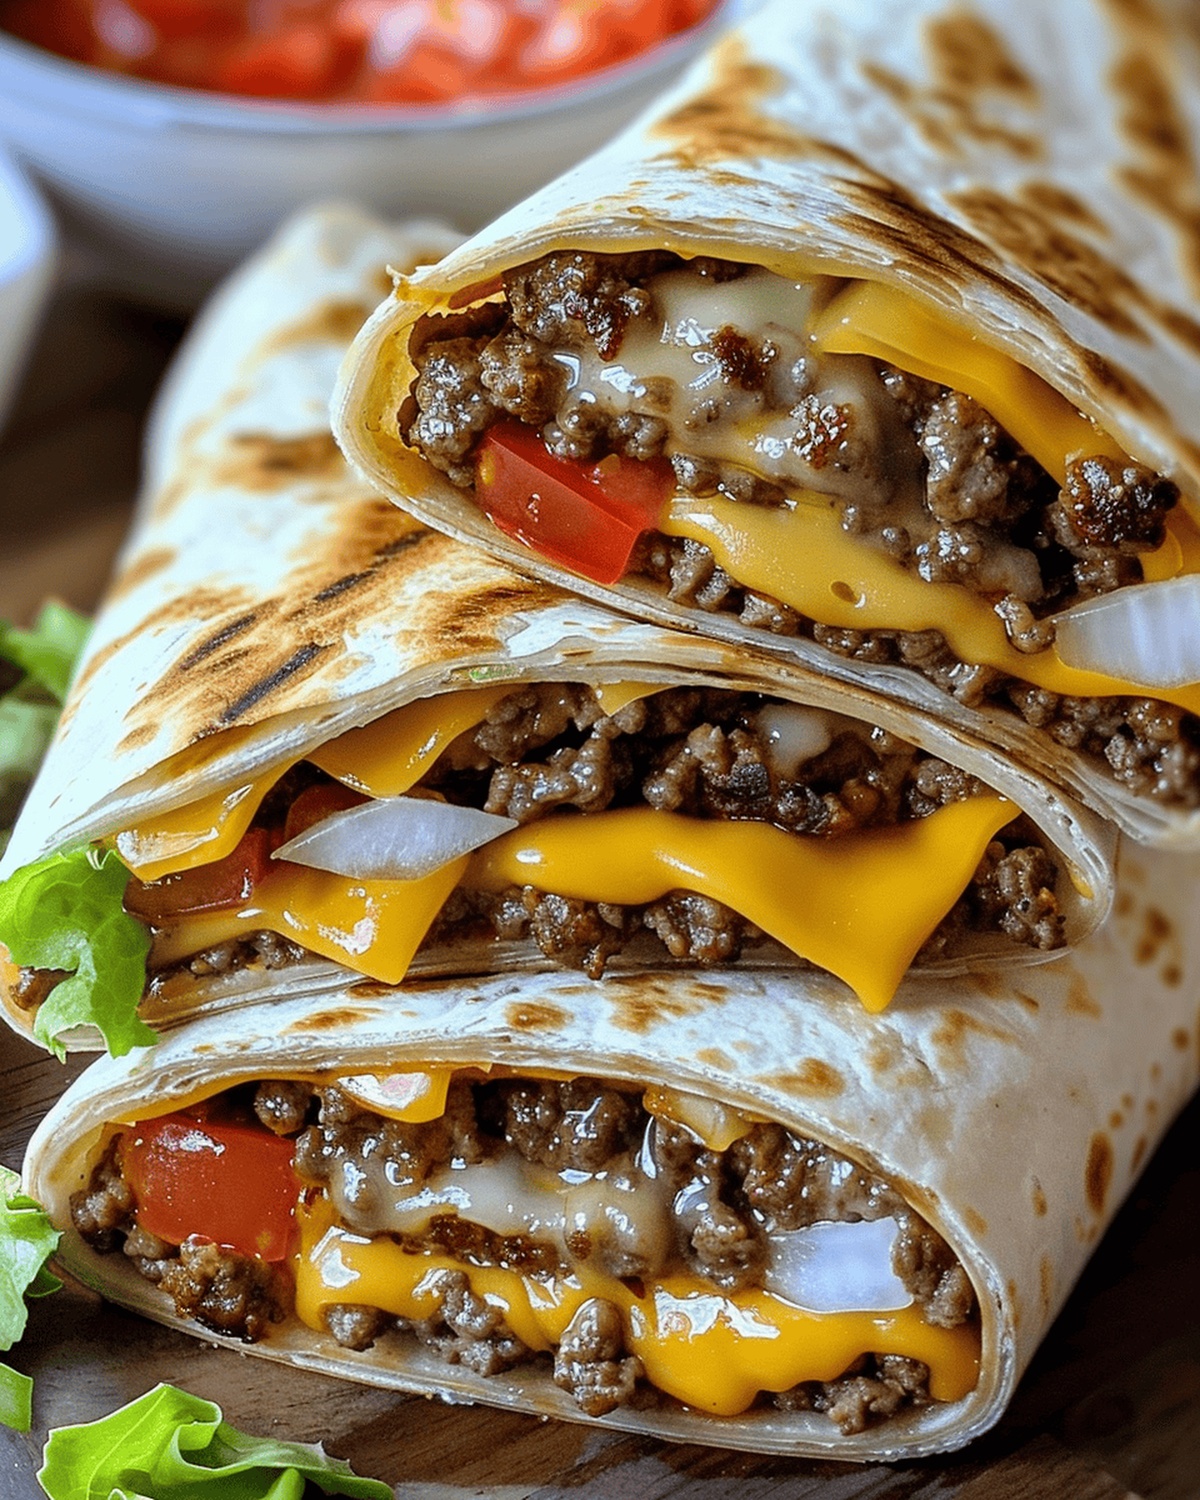
Lazy weeknight dinners just got a delicious upgrade with these easy cheeseburger wraps that bring all the classic burger flavors into a convenient handheld package.
The sizzling ground beef melts perfectly with gooey cheese, creating a mouthwatering combination that will make everyone at the table cheer.
Tender tortillas cradle a savory mixture of seasoned meat, crisp lettuce, and tangy condiments.
Each bite packs the familiar comfort of a burger without the mess of a traditional bun.
Packed with protein and bursting with flavor, these wraps are a total crowd-pleaser for both kids and adults.
Ditch the plate and utensils – these wraps are ready to satisfy your burger cravings in the most delightful way possible.
Let’s find out this quick and tasty meal that proves sometimes the simplest recipes are the most spectacular.
Quick Recipe Overview
Prep Time: 10 minutes
Cook Time: 20 minutes
Total Time: 30 minutes
Calories: 400 kcal
Servings: 5
What You’ll Need for Cheeseburger Wraps
For Protein Base:
Ground Beef: Delivers rich, meaty flavor and substantial protein foundation for the wrap, selecting lean cuts helps reduce excess grease and enhance overall taste.
Lettuce, Tomatoes, Onions: Crisp lettuce adds refreshing texture, ripe tomatoes bring juicy sweetness, and sharp onions contribute zesty bite, selecting garden-fresh produce guarantees maximum crispness and vibrant flavor profile.
Salt, Pepper: Essential seasonings that elevate and balance meat’s natural taste, using freshly ground black pepper intensifies overall seasoning.
For Optional Condiment Companions:
Ketchup, Mustard, Pickles: Classic burger companions that provide tangy, sharp, and briny notes, selecting high-quality condiments can transform ordinary wrap into extraordinary culinary experience.
Equipment That Helps with Cheeseburger Wraps
Skillet: Large, heavy-bottomed pan for browning beef and grilling wraps.
Spatula: Essential for stirring and flipping meat and wraps.
Cutting board: Clean surface for chopping vegetables and preparing ingredients.
Chef’s knife: Sharp tool for slicing tomatoes, onions, and cutting wraps.
Measuring spoons: Helpful for adding precise amounts of salt and pepper.
Tongs: Great for handling and turning wraps while grilling.
Step-by-Step Cheeseburger Wrap Assembly
Beef Preparation Fresh ground beef gets a flavor boost in this skillet adventure. Brown the meat thoroughly, letting those delicious seasonings mingle and create a mouthwatering base for your wrap.
Tortilla Canvas Select a soft tortilla as your delicious foundation. Center the cooked beef like a treasure map, creating the heart of your culinary creation.
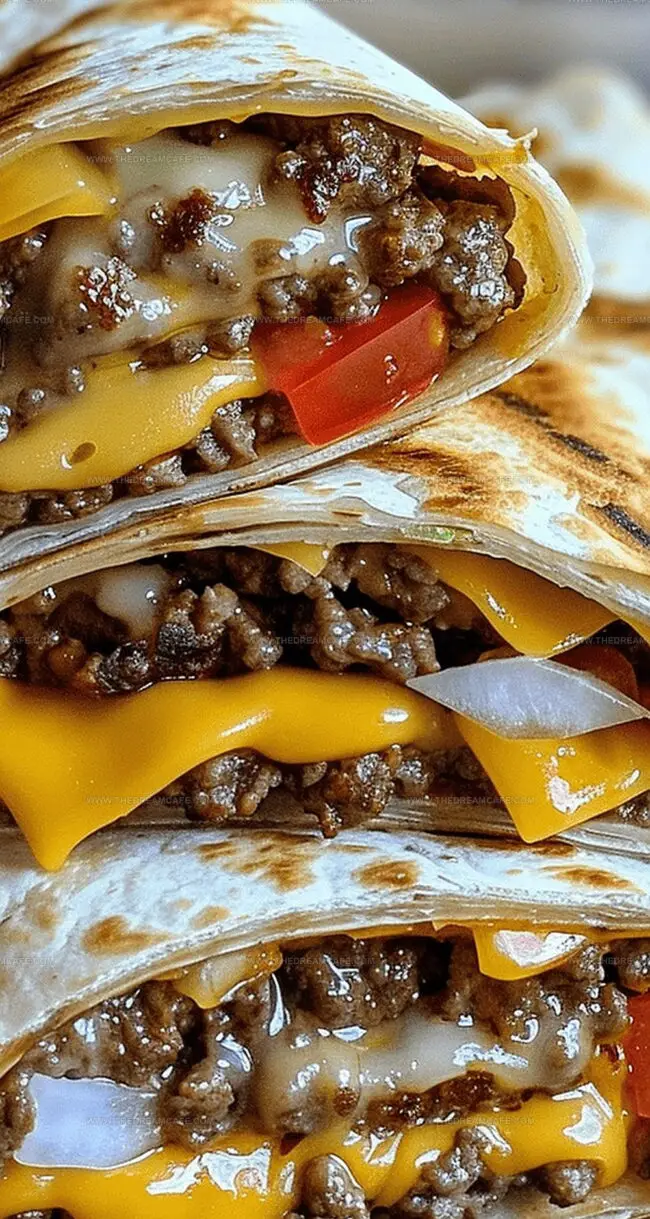
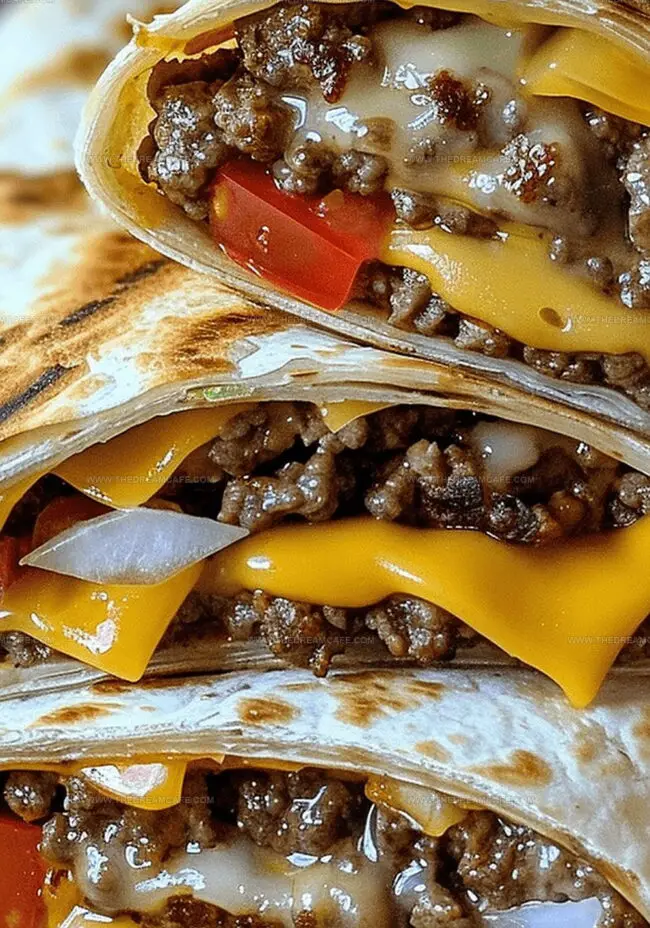
Flavor Explosion Sprinkle crisp lettuce, juicy tomatoes, and zesty onions across the beef. Add a generous handful of melty cheddar cheese that promises gooey goodness in every bite.
Wrap Technique Gently fold the tortilla’s sides, tucking in the ingredients like a cozy blanket. Roll the wrap with care, creating a tight bundle of flavor that promises a perfect handheld meal.
Golden Crispness Sizzle the wrap in a skillet, transforming the exterior into a crispy golden shell. Grill each side until it develops a beautiful crunch that signals pure deliciousness is moments away.
Serving Magic Slice the wrap diagonally, revealing the colorful interior. Plate with your favorite condiments nearby, ready to enhance this totally awesome meal experience.
Easy Ways to Modify Cheeseburger Wraps
Choose lean ground beef (90/10) for less grease and healthier wraps. Ground turkey works great as a lighter alternative for those watching calories.
Mix different cheese types like pepper jack, monterey jack, or Swiss for unique flavor profiles. Crumbled blue cheese adds a tangy twist for adventurous eaters.
Experiment with fresh spinach, grilled bell peppers, or pickled jalapeños to add extra nutrition and crunch. Swap raw onions for caramelized onions for deeper, sweeter flavor.
Create homemade special sauce by mixing mayo, ketchup, mustard, and pickle relish. Try sriracha mayo or chipotle sauce for bolder, spicier results that elevate the wrap’s taste.
Replace tortillas with large lettuce leaves for a carb-free version. Use low-carb tortillas or grain-free wraps for those following specific dietary plans.
How to Serve Cheeseburger Wraps Right
Picnic Party Platter: Slice these wraps into bite-sized pieces and arrange on a colorful platter for a crowd-pleasing appetizer perfect for game days or summer gatherings.
Classic Diner Style: Serve alongside crispy french fries and a cold milkshake to recreate that nostalgic burger joint experience right at home.
Customizable Condiment Bar: Set out small bowls of ketchup, mustard, mayo, pickles, and hot sauce so everyone can personalize their wrap with their favorite toppings.
Healthy Lunch Companion: Pair with a fresh garden salad or cucumber slices to balance the hearty wrap and add some nutritious crunch to your meal.
Cheeseburger Wraps Storage Notes
Quick Refrigeration Strategy: Store wrapped cheeseburger rolls in airtight containers for up to 3 days. Cool completely before sealing to prevent soggy tortillas and maintain crisp texture.
Smart Freezing Technique: Individually wrap each cheeseburger wrap in plastic or aluminum foil. Freeze flat for maximum space efficiency, keeping them fresh for 2-3 weeks. Thaw overnight in refrigerator before reheating.
Perfect Reheating Method: Warm wraps in skillet over medium heat for 2-3 minutes per side, restoring original crispiness. Alternatively, use air fryer at 350°F for 4-5 minutes to revive golden exterior and prevent sogginess.
Portion Control Approach: Prepare multiple wraps during meal prep, separating layers with parchment paper to prevent sticking. Stack in neat rows within storage containers for easy grab-and-go lunches or quick weeknight dinners.
Juicy cheeseburger wraps combine classic burger flavors within warm tortillas for a convenient meal. Ground beef, melted cheese, and fresh toppings create a handheld delight you’ll crave again and again.
Ingredients
Scale
1 lb (453.6 g) ground beef
1 cup (240 ml) shredded cheddar cheese
4 large flour tortillas
1 cup (240 ml) shredded lettuce
1 cup (240 ml) diced tomatoes
½ cup (120 ml) diced onions
Salt, to taste
Pepper, to taste
Ketchup, for serving (optional)
Mustard, for serving (optional)
Pickles, for serving (optional)
Instructions
Meat Preparation: Sizzle ground beef in a skillet over medium-high heat, crumbling and seasoning with salt and pepper until thoroughly browned and no pink remains.
Tortilla Setup: Position a flour tortilla flat, creating an even wrap foundation with sufficient border space for folding.
Layering Process: Distribute warm beef across tortilla center, followed by melting cheddar cheese that blankets the meat evenly.
Vegetable Integration: Arrange crisp lettuce, ripe tomatoes, and zesty red onions atop the cheese layer, creating a vibrant and textural foundation.
Condiment Enhancement: Drizzle preferred sauces like ketchup, mustard, or mayonnaise across the vegetable layer for additional flavor complexity.
Wrapping Technique: Fold bottom tortilla edge upward, tuck side edges inward, and roll tightly to form a compact, secure package with sealed edges.
Finishing Touch: Grill wrap in a non-stick skillet over medium heat, rotating to achieve a golden-brown, crispy exterior on all sides, approximately 2-3 minutes per side.
Serving Presentation: Remove from heat, slice diagonally, and plate with complementary condiments, ensuring a visually appealing and delectable meal.
Notes
Drain Fat Thoroughly: Remove excess grease to prevent soggy wraps and maintain a clean, crisp texture.
Warm Cheese Melting Trick: Spread cheese directly on hot beef to create a natural, gooey melting effect that enhances flavor.
Wrap Folding Technique: Fold bottom edge first, then sides, rolling tightly to prevent ingredients from falling out during cooking and eating.
Crispy Exterior Secret: Grill wrap seam-side down to seal edges and create a beautiful golden-brown crunch that elevates the entire eating experience.
Auguste Escoffier School of Culinary Arts, Boulder, CO
Degree: Diploma in Culinary Arts
Focus: Hands-on training in classic and modern culinary techniques, emphasizing sustainable cooking practices, kitchen professionalism, and real-world restaurant experience through externships.
Oregon State University
Degree: B.S. in Nutrition and Food Management
Focus: In-depth study of human nutrition, food safety, meal planning, and food-service operations, with a strong foundation in public health, dietetics, and community-based nutrition programs.
Sophie Reynolds is the recipe developer and culinary voice behind many of the approachable, flavor-focused creations at The Dream Café.
Sophie’s style leans into comfort food made simple: wholesome, satisfying meals anyone can make with confidence. Her passion lies in helping home cooks feel at ease in the kitchen while finding joy in the everyday act of cooking.

Sophie Reynolds
Co-Founder, Recipe Curator & Culinary Educator
Expertise
Education
Auguste Escoffier School of Culinary Arts, Boulder, CO
Oregon State University
Sophie Reynolds is the recipe developer and culinary voice behind many of the approachable, flavor-focused creations at The Dream Café.
Sophie’s style leans into comfort food made simple: wholesome, satisfying meals anyone can make with confidence. Her passion lies in helping home cooks feel at ease in the kitchen while finding joy in the everyday act of cooking.