
Rich Low Carb Keto Coffee Ice Cream Recipe
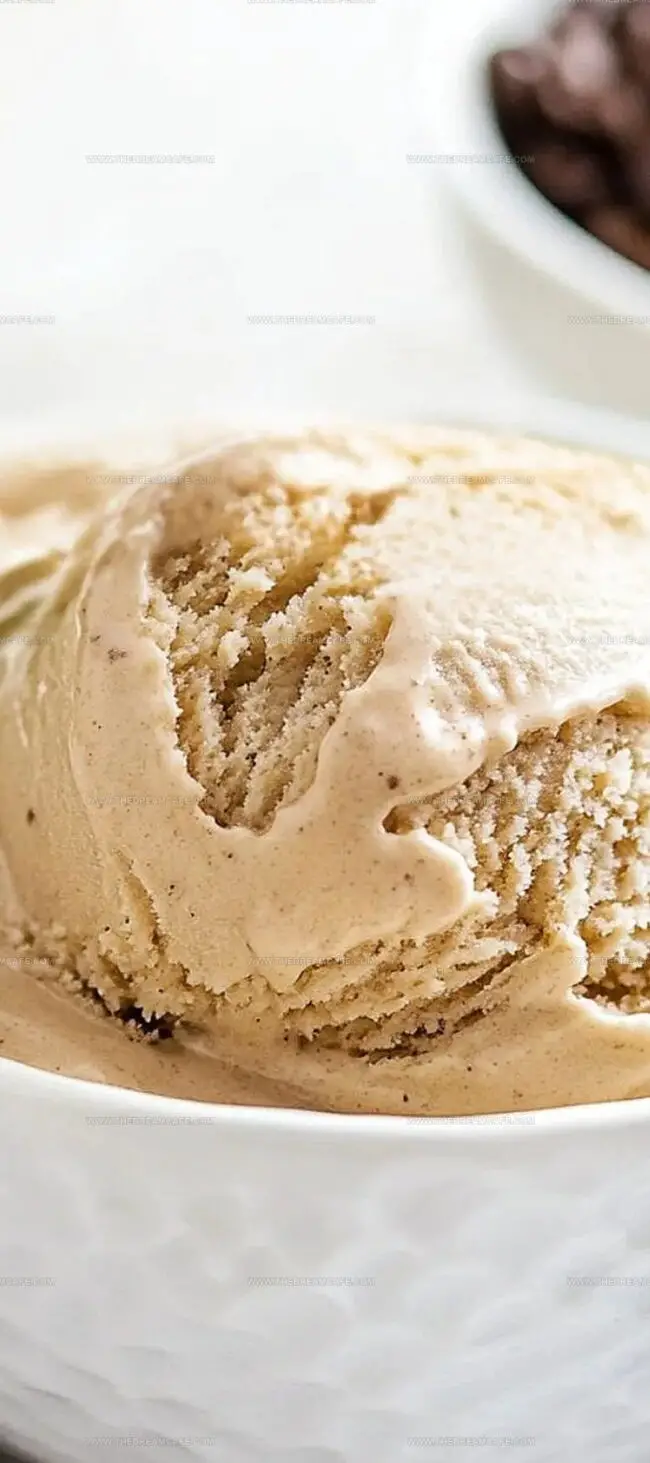
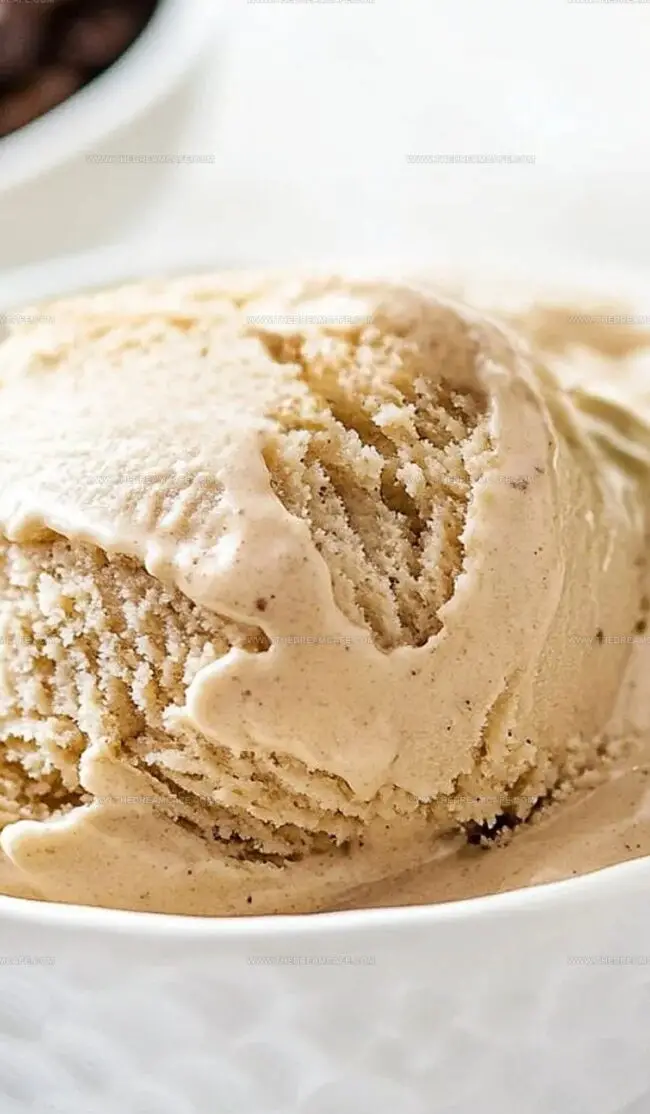
Keto coffee ice cream represents a dreamy escape for those craving a rich, decadent dessert without compromising their nutritional goals.
Health-conscious sweet tooths can finally celebrate a creamy, cold treat that defies traditional sugar-laden expectations.
Caffeine enthusiasts will marvel at how this ingenious dessert combines morning motivation with evening indulgence.
Smooth and velvety textures dance with robust coffee notes, creating a sophisticated flavor profile that feels both luxurious and guilt-free.
Cold and silky, this frozen delight transforms simple ingredients into a remarkable culinary experience that satisfies deep cravings.
What Makes Coffee Ice Cream So Energizing

What You’ll Need for Bold Flavor and Smoothness
Dairy Base:Flavor Enhancers:Binding and Stabilizing Ingredients:How to Make Creamy Coffee Ice Cream at Home

Step 1: Prepare Egg Base
In a medium mixing bowl, blend egg yolks with vanilla syrup and sea salt until the mixture turns smooth and develops a light yellow color. Set the bowl aside for later use.
Step 2: Create Coffee Cream Blend
In a medium saucepan, combine:Heat the mixture over medium temperature, stirring occasionally, until it reaches a gentle simmer. Remove from heat immediately.
Step 3: Blend Hot and Cold Mixtures
Gently stream the hot cream mixture into the egg yolk mixture, whisking continuously to prevent egg scrambling.
Step 4: Cook Custard Mixture
Transfer the combined mixture back to the saucepan, cooking over low heat. Stir frequently until the temperature reaches 170°F, which typically takes 3-5 minutes. Remove from heat once done.
Step 5: Cool and Chill
Cover the custard and refrigerate for a minimum of 4 hours. Ensure the mixture reaches a temperature below 40°F before proceeding.
Step 6: Churn Ice Cream
Pour the chilled mixture into a pre-frozen ice cream maker bowl. Churn according to the machine’s instructions, typically 20-25 minutes, until it develops a soft-serve consistency.
Step 7: Final Freezing
Either serve immediately or transfer to a freezer-safe container. Allow the ice cream to freeze until it reaches your desired firmness.
Tips to Boost Flavor Without Bitterness
How to Store It Without Ice Crystals
Coffee Ice Cream Variants to Wake Up Your Taste Buds
Wrapping Up the Coolest Coffee Treat
Low-carb keto coffee ice cream transforms classic dessert expectations with its rich, creamy profile and sophisticated flavor palette.
Sophisticated culinary enthusiasts discover pure pleasure in this guilt-free indulgence that combines robust coffee notes with silky smooth textures.
Complex ingredients merge seamlessly, creating an elegant frozen treat without compromising nutritional goals.
Caffeine lovers find solace in this remarkable recipe that balances keto principles with gourmet sensibilities.
Delightful aromas and luxurious mouthfeel promise an unforgettable sensory experience that challenges traditional ice cream conventions.
Readers who crave adventure in their kitchen will adore this recipe – so snap a photo, share your dish on social media, and let fellow keto explorers marvel at your culinary prowess!
Print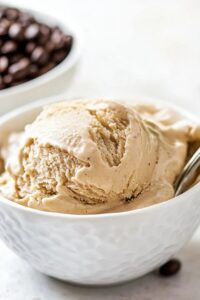
Low Carb Keto Coffee Ice Cream Recipe
- Total Time: 15 minutes
- Yield: 4 1x
Description
Keto Coffee Ice Cream delivers rich, creamy indulgence without sugar guilt. Smooth espresso notes blend seamlessly with velvety cream, creating a luxurious dessert you’ll savor after every memorable bite.
Ingredients
Main Ingredients:
- 360ml / 1½ cups unsweetened almond milk
- 240ml / 1 cup heavy cream (double cream in the UK)
- 5 large egg yolks
- 120ml / ½ cup sugar-free vanilla syrup
Flavor Enhancers:
- 2 tablespoons instant coffee (regular or decaf)
Seasoning:
- 1 pinch sea salt
Instructions
- Prepare the egg base by whisking egg yolks, vanilla syrup, and sea salt in a medium bowl until the mixture becomes smooth and transforms to a pale yellow color.
- Combine almond milk, heavy cream, and instant coffee in a medium saucepan. Gently heat the liquid over medium temperature, stirring intermittently until the mixture approaches a simmer, then immediately remove from heat source.
- Create a gradual temperature transition by slowly streaming the hot cream mixture into the egg yolk mixture, whisking continuously to prevent egg curdling.
- Transfer the combined liquid back to the saucepan and cook over low heat. Stir consistently until the custard reaches 76°C (170°F), which typically takes 3-5 minutes. Remove from heat immediately after reaching target temperature.
- Seal the custard in a container and refrigerate for a minimum of 4 hours, ensuring the temperature drops below 4°C (40°F) for optimal texture.
- Pour the thoroughly chilled mixture into a pre-frozen ice cream maker bowl. Activate the churning process according to the manufacturer’s guidelines, which usually requires 20-25 minutes until the mixture achieves a soft-serve consistency.
- For a firmer ice cream texture, transfer the churned mixture to a freezer-safe container and allow it to solidify completely before serving.
Notes
- Prep the freezer bowl a full day ahead to guarantee a smooth churning process, preventing any potential ice cream texture mishaps.
- Cool the custard base completely before churning, aiming for a temperature below 40°F to ensure a luxuriously creamy final product.
- Gentle whisking is key when combining hot cream with egg yolks, preventing unwanted scrambling and maintaining a silky-smooth consistency.
- Room-temperature egg yolks blend more effectively, creating a seamless mixture that integrates perfectly with the heated cream.
- Allow the finished ice cream to soften briefly at room temperature, transforming its firm texture into a delightfully scoopable treat.
- Prep Time: 10 minutes
- Cook Time: 5 minutes
- Category: Desserts, Snacks, Drinks
- Method: Simmering
- Cuisine: American
Nutrition
- Serving Size: 4
- Calories: 195
- Sugar: 0.1g
- Sodium: 60mg
- Fat: 19.1g
- Saturated Fat: 10.7g
- Carbohydrates: 3.1g
- Fiber: 0.3g
- Protein: 3.5g
- Cholesterol: 192mg
Julian Park
Co-Founder, Cuisine Researcher & Food Culture Writer
Expertise
Education
The Institute of Culinary Education (ICE), Los Angeles, CA
Julian Park is a natural storyteller at The Dream Café who blends hands-on culinary experience with a passion for exploring global food traditions. A graduate of The Institute of Culinary Education in Los Angeles, Julian combines professional technique with a love for cultural discovery, diving into how dishes reflect heritage, migration, and identity.
His work spans everything from in-depth cuisine guides to reflections on everyday meals around the world. With a curious palate and a journal always close by, Julian helps readers connect with food in a way that feels so insightful and personal.