
Quick & Creamy Low Carb Keto Mason Jar Ice Cream Recipe
Low-carb keto mason jar ice cream transforms ordinary dessert moments into delightful culinary adventures.
Rich, velvety textures emerge from surprisingly simple ingredients that dance together effortlessly.
Minimal kitchen equipment becomes your secret weapon in crafting this decadent treat.
Carb-conscious sweet lovers rejoice as traditional barriers melt away with this innovative approach.
Smooth, indulgent flavors promise satisfaction without compromising nutritional goals.
Cold, creamy goodness awaits those willing to embrace a smarter dessert strategy.
Your taste buds will thank you for this game-changing recipe:
Why This Mason Jar Ice Cream Is So Clever
Everything You Need for a Jar of Joy
Dairy Base:Sweetener:Finishing Touches:How to Shake Up the Creamiest Ice Cream
Step 1: Gather Your Creamy Companions
Collect all ingredients for your delightful frozen treat:You’ll need a 16 oz wide-mouth mason jar for this delicious adventure.
Step 2: Create the Magic Mixture
Pour all ingredients directly into the mason jar. Make sure each ingredient gets a warm welcome.
Step 3: Shake It Like a Pro
Seal the jar tightly with its lid. Now, channel your inner dance moves and shake vigorously for about 3 minutes. Watch the mixture transform and become thick and dreamy. Be careful not to shake too long, or you might accidentally create whipped cream instead.
Step 4: Chill Out
Place your jar in the freezer’s cozy corner. Let it rest and firm up for 4–6 hours. During this time, the mixture will slowly transform into a creamy frozen delight.
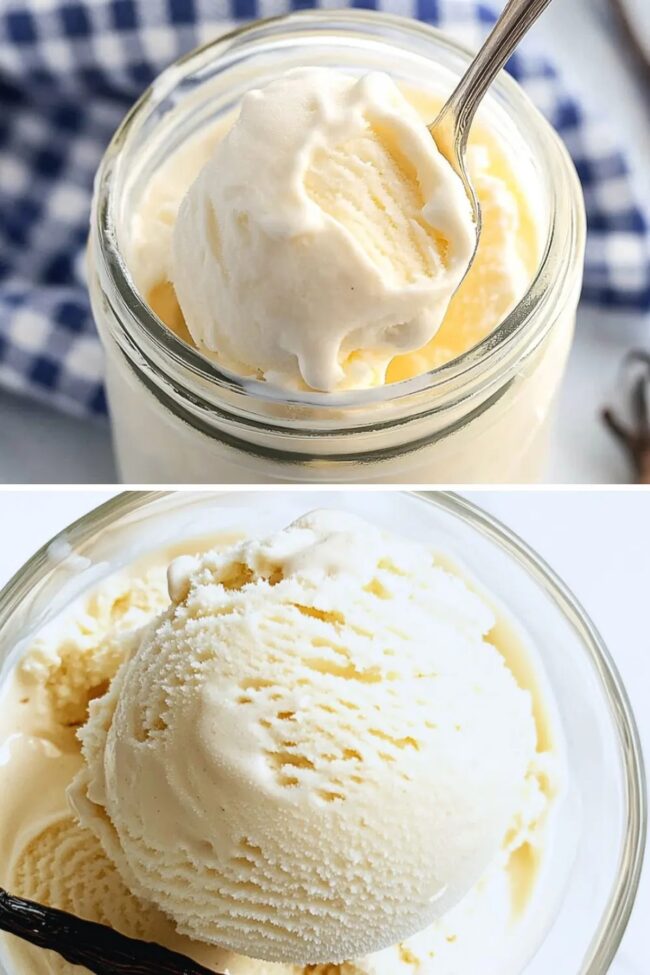
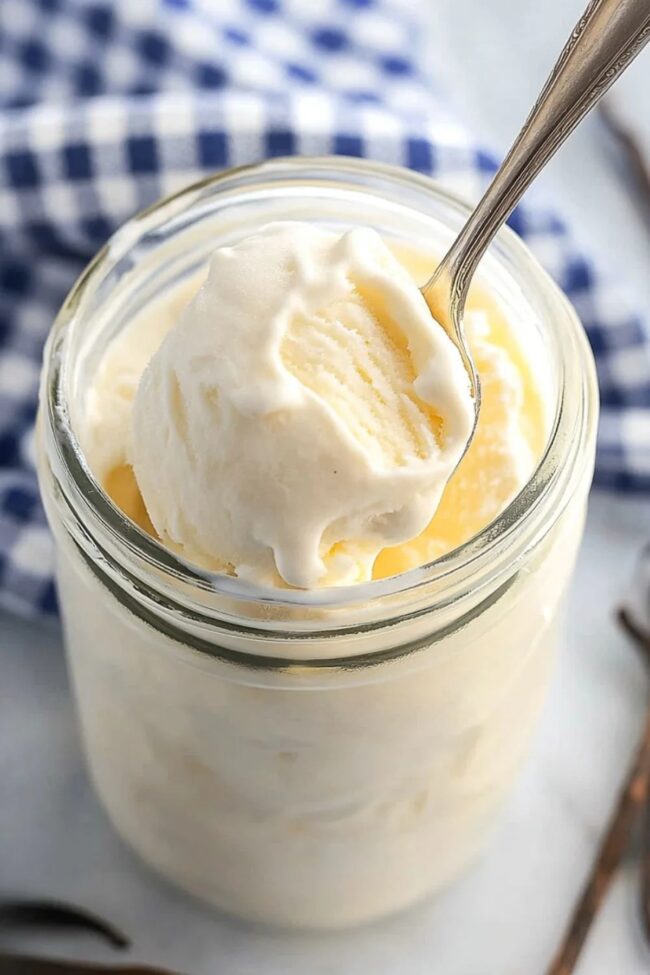
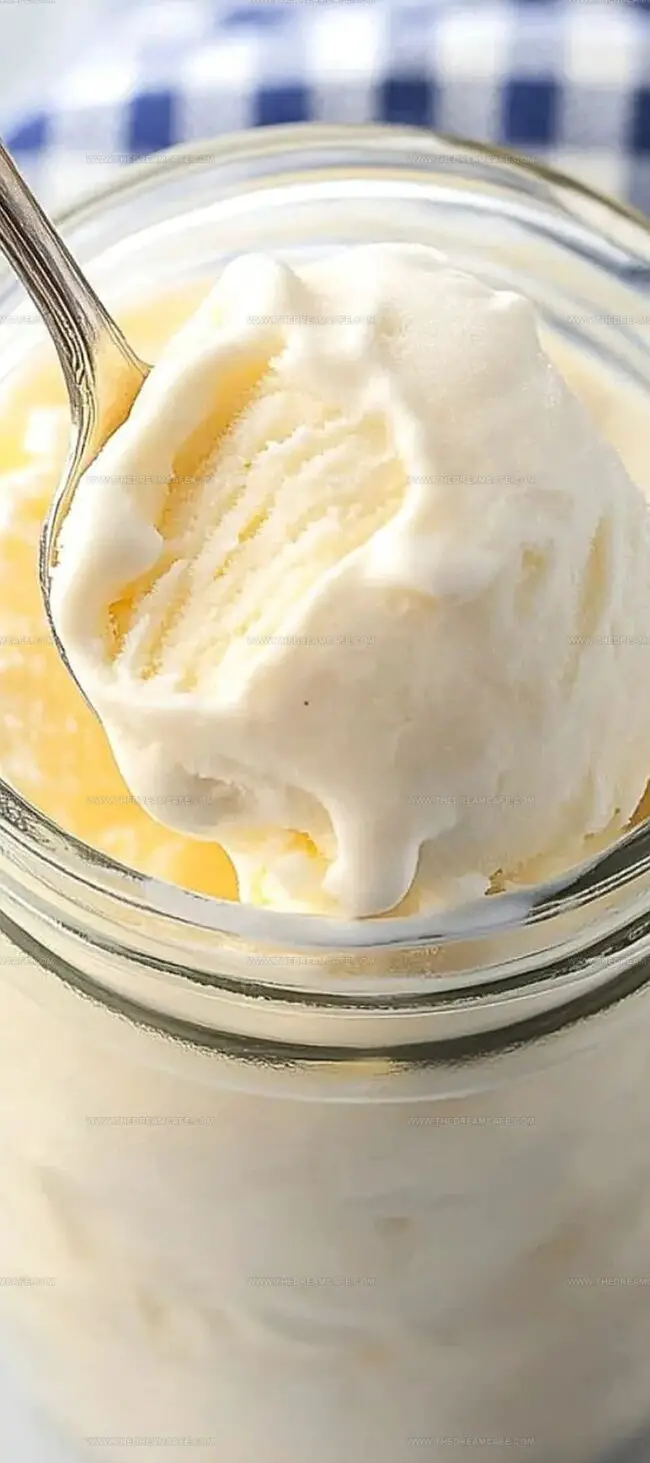
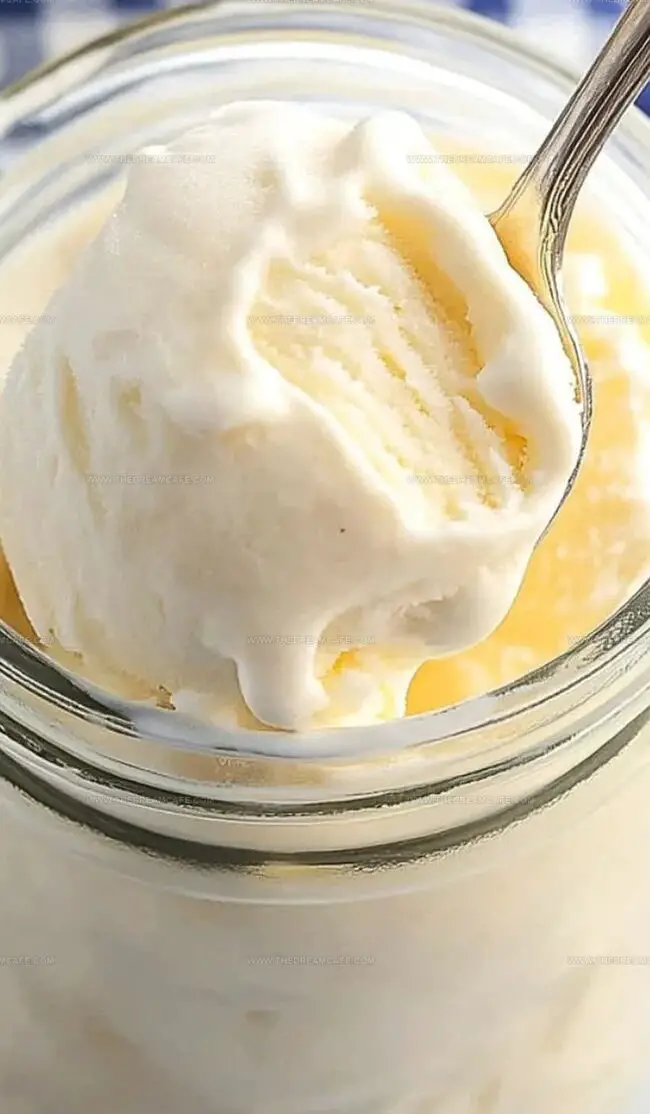
Step 5: Serve With Style
Remove the jar from the freezer and let it sit at room temperature for 5–10 minutes. This helps soften the ice cream, making it easier to scoop and enjoy. Grab a spoon and dive right into your homemade keto-friendly treat – no fancy dishes required!
Pro Tip: Feel free to experiment with different flavor extracts or add a sprinkle of cinnamon for an extra twist.
Smart Tips for Keto Mason Jar Ice Cream
How to Store for On-Demand Indulgence
Creative Mix-Ins for Personalized Pints
Ending on a Chilled Note
Keto mason jar ice cream emerges as pure culinary magic, transforming simple ingredients into a creamy cold delight without complex machinery.
Minimal effort produces maximum satisfaction in this ingenious dessert method.
Kitchen novices and seasoned chefs alike can master this quick treat with just a mason jar and four ingredients.
Low-carb lifestyles find sweet redemption through this protein-packed, sugar-free indulgence.
Cold comfort waits inside your freezer, promising rich flavors and smooth textures that dance across taste buds.
Passionate recipe explorers: snap that photo, tag passionate keto friends, and spread sweet inspiration across social media platforms – one delicious jar at a time!
Print
Low Carb Keto Mason Jar Ice Cream Recipe
- Total Time: 10 minutes
- Yield: 2 1x
Description
Creamy keto mason jar ice cream delivers pure indulgence without guilt. Cool summer treats meet low-carb magic, promising smooth satisfaction for dessert enthusiasts seeking delicious alternatives to traditional sugar-laden sweets.
Ingredients
Main Ingredients:
- 240 milliliters (1 cup) heavy cream (double cream)
Sweeteners:
- 1.5 tablespoons powdered monk fruit allulose blend
Flavor Enhancers:
- 1 teaspoon vanilla extract
- 1 pinch sea salt
Instructions
- Prepare a wide-mouth mason jar by thoroughly cleaning and drying it to ensure a pristine environment for creating your homemade ice cream.
- Measure and pour the heavy cream into the jar, ensuring no spillage occurs during the process.
- Add the selected sweetener, carefully measuring to achieve the desired level of sweetness without overwhelming the delicate cream base.
- Incorporate the vanilla extract, which will infuse a rich, aromatic flavor throughout the mixture.
- Sprinkle a small pinch of sea salt to enhance and balance the overall taste profile of the ice cream.
- Secure the jar lid tightly, making sure it is completely sealed to prevent any potential leakage during the shaking process.
- Vigorously shake the jar for approximately 3 minutes, maintaining a consistent rhythm and intensity to promote proper emulsification and volume increase.
- Monitor the mixture’s transformation, stopping when it has thickened and expanded to nearly double its original volume, being cautious not to over-shake.
- Carefully transfer the jar to the freezer, positioning it in a stable location where it won’t be disturbed.
- Allow the mixture to freeze for 4-6 hours, periodically checking its consistency to achieve the perfect soft-to-hard texture.
- Remove the jar from the freezer and let it rest at room temperature for 5-10 minutes to soften slightly, which will improve scoopability and creaminess.
- Serve directly from the jar, enjoying the freshly made, homemade ice cream with your preferred toppings or garnishes.
Notes
- Ice crystals become smoother when the cream starts super cold, straight from the refrigerator’s coldest section.
- Mason jars with wide mouths create perfect shaking space, preventing splatters and ensuring even mixing during the process.
- Vigorous shaking transforms liquid cream into creamy dreamy dessert within three magical minutes, stopping before butter formation occurs.
- Freezer placement matters tremendously – positioning the jar upright allows consistent temperature distribution for perfect texture development.
- Serving requires patience, letting the frozen treat rest briefly at room temperature helps achieve that ideal scoop-able consistency.
- Prep Time: 5 minutes
- Cook Time: 5 minutes
- Category: Desserts, Snacks
- Method: Freezing
- Cuisine: American
Nutrition
- Serving Size: 2
- Calories: 207
- Sugar: 1.9g
- Sodium: 25mg
- Fat: 21.6g
- Saturated Fat: 13.8g
- Carbohydrates: 1.7g
- Fiber: 0.1g
- Protein: 1.6g
- Cholesterol: 80mg
Julian Park
Co-Founder, Cuisine Researcher & Food Culture Writer
Expertise
Education
The Institute of Culinary Education (ICE), Los Angeles, CA
Julian Park is a natural storyteller at The Dream Café who blends hands-on culinary experience with a passion for exploring global food traditions. A graduate of The Institute of Culinary Education in Los Angeles, Julian combines professional technique with a love for cultural discovery, diving into how dishes reflect heritage, migration, and identity.
His work spans everything from in-depth cuisine guides to reflections on everyday meals around the world. With a curious palate and a journal always close by, Julian helps readers connect with food in a way that feels so insightful and personal.