Luscious Oreo Cheesecake Bites Recipe

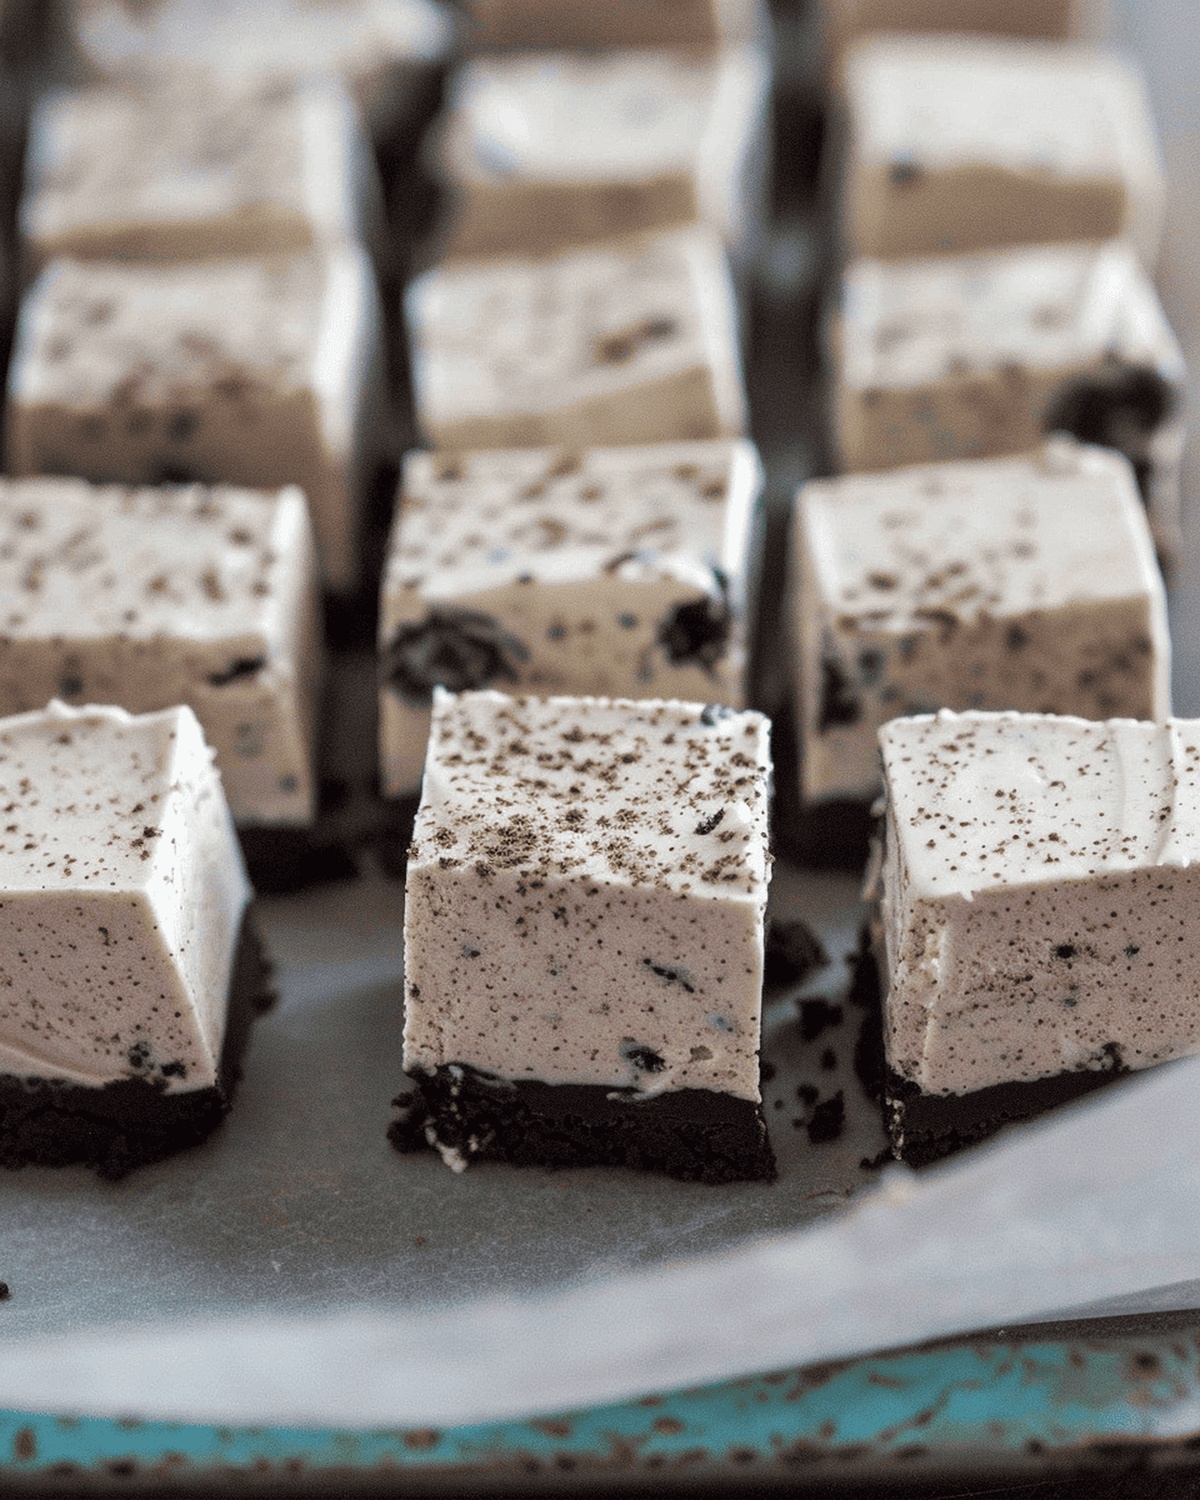
Dreamy No Bake Oreo Cheesecake Bites Recipe for Sweet Fans

Delectable no bake Oreo cheesecake bites dance with creamy elegance on your taste buds.

These irresistible treats combine the classic crunch of Oreo cookies with a silky smooth cheesecake filling.

Rich chocolate crumbs create a perfect base for the decadent cream cheese mixture that melts in your mouth.

Each bite promises a delightful blend of sweet and tangy flavors that will make dessert lovers swoon.

no oven required means these little delights come together quickly and effortlessly.

The simplicity of this recipe belies the incredible taste that awaits you.

You’ll want to whip up a batch of these heavenly bites for every occasion, from casual gatherings to special celebrations.

Quick Recipe Overview

Prep Time: 25 minutes

Cook Time:

Total Time: 25 minutes

Calories: 166 kcal

Servings: 13

Ingredients for No Bake Oreo Cheesecake Bites

For Oreo Crust Base:
  • Oreo Cookies: Provides rich chocolate flavor and creates a crumbly, indulgent foundation that adds delightful texture and depth to the dessert.
  • Unsalted Butter: Binds the cookie crumbs together, ensuring a compact and stable crust that holds its shape perfectly.
For Cheesecake Filling Base:
  • Heavy Cream: Whips into luxurious peaks, creating a light and airy texture that makes the cheesecake incredibly smooth and creamy.
  • Granulated Sugar: Sweetens the filling and helps stabilize the whipped cream for a perfect consistency.
  • Vanilla Extract: Adds a warm, aromatic essence that enhances the overall flavor profile of the cheesecake.
For Creamy Cheese Layer:
  • Cream Cheese: Delivers a rich, tangy base that gives the cheesecake its classic velvety texture and signature taste.
  • Oreo Crumbs: Introduces delightful chocolate cookie bits throughout the filling, creating unexpected bursts of flavor and visual appeal.

Kitchen Tools for Oreo Cheesecake Bites

  • Food Processor: Essential for grinding Oreo cookies into fine crumbs.
  • Microwave: Quick tool for melting butter smoothly.
  • Perfect size for creating cheesecake bars.
  • Parchment Paper: Crucial for easy removal and clean cutting.
  • Measuring Cup: Helps press Oreo crust evenly and precisely.
  • Stand Mixer or Hand Mixer: Needed for whipping cream and beating cream cheese.
  • Balloon Whip Attachment: Helps create stiff cream peaks efficiently.
  • Mixing Bowls: For combining ingredients and preparing different components.
  • Spatula: Used for folding ingredients and smoothing the top of the cheesecake.
  • Sharp Knife: For cutting cheesecake into neat bite-sized squares.
  • Plastic Wrap: Covers cheesecake during freezing process.

Making No Bake Oreo Cheesecake Bites Effortlessly

  • Oreo Cookie Base

Crush Oreo cookies into fine crumbs using a food processor. Melt butter and mix with cookie crumbs. Press mixture firmly into a lined baking pan, creating a smooth foundation for the cheesecake. Refrigerate while preparing the filling.

  • Creamy Cheesecake Layer

Whip heavy cream with sugar until peaks form. In another bowl, blend cream cheese until silky smooth. Gently fold whipped cream into cream cheese, creating a light and airy texture. Sprinkle reserved Oreo crumbs into the mixture, distributing evenly.

  • Freezing and Setting

Pour the creamy mixture over the chilled Oreo base. Smooth the top with a spatula to ensure an even surface. Cover with plastic wrap and place in the freezer. Allow the cheesecake to set completely, preferably overnight.

  • Serving

Remove cheesecake from freezer and lift out of the pan using parchment paper. Slice into small, bite-sized squares. Serve immediately for a cool, decadent treat that melts in your mouth.

Simple Tips to Customize Oreo Cheesecake Bites

  • Let cream cheese soften at room temperature for 30-45 minutes before mixing to ensure a smooth, lump-free filling that blends perfectly.
  • Experiment with different Oreo flavors like mint, peanut butter, or birthday cake to create unique cheesecake bite variations that surprise your taste buds.
  • Use cold heavy cream and chill your mixing bowl beforehand to achieve maximum volume and stable whipped cream peaks that hold their shape.
  • Prepare these cheesecake bites up to a week in advance, storing them in an airtight container in the freezer for quick and easy dessert options that are always ready to serve.
  • Drizzle melted chocolate, sprinkle crushed Oreos, or add a dollop of whipped cream on top to elevate the presentation and add extra flavor complexity.

Serving No Bake Oreo Cheesecake Bites for Any Occasion

  • Serve with Chocolate Drizzle: Melt dark chocolate and create elegant zigzag patterns across the cheesecake bites for a luxurious touch.
  • Garnish with Oreo Crumbles: Sprinkle extra crushed Oreo cookies on top to enhance the cookie texture and add a delightful crunch.
  • Pair with Fresh Berries: Place a small cluster of raspberries or strawberries beside each cheesecake bite to introduce a fresh, tangy contrast to the rich dessert.
  • Create Chilled Presentation: Arrange the bites on a cold marble or glass serving platter to maintain their perfect texture and provide an elegant display.

Keeping Oreo Cheesecake Bites Fresh and Ready

  • Refrigerate and Savor Wisely
  • Chill the Oreo cheesecake bites in an airtight container to maintain their delightful texture and prevent freezer burn. Keep them separated by parchment paper to avoid sticking.
  • Freeze for Future Treats
  • Store the cheesecake bites in the freezer for up to 2 months. Wrap them individually in plastic wrap, then place in a freezer-safe container to lock in freshness and prevent flavor absorption.
  • Quick Thawing Technique
  • Remove the bites from the freezer 10-15 minutes before serving. Let them sit at room temperature, allowing them to soften slightly for the perfect creamy consistency.
  • Portion and Portion Control
  • Pre-cut the cheesecake into bite-sized pieces before freezing. This smart strategy makes it easy to grab a quick dessert without thawing the entire batch, helping you manage portion sizes and spontaneous sweet cravings.
Print
clock clock iconcutlery cutlery iconflag flag iconfolder folder iconinstagram instagram iconpinterest pinterest iconfacebook facebook iconprint print iconsquares squares iconheart heart iconheart solid heart solid icon
Luscious Oreo Cheesecake Bites Recipe

Luscious Oreo Cheesecake Bites Recipe


5 Stars 4 Stars 3 Stars 2 Stars 1 Star

4.6 from 27 reviews

  • Total Time: 25 minutes
  • Yield: 13 1x

Description

Quick no bake oreo cheesecake bites bring creamy indulgence without oven hassle. Chilled dessert delights with rich chocolate cookie crumbs and smooth cream cheese center, perfect for casual gatherings or midnight cravings.


Ingredients

Scale
  • 1 lb (454 g) cream cheese
  • 1 package (405 g) Oreo cookies
  • 1 cup (240 g) heavy whipping cream
  • 3 oz (85 g) unsalted butter, melted
  • ½ cup (90 g) granulated sugar
  • 1 tsp (4 g) pure vanilla extract

Instructions

  1. Crust Preparation: Pulverize Oreo cookies in a food processor until finely ground. Melt unsalted butter and combine with cookie crumbs, mixing thoroughly with a fork.
  2. Pan Setup: Lightly brush an 8-inch square baking pan with melted butter and line with parchment paper, ensuring overhang for easy removal. Press the Oreo-butter mixture firmly and evenly into the pan using a measuring cup bottom.
  3. Cream Preparation: Whip heavy cream, sugar, and vanilla extract in a mixer until stiff peaks form. In the same bowl, beat cream cheese and remaining sugar until smooth and creamy.
  4. Filling Incorporation: Gently fold whipped cream into cream cheese mixture. Fold in reserved Oreo crumbs, ensuring even distribution throughout the filling.
  5. Freezing Process: Pour the Oreo cheesecake filling over the chilled crust, smoothing the top with a spatula. Cover with plastic wrap and freeze for a minimum of 4 hours or overnight until completely set.
  6. Serving: Remove from freezer, lift cheesecake out using parchment paper overhangs. Slice into bite-sized squares and serve chilled.

Notes

  • Chill Equipment: Ensure mixing bowls and beaters are cold to help whipped cream form stiff peaks faster and maintain better structure.
  • Butter Melting Tip: Microwave butter in short intervals, stirring between each to prevent overheating and potential burning.
  • Pressing Crust Technique: Use a flat-bottomed measuring cup or glass to create an even, compact crust that won’t crumble when cutting.
  • Freezing Strategy: Allow cheesecake to set completely overnight for the best texture and cleanest slice, preventing crumbly or soft edges.
  • Prep Time: 25 minutes
  • Category: Desserts, Snacks
  • Method: None
  • Cuisine: American

Nutrition

  • Serving Size: 13
  • Calories: 166
  • Sugar: 9 g
  • Sodium: 90 mg
  • Fat: 11 g
  • Saturated Fat: 7 g
  • Unsaturated Fat: 3 g
  • Trans Fat: 0 g
  • Carbohydrates: 16 g
  • Fiber: 1 g
  • Protein: 2 g
  • Cholesterol: 36 mg
Sophie Reynolds

Sophie Reynolds

Co-Founder, Recipe Curator & Culinary Educator

Expertise

  • Home Cooking Innovation & Comfort Recipes
  • Flavor Development & Ingredient Pairing
  • Seasonal Produce Integration
  • Recipe Testing & Instructional Clarity
  • Culinary Education & Community Workshops

Education

Auguste Escoffier School of Culinary Arts, Boulder, CO

  • Degree: Diploma in Culinary Arts
  • Focus: Hands-on training in classic and modern culinary techniques, emphasizing sustainable cooking practices, kitchen professionalism, and real-world restaurant experience through externships.

Oregon State University

  • Degree: B.S. in Nutrition and Food Management
  • Focus: In-depth study of human nutrition, food safety, meal planning, and food-service operations, with a strong foundation in public health, dietetics, and community-based nutrition programs.

Sophie Reynolds is the recipe developer and culinary voice behind many of the approachable, flavor-focused creations at The Dream Café. 

Sophie’s style leans into comfort food made simple: wholesome, satisfying meals anyone can make with confidence. Her passion lies in helping home cooks feel at ease in the kitchen while finding joy in the everyday act of cooking.

Leave a Reply

Your email address will not be published. Required fields are marked *

Recipe rating 5 Stars 4 Stars 3 Stars 2 Stars 1 Star