
Golden Teriyaki Rice Bowls Recipe: Homemade Magic for Dinner
The sizzling aroma of homemade teriyaki rice bowls wafts through the kitchen, promising a delectable meal that combines savory flavors and tender ingredients.
This classic Asian-inspired dish brings together perfectly cooked rice and mouthwatering protein in a single, satisfying bowl.
teriyaki sauce creates a glossy, caramelized coating that instantly makes any protein irresistible.
The combination of sweet and umami notes dances across your palate with each forkful.
Tender chicken or tofu absorbs the rich marinade, creating a deeply flavorful base for this simple yet impressive meal.
Fresh vegetables add a crisp, colorful contrast to the warm rice and protein.
Let’s find out this easy recipe that brings restaurant-quality comfort directly to your dining table with minimal effort and maximum deliciousness.
Quick Recipe Overview
What Makes Ground Beef Teriyaki Rice Bowls Great
For Teriyaki Sauce Base:For Flavor Enhancers:For Sauce Thickening:Tools to Speed Up Beef Teriyaki Bowl Prep
Cooking Ground Beef Teriyaki Bowls at Home
Create a flavorful base by mixing soy sauce, water, sugars, rice vinegar, ginger, and garlic in a saucepan. Heat until the mixture bubbles and becomes vibrant.
Develop a rich, glossy texture by blending warm water with cornstarch. Pour this mixture into the boiling sauce, stirring until it thickens into a luxurious glaze.
Sizzle ground beef in a skillet with sesame oil and aromatic seasonings. Break the meat into small, delectable crumbles while cooking. Drain any excess grease to keep the dish light.
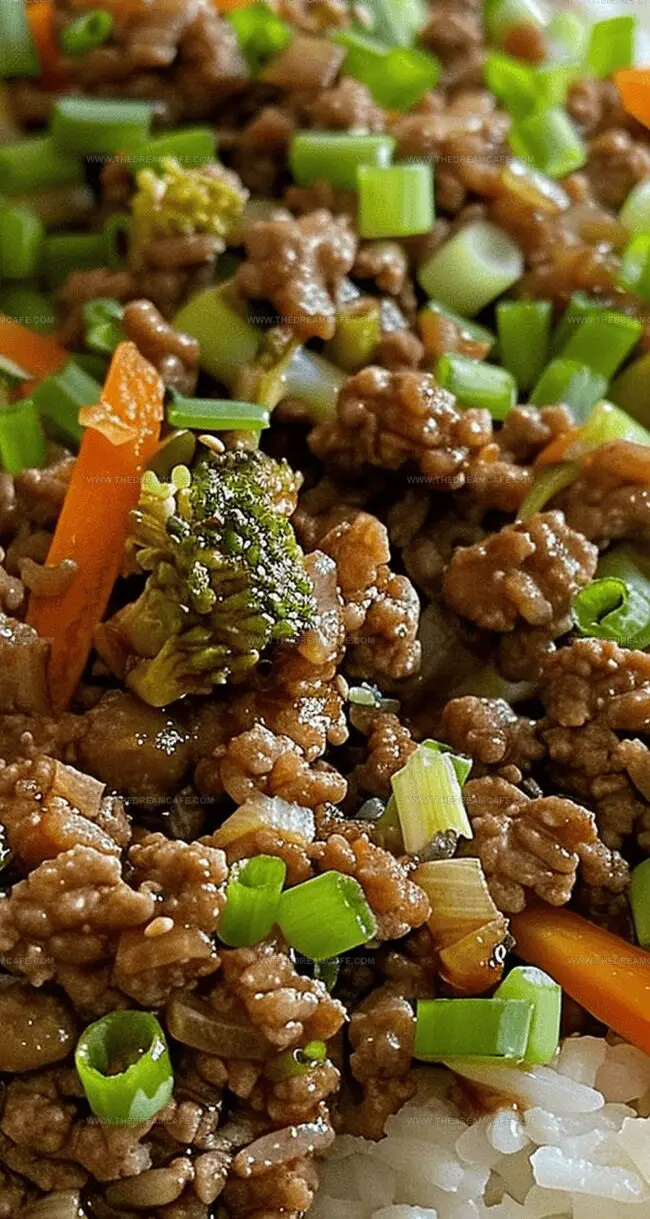
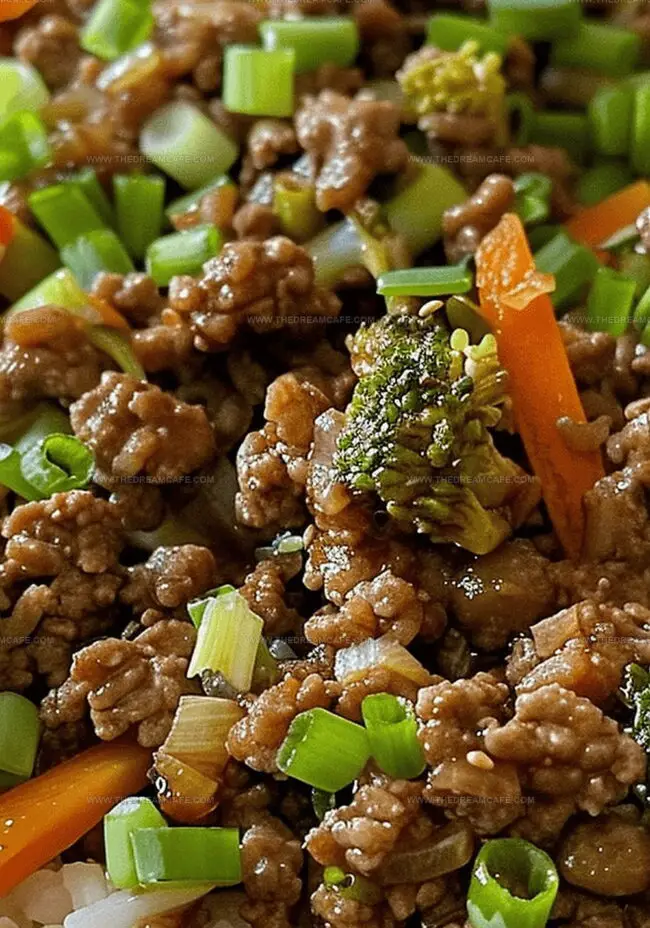
Introduce colorful broccoli and carrots to the seasoned beef. Pour the glossy teriyaki sauce over the mixture, allowing everything to simmer and meld together into a mouthwatering medley.
Nestle the teriyaki beef and vegetables over a bed of fluffy rice. Sprinkle fresh green onions on top for a burst of color and zesty finish.
Smart Add-Ons to Enhance Teriyaki Rice Bowls
Plating Ground Beef Rice Bowls for Quick Meals
Storage Tips for Teriyaki Bowls That Reheat Well
Print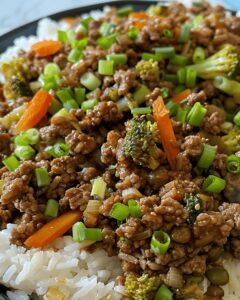
Mouthwatering Teriyaki Rice Bowls Recipe
- Total Time: 35 minutes
- Yield: 5 1x
Description
Classic Japanese teriyaki rice bowls deliver a perfect balance of savory protein and fluffy rice. Home cooks can easily craft this delicious meal with simple ingredients and quick preparation techniques.
Ingredients
- 1 lb (0.45 kg) ground beef
- ½ cup (120 ml) low-sodium soy sauce
- 2 tbsps brown sugar
- 2 tbsps granulated sugar
- 2 tbsps rice vinegar
- ⅓ cup (80 ml) water
- 2 tbsps warm water
- 1 tbsp cornstarch
- 1 tsp fresh ginger paste
- 1 tsp chopped garlic
Instructions
- Sauce Preparation: Combine soy sauce, water, brown and white sugars, rice vinegar, fresh ginger, and crushed garlic in a saucepan over medium-high heat, whisking continuously until the mixture reaches a rolling boil and sugars dissolve completely.
- Thickening Process: Create a smooth cornstarch slurry by mixing warm water with cornstarch, then pour into the boiling sauce, stirring vigorously to develop a glossy, spoon-coating consistency.
- Meat Cooking: Heat sesame oil in a large skillet, add ground beef, and crumble while seasoning with garlic powder, onion powder, and salt; drain excess fat to ensure a lean protein base.
- Vegetable Integration: Introduce finely chopped broccoli florets and julienned carrots to the skillet, creating a colorful and nutritious vegetable blend.
- Flavor Infusion: Pour the thickened teriyaki sauce over the beef and vegetables, stirring to ensure even coating, then reduce heat and simmer for 12-15 minutes to allow flavors to meld and vegetables to become tender-crisp.
- Plating: Serve the teriyaki beef and vegetable mixture atop steamed white or brown rice, finishing with a garnish of thinly sliced green onions for a fresh, zesty touch.
Notes
- Sauce Consistency Check: Aim for a glossy, slightly thick teriyaki sauce that coats the back of a spoon without being too runny or overly dense.
- Meat Texture Tip: Crumble ground beef into small, uniform pieces to ensure even cooking and maximum sauce absorption.
- Vegetable Crunch Technique: Cook broccoli and carrots just until tender-crisp to maintain their vibrant color and nutritional value.
- Flavor Balancing Trick: Adjust seasoning gradually, tasting as you go to prevent over-salting and achieve a perfect sweet-savory teriyaki profile.
- Prep Time: 10 minutes
- Cook Time: 25 minutes
- Category: Dinner, Lunch
- Method: Sautéing
- Cuisine: Japanese
Nutrition
- Serving Size: 5
- Calories: 350
- Sugar: 10 g
- Sodium: 700 mg
- Fat: 20 g
- Saturated Fat: 8 g
- Unsaturated Fat: 10 g
- Trans Fat: 0 g
- Carbohydrates: 30 g
- Fiber: 1 g
- Protein: 20 g
- Cholesterol: 70 mg
Sophie Reynolds
Co-Founder, Recipe Curator & Culinary Educator
Expertise
Education
Auguste Escoffier School of Culinary Arts, Boulder, CO
Oregon State University
Sophie Reynolds is the recipe developer and culinary voice behind many of the approachable, flavor-focused creations at The Dream Café.
Sophie’s style leans into comfort food made simple: wholesome, satisfying meals anyone can make with confidence. Her passion lies in helping home cooks feel at ease in the kitchen while finding joy in the everyday act of cooking.