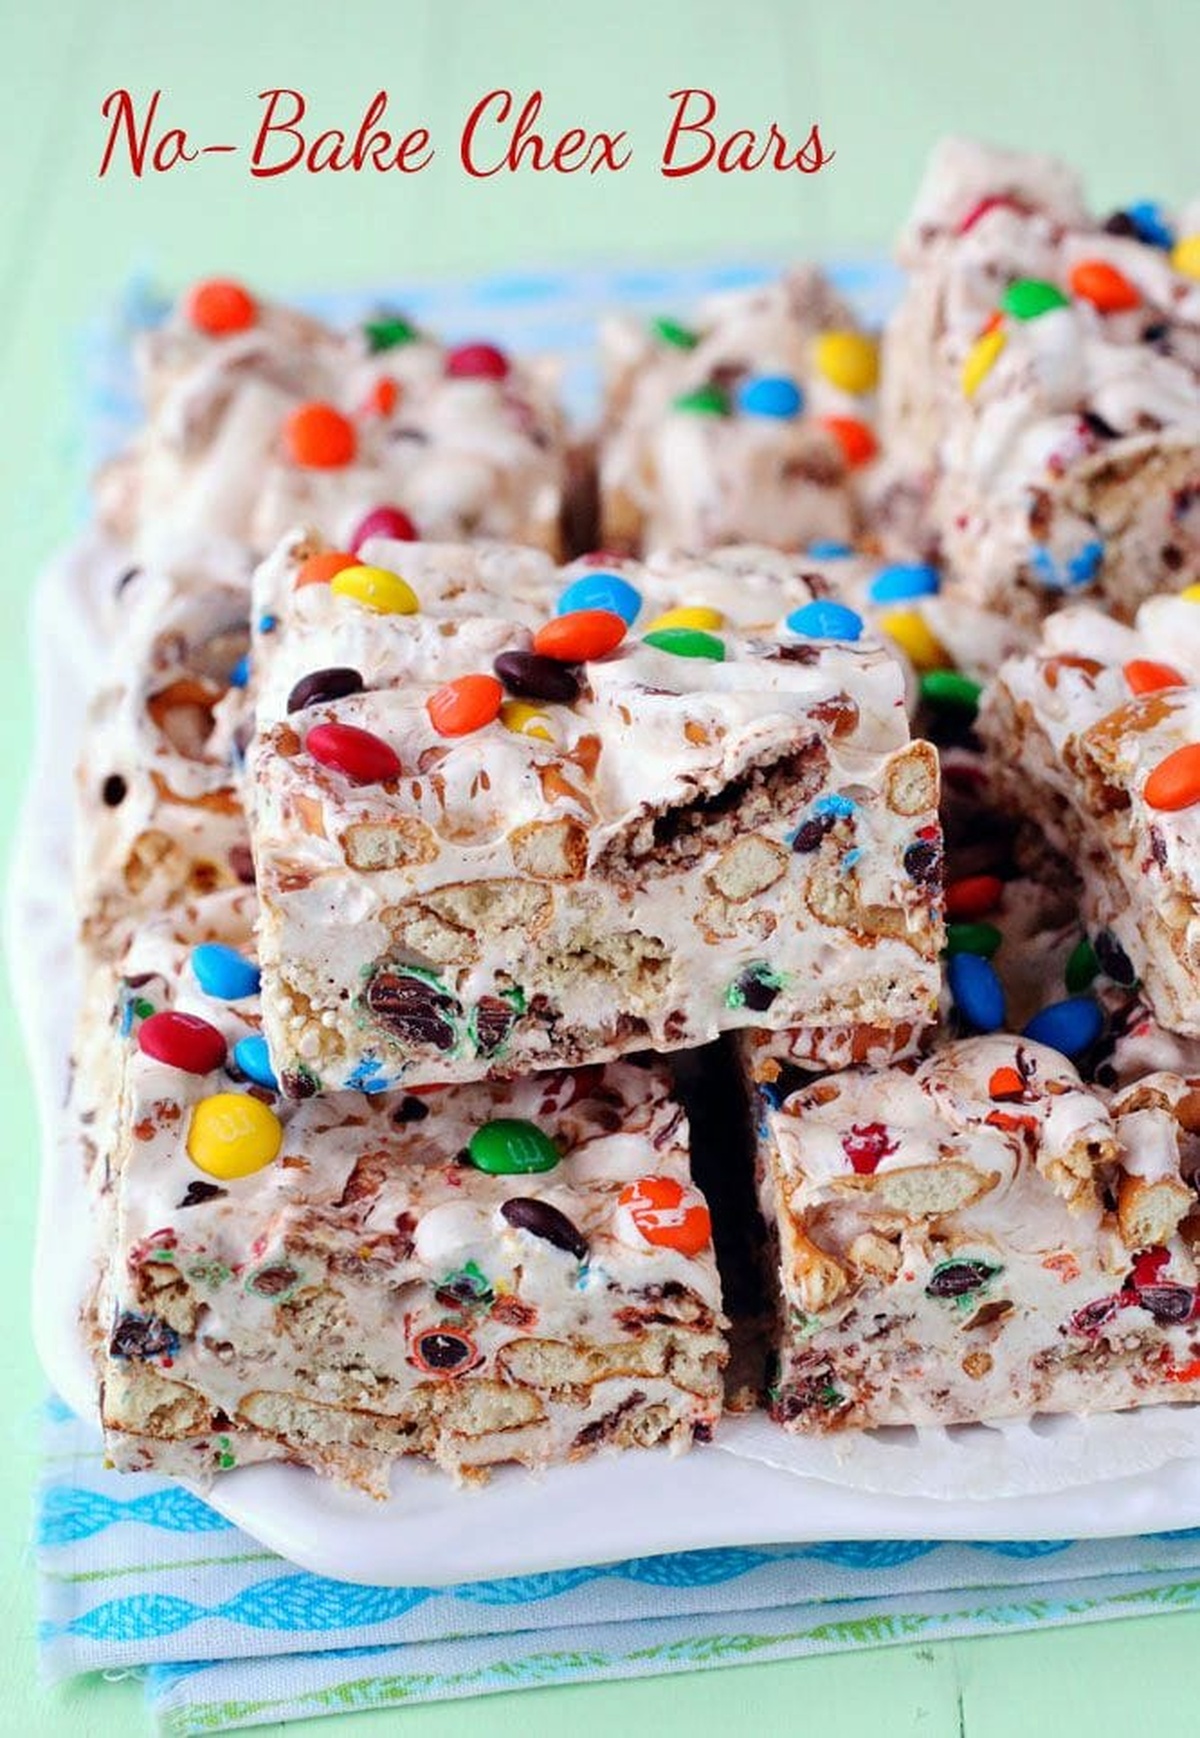
Simple No-Bake Chex Bars Recipe: Sweet Treats in a Flash
Craving a no-bake Chex bars delight that redefines ordinary ingredients into an extraordinary treat?
Sweet and salty cravings meet their perfect match with this irresistible snack.
Crispy cereal pieces mingle with gooey marshmallow and creamy peanut butter, creating a texture that dances between crunchy and smooth.
Kids and adults alike will fall in love with these simple yet indulgent bars that require zero oven time.
Minimal effort delivers maximum flavor, making this recipe a go-to for quick desserts or unexpected hunger moments.
Pantry staples come together in a magical blend of sweet, salty, and satisfying goodness.
Why No-Bake Chex Bars Are the Ultimate Snack Fix
What You’ll Need to Make No-Bake Chex Bars
Base Ingredients:Binding Ingredients:Preparation Ingredients:How to Whip Up No-Bake Chex Bars in Minutes

Step 1: Prepare the Baking Dish
Line a 9×9-inch pan with foil or parchment paper, then lightly spray with non-stick cooking spray to ensure easy removal.
Step 2: Gather Dry Ingredients
Combine in a large mixing bowl:Step 3: Create Gooey Binding Sauce
In a medium saucepan, melt together:Remove from heat and stir in marshmallow fluff until completely smooth and well combined.
Step 4: Mix and Coat
Pour the warm marshmallow mixture over the dry ingredients. Gently stir with a wooden spoon, ensuring every morsel gets a delicious coating.
Step 5: Shape the Bars
Transfer the mixture to the prepared pan. Use slightly damp hands to press the mixture evenly, preventing the mixture from sticking to your fingers.
Step 6: Chill and Set
Cover the pan with plastic wrap and refrigerate for 2 hours, or until the bars become firm and hold their shape.
Step 7: Slice and Serve
Lift the bars out of the pan using the foil or parchment paper overhang. Place on a cutting board and slice into 9 perfect squares.
Step 8: Store and Enjoy
Keep the bars in an airtight container in the refrigerator. They’ll stay fresh and delicious for up to 1 week.
Handy Tips for Better No-Bake Chex Bars
How to Keep No-Bake Chex Bars Fresh and Tasty
Perfect Pairings for No-Bake Chex Bars
Delicious No-Bake Chex Bars Variations You Should Try
Print
No-Bake Chex Bars Recipe
- Total Time: 2 hours 10 minutes
- Yield: 9 1x
Description
Mexican chocolate Chex bars deliver a spicy-sweet symphony of crunch and indulgence. Creamy chocolate, cinnamon, and a hint of cayenne pepper create irresistible no-bake treats perfect for quick dessert cravings.
Ingredients
Main Ingredients:
- 3 cups Chocolate Chex
- 3 cups small pretzels
- 1 cup mini M&M’s
Binding Ingredients:
- 6 tablespoons (85 grams) butter
- ½ cup (120 milliliters) creamy peanut butter
- 3 cups marshmallow fluff
Instructions
- Prepare a 9×9-inch (23×23 centimeter) baking pan by lining it with aluminum foil or parchment paper, ensuring complete coverage and edges extend slightly over the pan sides for easy removal. Lightly coat the liner with non-stick cooking spray.
- In a spacious mixing bowl, gently combine crunchy pretzels, chocolate-flavored Chex cereal, and colorful miniature M&M’s candies until ingredients are evenly distributed.
- Select a medium saucepan and melt unsalted butter and creamy peanut butter together over low heat, stirring continuously to prevent scorching. Once melted, remove from heat source.
- Add marshmallow fluff to the warm butter and peanut butter mixture, whisking thoroughly until the combination transforms into a smooth, glossy liquid with no visible lumps.
- Pour the warm marshmallow blend over the cereal and pretzel mixture, using a sturdy wooden spoon or silicone spatula to ensure every morsel becomes evenly coated with the sticky mixture.
- Transfer the mixture into the prepared pan, using slightly dampened hands to firmly press the contents into a uniform, compact layer without creating air pockets.
- Cover the pan with plastic wrap and refrigerate for 2 to 3 hours, or until the bars become completely firm and set.
- Lift the chilled mixture from the pan using the extended foil or parchment edges, placing it on a clean cutting surface.
- Slice the chilled block into 9 equal-sized square bars using a sharp knife, wiping the blade clean between cuts for neat edges.
- Store the completed bars in an airtight container within the refrigerator, where they will remain fresh for up to 7 days.
Notes
- Gather all ingredients beforehand to streamline the no-bake bar preparation process.
- Wet hands with cold water when pressing mixture into pan to prevent sticky frustration and ensure smooth bar formation.
- Mix marshmallow and peanut butter over low heat to create a silky, even coating that binds ingredients perfectly.
- Customize bars by swapping out M&M’s for favorite chocolate chips, nuts, or sprinkles for personalized crunch.
- Refrigeration helps bars set quickly and maintains their ideal chewy texture for up to a week.
- Prep Time: 10 minutes
- Cook Time: 2 hours
- Category: Snacks
- Method: Blending
- Cuisine: American
Nutrition
- Serving Size: 9
- Calories: 280 kcal
- Sugar: 22g
- Sodium: 150mg
- Fat: 12g
- Saturated Fat: 6g
- Unsaturated Fat: 6g
- Trans Fat: 0g
- Carbohydrates: 38g
- Fiber: 1g
- Protein: 3g
- Cholesterol: 10mg
Julian Park
Co-Founder, Cuisine Researcher & Food Culture Writer
Expertise
Education
The Institute of Culinary Education (ICE), Los Angeles, CA
Julian Park is a natural storyteller at The Dream Café who blends hands-on culinary experience with a passion for exploring global food traditions. A graduate of The Institute of Culinary Education in Los Angeles, Julian combines professional technique with a love for cultural discovery, diving into how dishes reflect heritage, migration, and identity.
His work spans everything from in-depth cuisine guides to reflections on everyday meals around the world. With a curious palate and a journal always close by, Julian helps readers connect with food in a way that feels so insightful and personal.