
Dreamy Orange Creamsicle Mini Cheesecakes Recipe – Sweet Bites
Orange creamsicle mini cheesecakes offer a whimsical twist on traditional dessert expectations.
Sweet memories of childhood frozen treats dance across your palate with each delectable bite.
These miniature delights blend creamy textures with bright citrus notes in a perfectly balanced sensation.
Compact yet indulgent, the mini cheesecakes showcase how small portions can deliver maximum flavor impact.
The combination creates a nostalgic experience that feels both familiar and excitingly new.
Delicate graham cracker crusts provide a satisfying crunch underneath the silky smooth filling.
Prepare to fall in love with a dessert that celebrates simple pleasures and joyful moments.
Why Orange Creamsicle Mini Cheesecakes Are a Burst of Sunshine
Zesty Ingredients That Make These Cheesecakes Stand Out
Base Ingredients:Whipping and Flavor Ingredients:Decoration and Finishing Ingredients:How to Bake Creamy Orange Creamsicle Cheesecakes
Step 1: Prepare Baking Setup
Line a muffin tin with 12 cupcake liners. Place 1 Oreo cookie at the bottom of each liner as a delightful crust.
Step 2: Create Cream Cheese Base
In a medium bowl, blend:Mix until the mixture becomes smooth and creamy.
Step 3: Whip Heavenly Cream
In a separate bowl, whip heavy cream until soft peaks form. Add orange extract and continue whipping until stiff peaks develop.
Step 4: Combine Cream Mixtures
Gently fold the cream cheese mixture into the whipped cream using low speed. Mix until just blended.
Step 5: Divide Cheesecake Filling
Split the mixture evenly between two bowls to create distinct flavor profiles.
Step 6: Layer Initial Filling
Spread half of the cheesecake filling over the Oreo cookies in each cupcake liner.
Step 7: Create Orange Variation
Mix the remaining filling with:Blend on low speed until well combined.
Step 8: Add Decorative Swirl
Gently layer the orange-infused mixture on top of the plain cheesecake base. Use a toothpick to create an elegant swirl effect.
Step 9: Chill and Set
Refrigerate for 3-4 hours or overnight to allow the cheesecakes to set completely.
Step 10: Serve with Flair
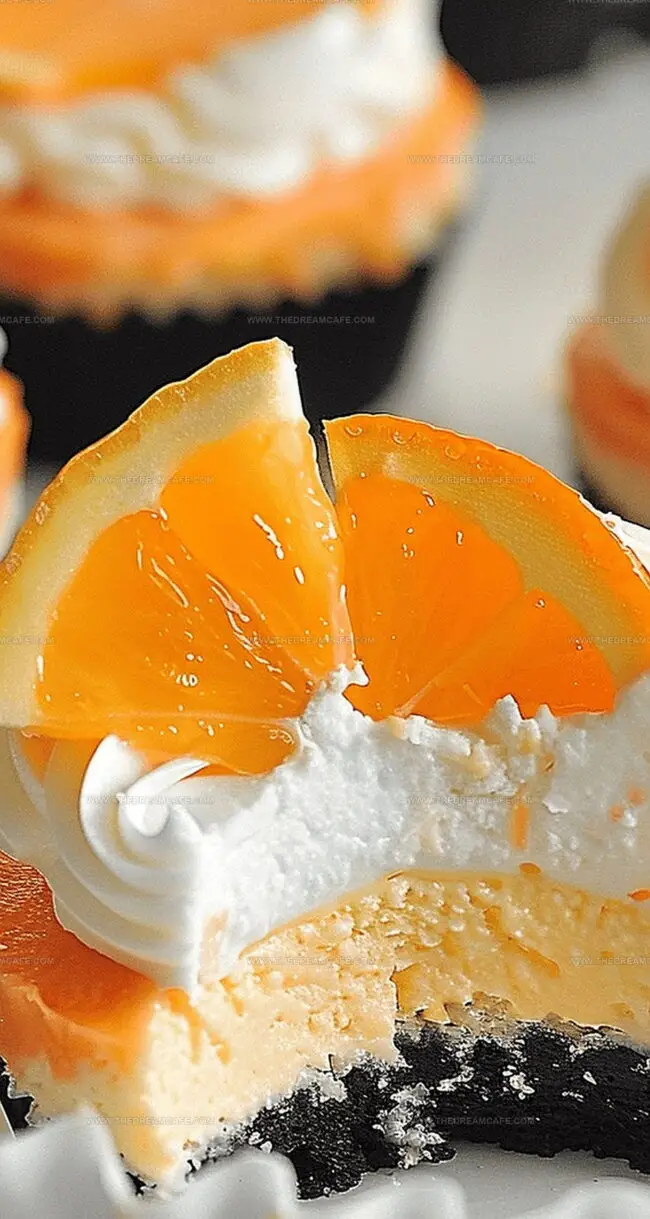
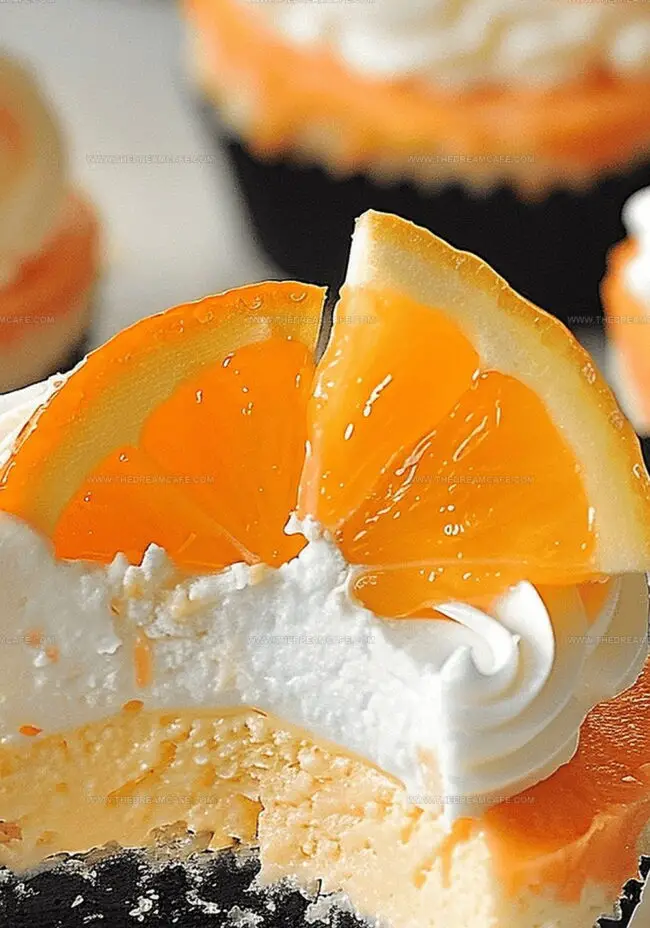
Garnish with whipped cream dollops and an optional orange slice for a stunning presentation.
Tricks for Cheesecakes That Never Crack or Dry
How to Store and Serve These Dreamy Minis Later
Pairing Suggestions for Orange Creamsicle Cheesecake Bites
Tangy Twists on a Creamsicle Favorite
Print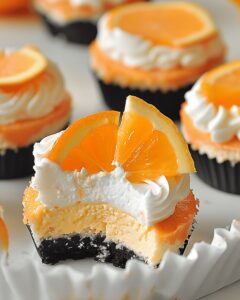
Orange Creamsicle Mini Cheesecakes Recipe
- Total Time: 20 minutes
- Yield: 12 1x
Description
Nostalgic Orange Creamsicle Mini Cheesecakes bring summer memories to life with zesty citrus and creamy texture. Silky orange-infused filling nestled in graham cracker crusts delivers classic dessert magic that refreshes palates and delights senses.
Ingredients
Main Ingredients (Cheesecake Base):
- 16 ounces (454 grams) cream cheese, room temperature
- 1 cup (240 milliliters) heavy whipping cream
- ½ cup (60 grams) powdered sugar
- 1 teaspoon (5 milliliters) vanilla extract
- ½ teaspoon (2.5 milliliters) orange extract
Crust:
- 12 Oreo cookies
Orange Flavor and Decoration:
- Zest of 1 orange
- 2 to 3 drops of orange gel food coloring
- Whipped cream (optional)
- Orange slices (optional)
Instructions
- Prepare a standard 12-cup muffin tin by lining each cavity with cupcake liners, then carefully place one whole Oreo cookie at the base of each liner as a crisp foundation.
- In a medium mixing bowl, thoroughly blend softened cream cheese with powdered sugar until the mixture achieves a silky, uniform consistency without any lumps.
- Using a separate clean bowl, whip heavy cream (236 milliliters or ) until soft, billowy peaks emerge, then introduce orange extract and continue whipping until stiff, defined peaks form.
- Delicately incorporate the cream cheese mixture into the whipped cream using a low-speed folding technique, ensuring minimal deflation of the airy cream.
- Divide the unified cheesecake filling evenly between two separate bowls to prepare for flavor differentiation.
- Distribute the plain cheesecake mixture across the Oreo-lined cupcake liners, creating an initial smooth layer approximately 1/2 inch (1.27 centimeters) thick.
- Transform the remaining filling by gently blending fresh orange zest and 2-3 drops of vibrant orange gel food coloring, maintaining a delicate mixing approach.
- Artfully layer the orange-infused filling atop the white base, using a slender toothpick to create elegant marbled swirls that intertwine the two colors.
- Refrigerate the mini cheesecakes for a minimum of 3-4 hours, or ideally overnight, allowing them to solidify and develop a rich, creamy texture.
- Just before serving, embellish each mini cheesecake with delicate dollops of whipped cream and an optional fresh orange slice for a sophisticated presentation.
Notes
- Prepare this zesty dessert ahead of time for maximum flavor infusion and stress-free entertaining.
- Chill thoroughly to allow flavors to meld and texture to become perfectly creamy and smooth.
- Experiment with different Oreo cookie varieties for a unique base that complements the bright orange profile.
- Use room temperature ingredients to ensure a silky-smooth cheesecake mixture without lumps.
- Fresh orange zest adds vibrant, authentic citrus notes that elevate the entire dessert experience.
- Prep Time: 20 minutes
- Cook Time: 0 minutes
- Category: Desserts, Snacks
- Method: None
- Cuisine: American
Nutrition
- Serving Size: 12
- Calories: 265 kcal
- Sugar: 17 g
- Sodium: 150 mg
- Fat: 20 g
- Saturated Fat: 12 g
- Unsaturated Fat: 8 g
- Trans Fat: 0.5 g
- Carbohydrates: 21 g
- Fiber: 1 g
- Protein: 3 g
- Cholesterol: 60 mg
Julian Park
Co-Founder, Cuisine Researcher & Food Culture Writer
Expertise
Education
The Institute of Culinary Education (ICE), Los Angeles, CA
Julian Park is a natural storyteller at The Dream Café who blends hands-on culinary experience with a passion for exploring global food traditions. A graduate of The Institute of Culinary Education in Los Angeles, Julian combines professional technique with a love for cultural discovery, diving into how dishes reflect heritage, migration, and identity.
His work spans everything from in-depth cuisine guides to reflections on everyday meals around the world. With a curious palate and a journal always close by, Julian helps readers connect with food in a way that feels so insightful and personal.