Spooky Mummy Rice Krispy Treat Recipe: Fun Halloween Sweet
When the Halloween spirit hits, a spooky mummy rice Krispy treat becomes the perfect sweet companion for festive gatherings.
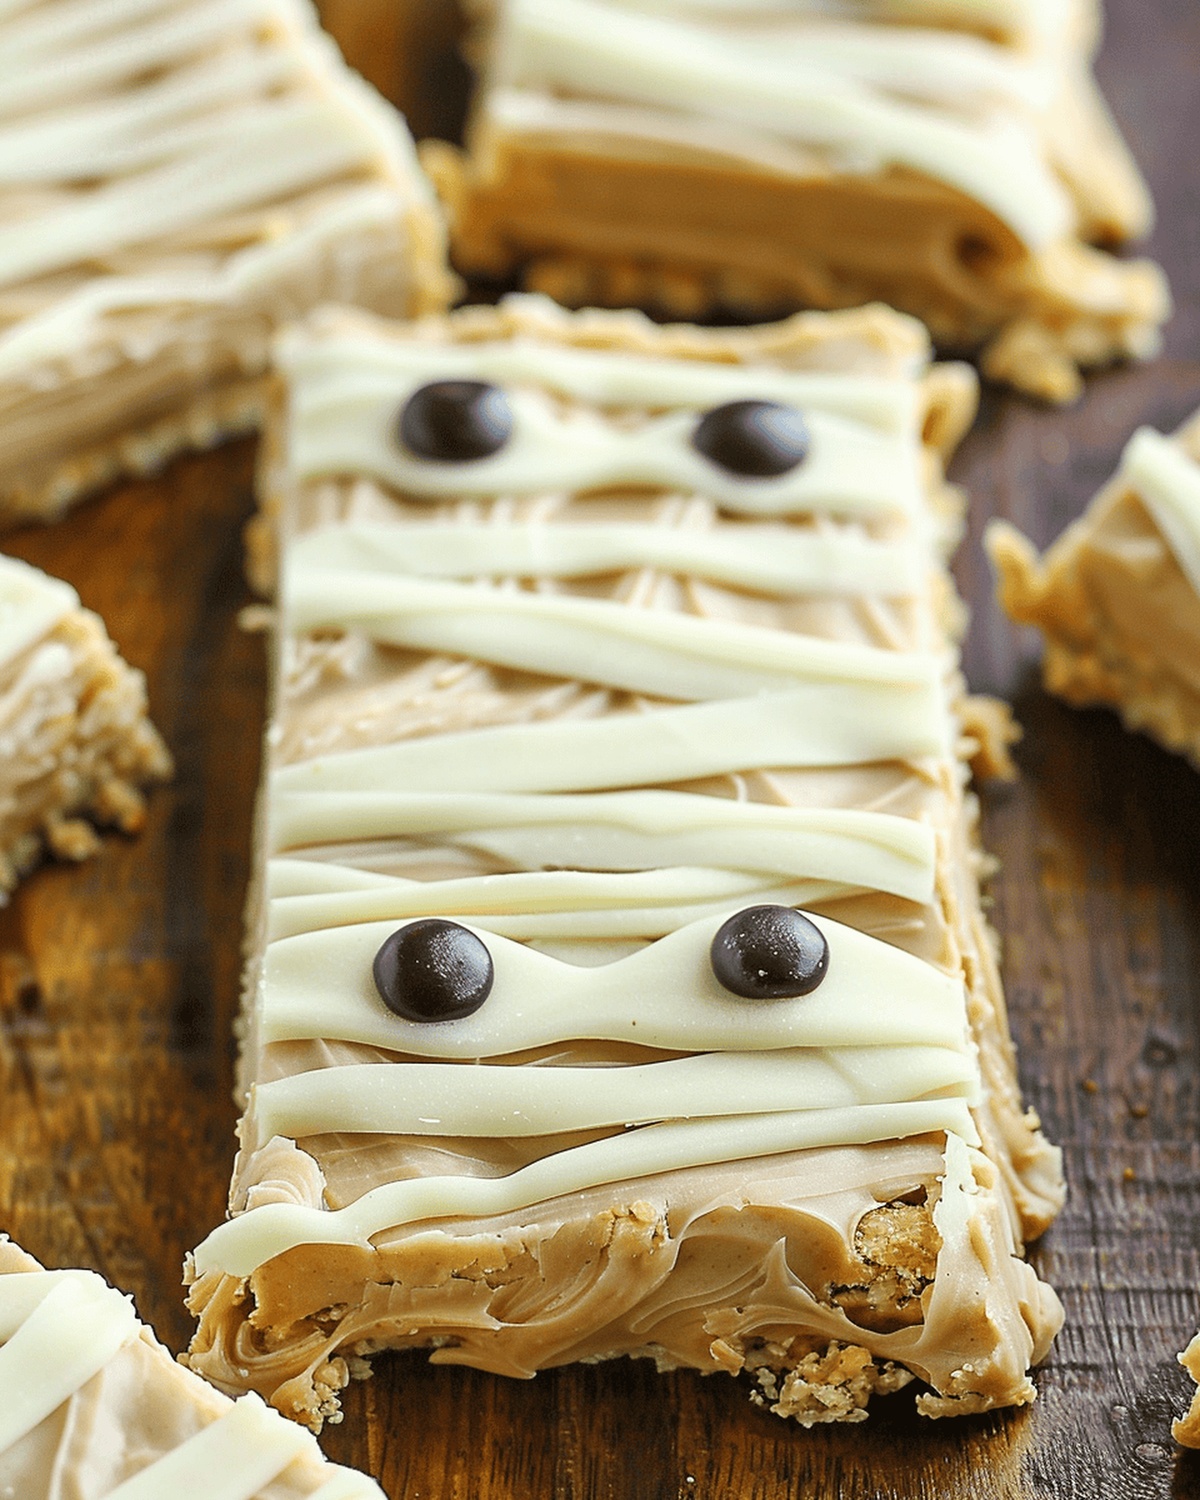
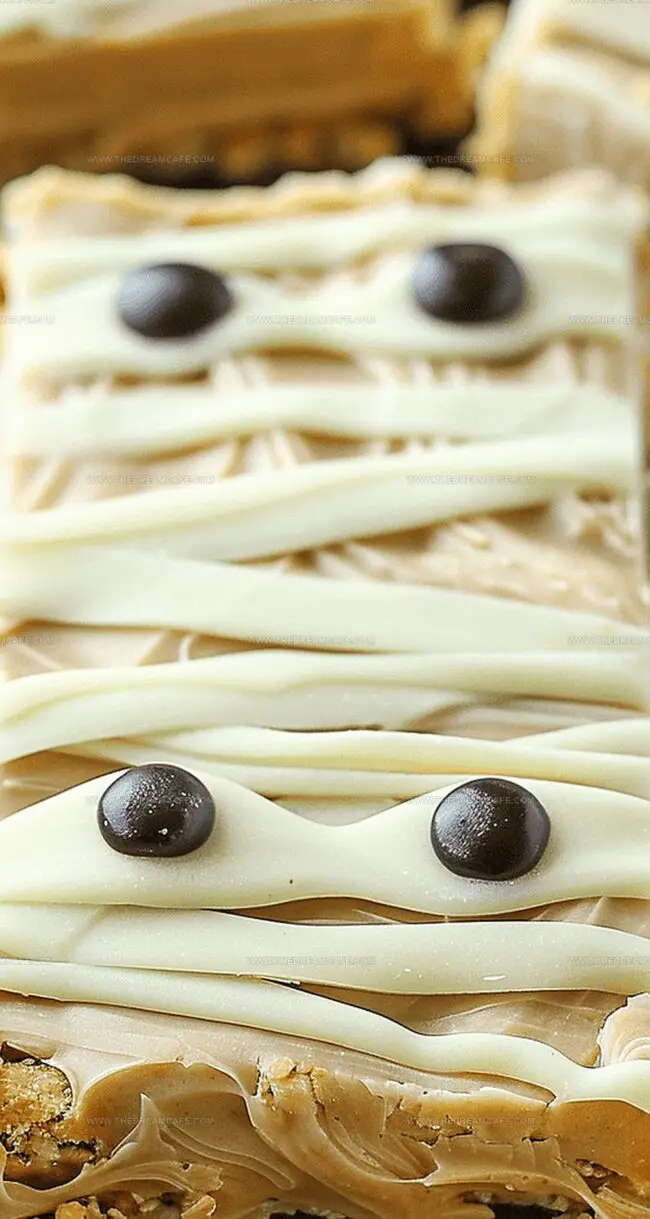
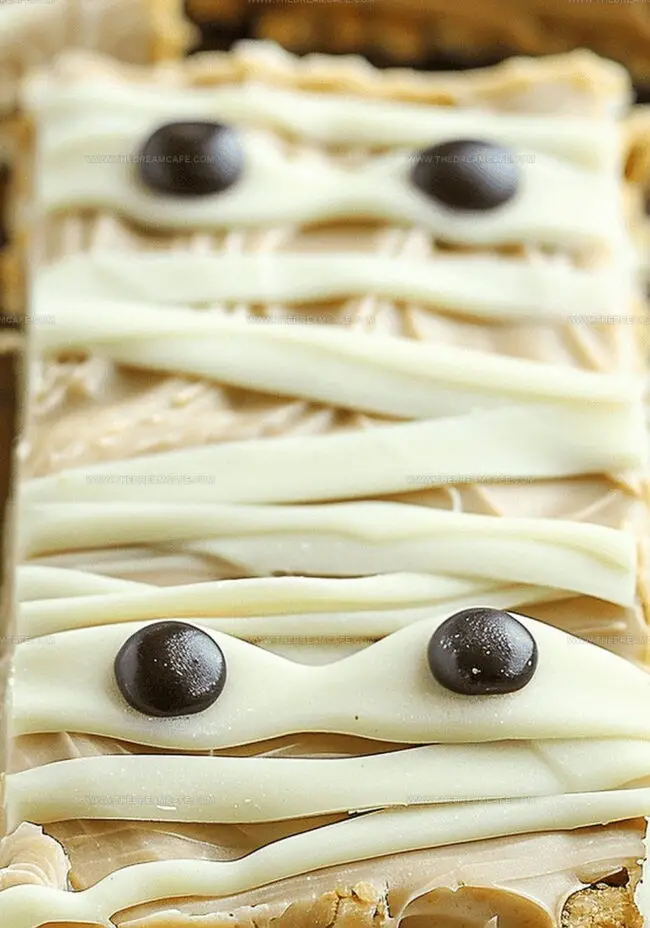
These adorable marshmallow-based desserts wrap creamy white chocolate and delicate candy eyes into an irresistible Halloween snack.
Bandaged with melted white chocolate drizzles, each treat looks like a playful mummy ready to delight.
The crispy texture and sweet marshmallow blend create an addictive treat that children and adults will love.
Simple ingredients and quick assembly make these mummy-themed desserts a breeze to create.
Scary-cute and delicious, these rice Krispy mummies will be the star of any Halloween party spread.
Unleash your inner baker and transform ordinary rice Krispy treats into spooktacular Halloween memories.
Quick Recipe Overview
Mummy Rice Krispy Treats Ingredient List
For Base:For Sweetening:For Decoration:Tools to Make Mummy Rice Krispy Treats
How to Assemble Mummy Rice Krispy Treats
Line a baking dish with parchment paper, letting edges hang over for easy removal later.
Mix peanut butter, melted butter, vanilla, and a dash of salt until silky smooth. Fold in powdered sugar gradually until the mixture becomes a dreamy, thick consistency.
Press the mixture into the lined dish, creating an even layer about half an inch thick. Pop into the freezer to set completely.
Gently melt white chocolate in short microwave bursts, stirring between each interval to prevent burning. Carefully drizzle the warm chocolate over the chilled peanut butter base.
Use a small piping bag to create zigzag lines across the chocolate surface, mimicking mummy bandages. Dot two mini chocolate chips as playful eyes.
Refrigerate the bars until the chocolate sets completely. Slice into rectangular shapes and serve these ghoulishly delightful treats.
Spooky Tips for Mummy Treat Decorations
Serving Suggestions for Rice Krispy Mummies
Storage Instructions for Mummy Rice Krispy Treats
Print
Spooky Mummy Rice Krispy Treat Recipe
- Total Time: 20 minutes
- Yield: 13 1x
Description
Spooky mummy rice krispy treats combine marshmallow goodness with playful Halloween design. Creamy white chocolate bandages and candy eyes create ghoulish Halloween dessert perfection for festive gatherings.
Ingredients
- 1 cup creamy peanut butter
- 2 cups white chocolate chips
- 2 cups powdered sugar
- ¼ cup (57 grams) unsalted butter, melted
- 2 teaspoons vanilla extract
- 1 pinch salt
- ¼ cup mini chocolate chips, for eyes
Instructions
- Prepare Base: Line an 8 x 8 inches baking dish with parchment paper, allowing overhang for easy removal.
- Create Mixture: Whisk peanut butter, melted butter, vanilla extract, and salt in a mixing bowl until smooth and integrated.
- Form Dough: Fold powdered sugar into the mixture, stirring until a uniform, cohesive consistency develops, then press evenly into the prepared dish.
- Chill Foundation: Freeze the peanut butter base for 15-20 minutes until completely solidified, then slice into precise rectangular shapes.
- Coat Bars: Melt white chocolate chips in short microwave intervals, stirring between bursts to prevent burning, then completely enrobe each peanut butter rectangle.
- Decorate Mummies: Create a piping bag from a plastic sandwich bag, snip a tiny corner, and drizzle white chocolate in zigzag patterns to mimic mummy bandages.
- Finalize Design: Place mini chocolate chips as eyes, gently pressing to secure, then refrigerate for a final 5-10 minutes to set all elements perfectly.
Notes
- Prevent Chocolate Burn: Microwave white chocolate in short 15-second intervals, stirring between each burst to avoid scorching and maintain smooth consistency.
- Chill for Stability: Refrigerate bars between steps to help solidify layers, ensuring clean lines and preventing messy handling during decoration.
- Piping Precision: Use a small plastic bag with a tiny snipped corner as a budget-friendly piping tool for creating delicate white chocolate mummy bandage details.
- Storage Strategy: Keep treats refrigerated in an airtight container for up to 5 days to maintain texture and prevent chocolate from melting.
- Prep Time: 20 minutes
- Cook Time: 0 minutes
- Category: Snacks, Desserts
- Method: None
- Cuisine: American
Nutrition
- Serving Size: 13
- Calories: 202
- Sugar: 23 g
- Sodium: 34 mg
- Fat: 10 g
- Saturated Fat: 4 g
- Unsaturated Fat: 6 g
- Trans Fat: 0 g
- Carbohydrates: 29 g
- Fiber: 0 g
- Protein: 3 g
- Cholesterol: 5 mg
Sophie Reynolds
Co-Founder, Recipe Curator & Culinary Educator
Expertise
Education
Auguste Escoffier School of Culinary Arts, Boulder, CO
Oregon State University
Sophie Reynolds is the recipe developer and culinary voice behind many of the approachable, flavor-focused creations at The Dream Café.
Sophie’s style leans into comfort food made simple: wholesome, satisfying meals anyone can make with confidence. Her passion lies in helping home cooks feel at ease in the kitchen while finding joy in the everyday act of cooking.