Ina Garten’s Bright Lemon Poppyseed Cake Recipe for Summer
Zesty and light, this lemon poppyseed cake brings sunshine to any kitchen.
Soft crumbs bursting with bright citrus notes create an irresistible dessert experience.
Delicate poppy seeds add subtle crunch and visual interest throughout each slice.
Home bakers adore the simplicity and elegance of this classic treat.
Buttermilk ensures a tender, moist texture that melts in your mouth.
The balanced combination of tangy lemon and sweet cake creates pure magic.
Sophisticated yet approachable, this recipe transforms ordinary ingredients into something extraordinary: grab your apron and let’s bake!
Why Lemon Poppyseed Cake Brightens Every Bite
Ingredients That Make This Cake Sing
Cake Base Ingredients:Flour Mixture:Wet Ingredients:Finishing Ingredients:Steps to Bake a Poppyseed Classic
Step 1: Prepare Buttermilk Poppy Seed Base
Combine buttermilk and poppy seeds in a measuring cup. Let the mixture rest at room temperature for 2 hours to develop rich flavors.
Step 2: Prepare Baking Equipment
Preheat oven to 350°F. Generously coat a Bundt pan with baking spray, ensuring complete coverage.
Step 3: Cream Butter and Sugar
In a large mixing bowl, use an electric mixer to blend butter and sugar until the mixture becomes light, fluffy, and pale yellow.
Step 4: Incorporate Wet Ingredients
Gradually add eggs one at a time, mixing thoroughly after each addition. Blend in vanilla extract and fresh lemon zest. Scrape down the bowl sides to ensure even mixing.
Step 5: Combine Dry Ingredients
In a separate bowl, sift together:Step 6: Create Liquid Mixture
Combine freshly squeezed lemon juice with the prepared buttermilk and poppy seed mixture.
Step 7: Blend Cake Batter
Alternately add flour mixture and buttermilk mixture to the butter mixture in three portions, beginning and ending with flour. Mix until just combined to maintain cake’s tender texture.
Step 8: Bake the Cake
Pour batter into prepared Bundt pan. Bake for 40-50 minutes, checking doneness with a cake tester that should come out clean when inserted.
Step 9: Prepare Lemon Syrup
In a saucepan, heat remaining sugar and lemon juice until sugar completely dissolves, creating a bright, tangy syrup.
Step 10: Soak and Cool Cake
Remove cake from oven and let cool in pan for 10 minutes. Transfer to a rack placed over a plate. Slowly spoon warm lemon syrup over the cake, allowing it to absorb completely. Cool for at least 30 minutes.
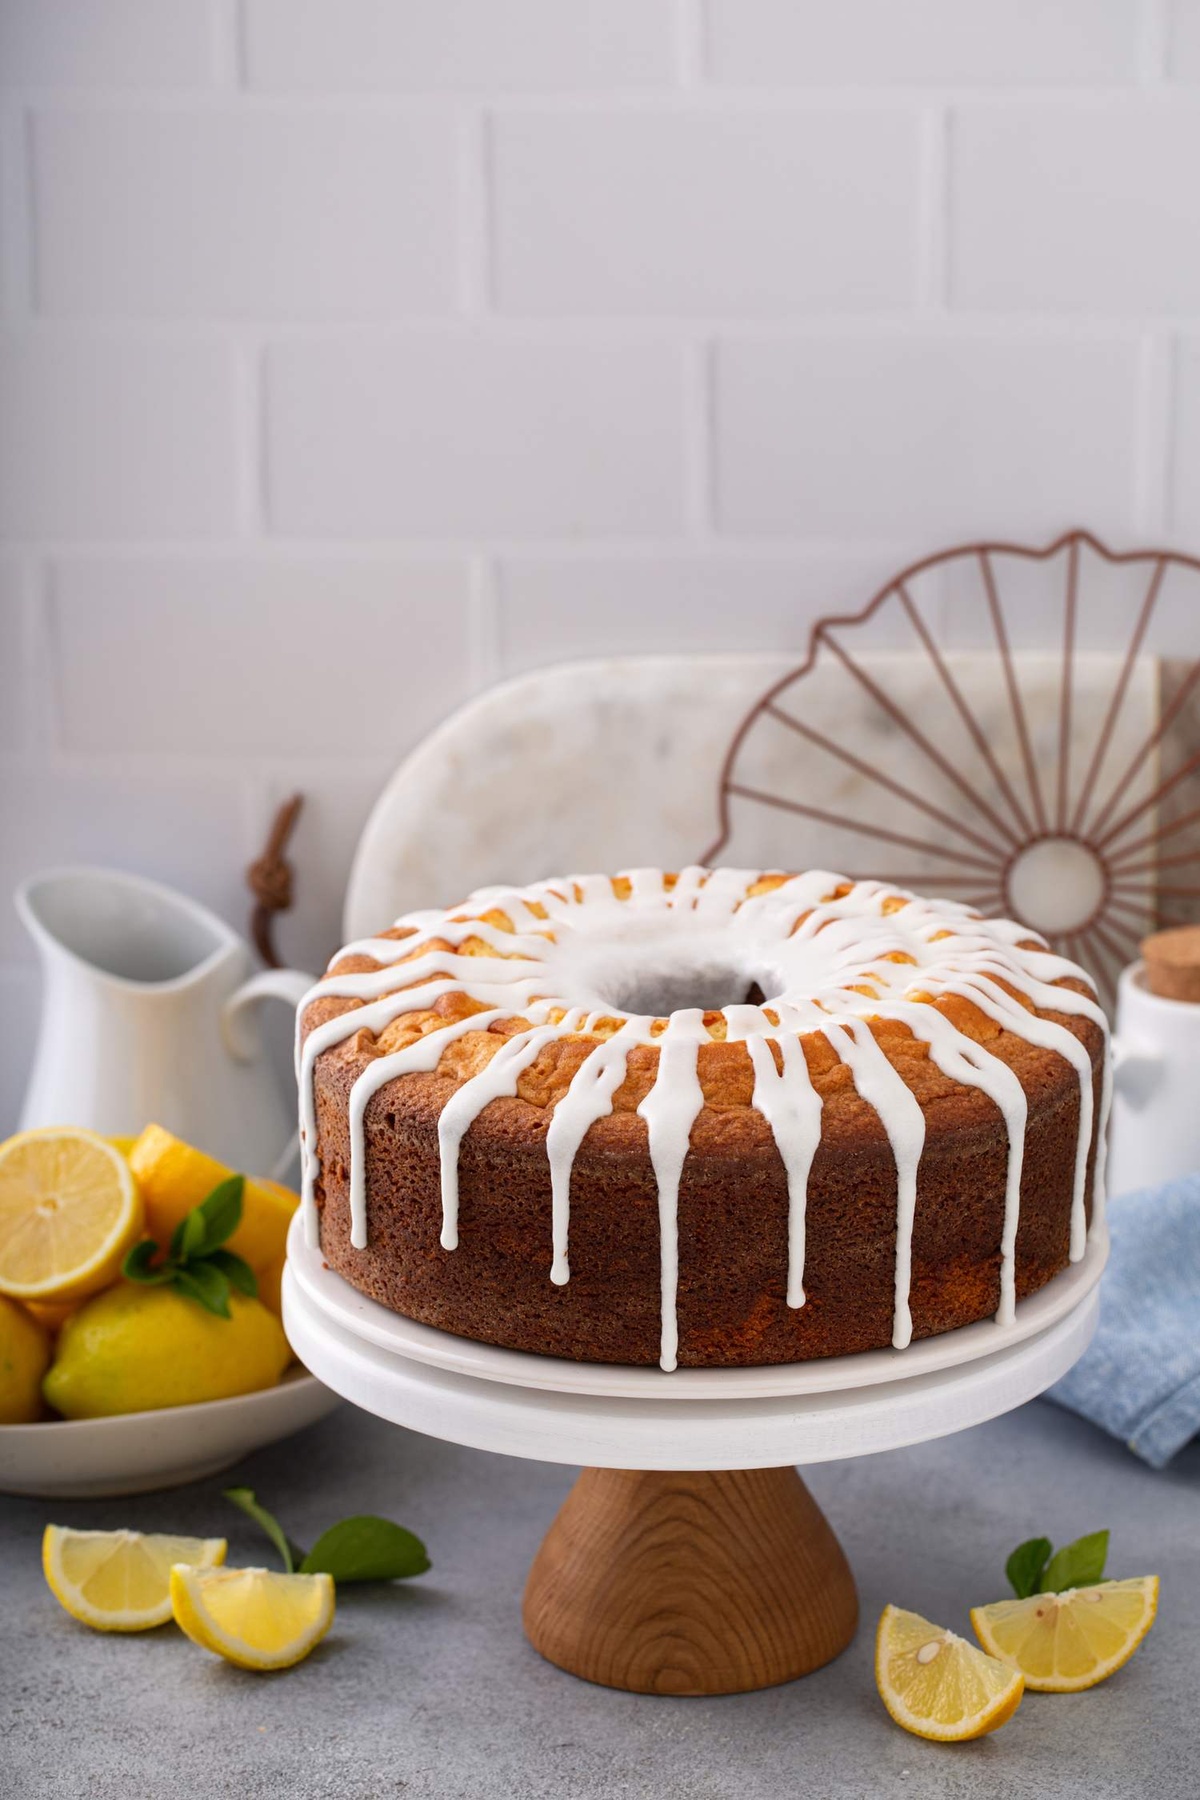
Step 11: Add Finishing Glaze
Whisk confectioners’ sugar and lemon juice until smooth and slightly runny. Drizzle glaze elegantly over the cooled cake, creating a beautiful, glossy finish.
Tips for Moistness and Lemon Zing

Keeping That Cake Fresh and Fluffy

Try These Twists on Poppyseed Style

Ending on a Citrus Note
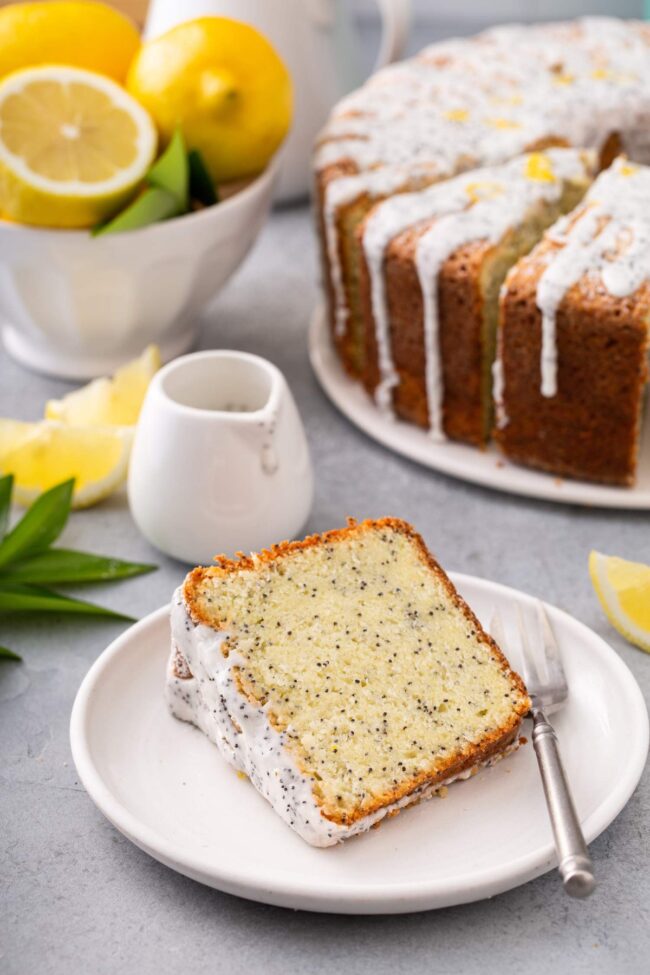
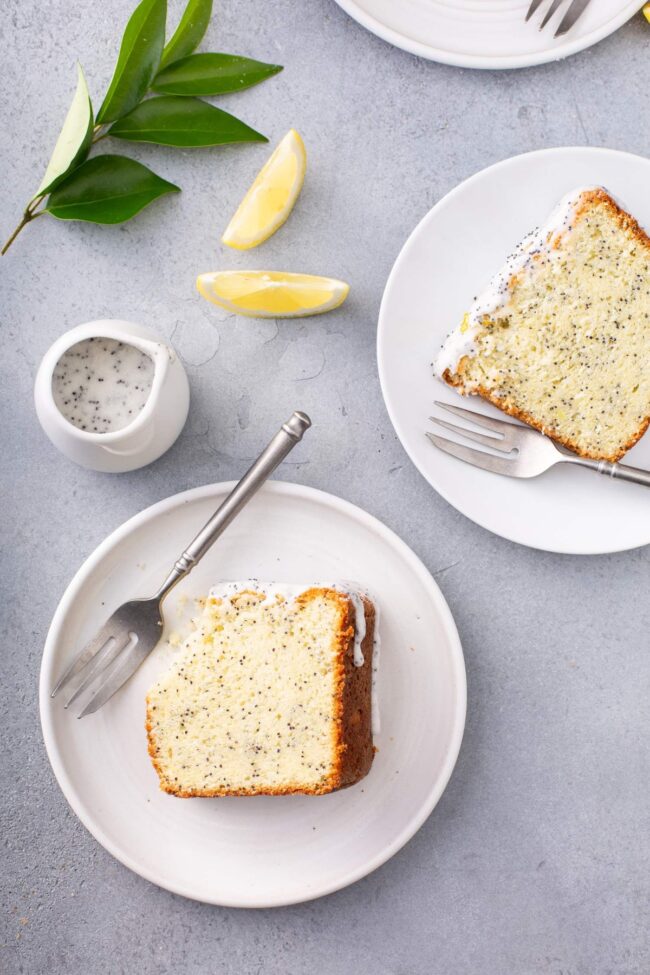
Culinary magic emerges from Ina Garten’s lemon poppyseed cake, a delightful symphony of citrus and texture.
Rich buttermilk creates a tender crumb while poppy seeds add subtle crunch and visual intrigue.
Bright lemon notes dance through each slice, promising pure indulgence with every forkful.
Home bakers can easily master this sophisticated dessert that whispers elegance and comfort.
Garten’s signature style shines through complex yet approachable techniques that guarantee success.
Bake this magnificent cake, share its zesty charm on social media, spark conversations with fellow dessert enthusiasts, and watch as friends marvel at your culinary prowess.
Print
Stuffed Cabbages Rolls Recipe
- Total Time: 2 hours 30 minutes
- Yield: 6 1x
Description
Polish cabbage rolls reveal hearty comfort from Eastern European kitchens, nestling savory ground meat and rice within tender cabbage leaves. Rich tomato sauce bathes these delectable parcels, inviting you to savor generations of culinary tradition on your plate.
Ingredients
Main Ingredients:
- 2 pounds ground meat (beef, pork, or a mix)
- 1 head of cabbage
- 1 cup uncooked rice
Vegetables and Fruits:
- 2 grated onions
- 1 quince (peeled and sliced)
Seasonings and Sauce:
- Salt (to taste)
- Pepper (to taste)
- Coriander (to taste)
- Tomato sauce (enough to cover the rolls)
Instructions
- In a large pot, bring water to a vigorous boil. Submerge the whole cabbage head and cook for 10-15 minutes, rotating periodically until leaves become pliable and easily detachable. Remove from heat and allow to cool slightly.
- Combine ground meat, finely chopped onions, uncooked rice, salt, ground black pepper, and crushed coriander in a mixing bowl. Thoroughly blend ingredients until uniformly mixed.
- Gently separate each cabbage leaf, carefully trimming the thick central stem to facilitate easier rolling.
- Allocate approximately 2-of meat mixture onto the center of each leaf. Fold the sides inward, then roll tightly from bottom to top, creating compact cylindrical parcels.
- Prepare a spacious cooking pot by placing a heat-resistant plate or heavy ceramic dish at the bottom to prevent rolls from sticking or breaking during cooking.
- Arrange rolled cabbage parcels snugly in the pot, positioning quince slices strategically between layers. Pour tomato sauce generously, ensuring complete coverage of the rolls.
- Secure the pot lid and bring contents to a medium simmer. Reduce heat and allow gentle cooking for 1.5-2 hours, periodically checking liquid levels and tenderness.
- Verify doneness by piercing cabbage rolls – leaves should feel tender and filling completely cooked. Serve immediately, garnishing with additional warm tomato sauce and optional fresh herbs.
Notes
- Cabbage leaves are the secret weapon for creating tender, flavorful rolls that melt in your mouth.
- Trimming thick stems ensures easier rolling and prevents tough, chewy bites.
- Mixing meat with rice and spices creates a harmonious filling that bursts with traditional flavors.
- Layering rolls with quince adds a subtle sweetness that elevates the entire dish.
- Gentle simmering transforms simple ingredients into a comforting, hearty meal that tells a story of home cooking.
- Prep Time: 30 minutes
- Cook Time: 2 hours
- Category: Dinner, Lunch, Appetizer
- Method: Boiling, Simmering
- Cuisine: Eastern European
Nutrition
- Serving Size: 6
- Calories: 345 kcal
- Sugar: 4 g
- Sodium: 150 mg
- Fat: 18 g
- Saturated Fat: 7 g
- Unsaturated Fat: 9 g
- Trans Fat: 0 g
- Carbohydrates: 30 g
- Fiber: 3 g
- Protein: 20 g
- Cholesterol: 70 mg
Julian Park
Co-Founder, Cuisine Researcher & Food Culture Writer
Expertise
Education
The Institute of Culinary Education (ICE), Los Angeles, CA
Julian Park is a natural storyteller at The Dream Café who blends hands-on culinary experience with a passion for exploring global food traditions. A graduate of The Institute of Culinary Education in Los Angeles, Julian combines professional technique with a love for cultural discovery, diving into how dishes reflect heritage, migration, and identity.
His work spans everything from in-depth cuisine guides to reflections on everyday meals around the world. With a curious palate and a journal always close by, Julian helps readers connect with food in a way that feels so insightful and personal.